
The Perfect Swiss Roll
The Perfect Swiss Roll
Making the perfect swiss roll comes down to having the right recipe, and a unique piece of equipment you might not think of!
Too many recipes tell you to roll a swiss roll in a tea towel to set the shape, but the secret lies in the cake batter itself, and using an oil based sponge to give it perfect flexibility. As oil is liquid at room temperature, it keeps the sponge flexible compared to a butter based recipe, than can become brittle as the sponge cools.
Once you’ve mastered the sponge, you can fill it with anything you like and then use my little technique of setting it inside of a pipe to get the perfect cylinder.
Ingredients
Method
Into a small dish, add the powdered gelatin and cold water. Stir it together and set it aside to bloom for 10 minutes. If using gelatin leaves, just soak 1 leaf in cold water.
Add the cream and vanilla into a small saucepan, and place it over a medium heat, stirring occasionally.
While it heats, scoop the bloomed gelatin into a tall measuring jug, along with the mascarpone and white chocolate. If using gelatin leaf, squeeze out the excess water and add this into the jug.
Once the cream is steaming, pour it into the jug and allow the mixture to sit for 2 minutes. Then, using a hand blender, blend until smooth. Cover the surface with clingfilm and refrigerate for a minimum of 6 hours.
Note - this sponge uses a 39 x 27 x 2cm (15 x 10.5 x 0.75") baking tray. If that does not match yours, you can scale the recipe to ensure you get the correct thickness. Use the rectangular volume convertor here and type the dimensions of your tray . My tray is 2106cm3. Calculate the volume of your tray and then scale accordingly. For example, if your tray is 2500cm3 then you would need to scale the recipe by (2500/2106) = 1.18x
You will also need to adjust the baking time. It is quite an easy visual check as the sponge should look a even golden brown colour and spring back slightly to the touch.
Pre-heat the oven to 180C/355 (non-fan assisted or 165C/330F fan assisted). Lightly grease a 39 x 27 x 2cm (15 x 10.5 x 0.75") baking tray and then line it with parchment paper.
Into the bowl of a stand mixer (or a large bowl if using an electric hand whisk), add the egg yolks, 45g caster sugar, vanilla and lemon zest. Whisk on a medium high speed, until it reaches a thick and pale in consistency. It should take around 3 minutes. Set this to one side.

Into the bowl of a stand mixer (or a large bowl if using an electric hand whisk), add the egg whites, and whisk on a medium low speed until frothy.

Increase the speed to medium and add the remaining 70g of sugar, 1 tablespoon at a time. Wait about 10-20s between each addition.
Once you have added all of the sugar, keep whisking, until you have a medium stiff peak. Keep an eye on it, as you don't want the meringue to go grainy.

In three parts, fold the meringue gently through the egg yolk mixture, until there are no streaks of meringue.

Sift in the flour and salt, and fold this through. Be sure to thoroughly scrape the bottom of the bowl, otherwise the flour will get stuck in little pockets of the mixture and not fully incorporate.

Pour in the oil and milk and fold this through - again thoroughly scraping the bottom of the bowl, as it has a tendency to sink to the bottom.

Pour the batter into the lined tin and bake for 22 minutes, or until it is a really even golden brown colour and springs back slightly when you touch it. Don't worry if it puffs up as it bakes, it will fall back down once you remove it from the oven.

Remove the tray from the oven, and immediately with the parchment paper, slide the sponge off the tray, and onto a wire cooling rack. Cool for 30 minutes at room temperature.

To get a really neat cylinder, we are going to set the swiss roll inside of a pipe. This is taking it to another level, and is not essential, but I've linked two pipes, 80mm and 84mm in the equipment list. It helps to have a few sizes of pipe, as the thickness of your sponge might vary to mine, depending on how much filling you add etc. Ideally you want a pipe made of plastic so the parchment wrapped sponge slides in easily.
Take the cooled sponge and flip it over onto a larger sheet of parchment paper. Peel off the parchment on the sponge.
On the right hand, short edge, use a serrated knife to trim it at a 45 degree angle. This will create a nice 'tail' that tucks under the swiss roll, creating a flush bottom edge.

On the left hand, short edge, trim off the very end where the sponge is a bit shaggy. Then score three vertical lines, being sure not to cut through the sponge. Each line should be about 1cm/0.4" apart.

Add a few tablespoons of jam to the sponge, and spread it out, creating an even layer.
Remove the vanilla cream from the fridge and in the bowl of a stand mixer, whisk it on a medium speed until it holds a medium peak.
Add the mixture into a piping bag, and pipe even lines across the sponge.
Use a warm palette knife to spread this evenly across the sponge. In general, you don't want to overfill the sponge or use a cream that is too soft, or as you roll, it will all be squeezed out at the end.

Starting from the left hand edge, fold the sponge on itself, trying to ensure you get a really tight fold, and that this part of the sponge tucks back underneath itself. Then use the parchment paper to help roll the remaining sponge into a tight log. It should roll really easily.

Wrap the parchment paper around the sponge, ensuring the 'tail'/seam that we created is on the underside. Place a ruler along the outer edge of the parchment, snug against the sponge. Hold the ruler firmly in place. While keeping the ruler still, pull the parchment from underneath in the opposite direction. This opposing tension tightens the wrap, drawing the sponge into a neat, even cylinder. Place a piece of tape on the parchment to secure it in place and refrigerate for 2-3 hours or longer.

At this point, if you have a pipe, slide the sponge (wrapped in the parchment) into the pipe, which should shape it into a perfect cylinder.
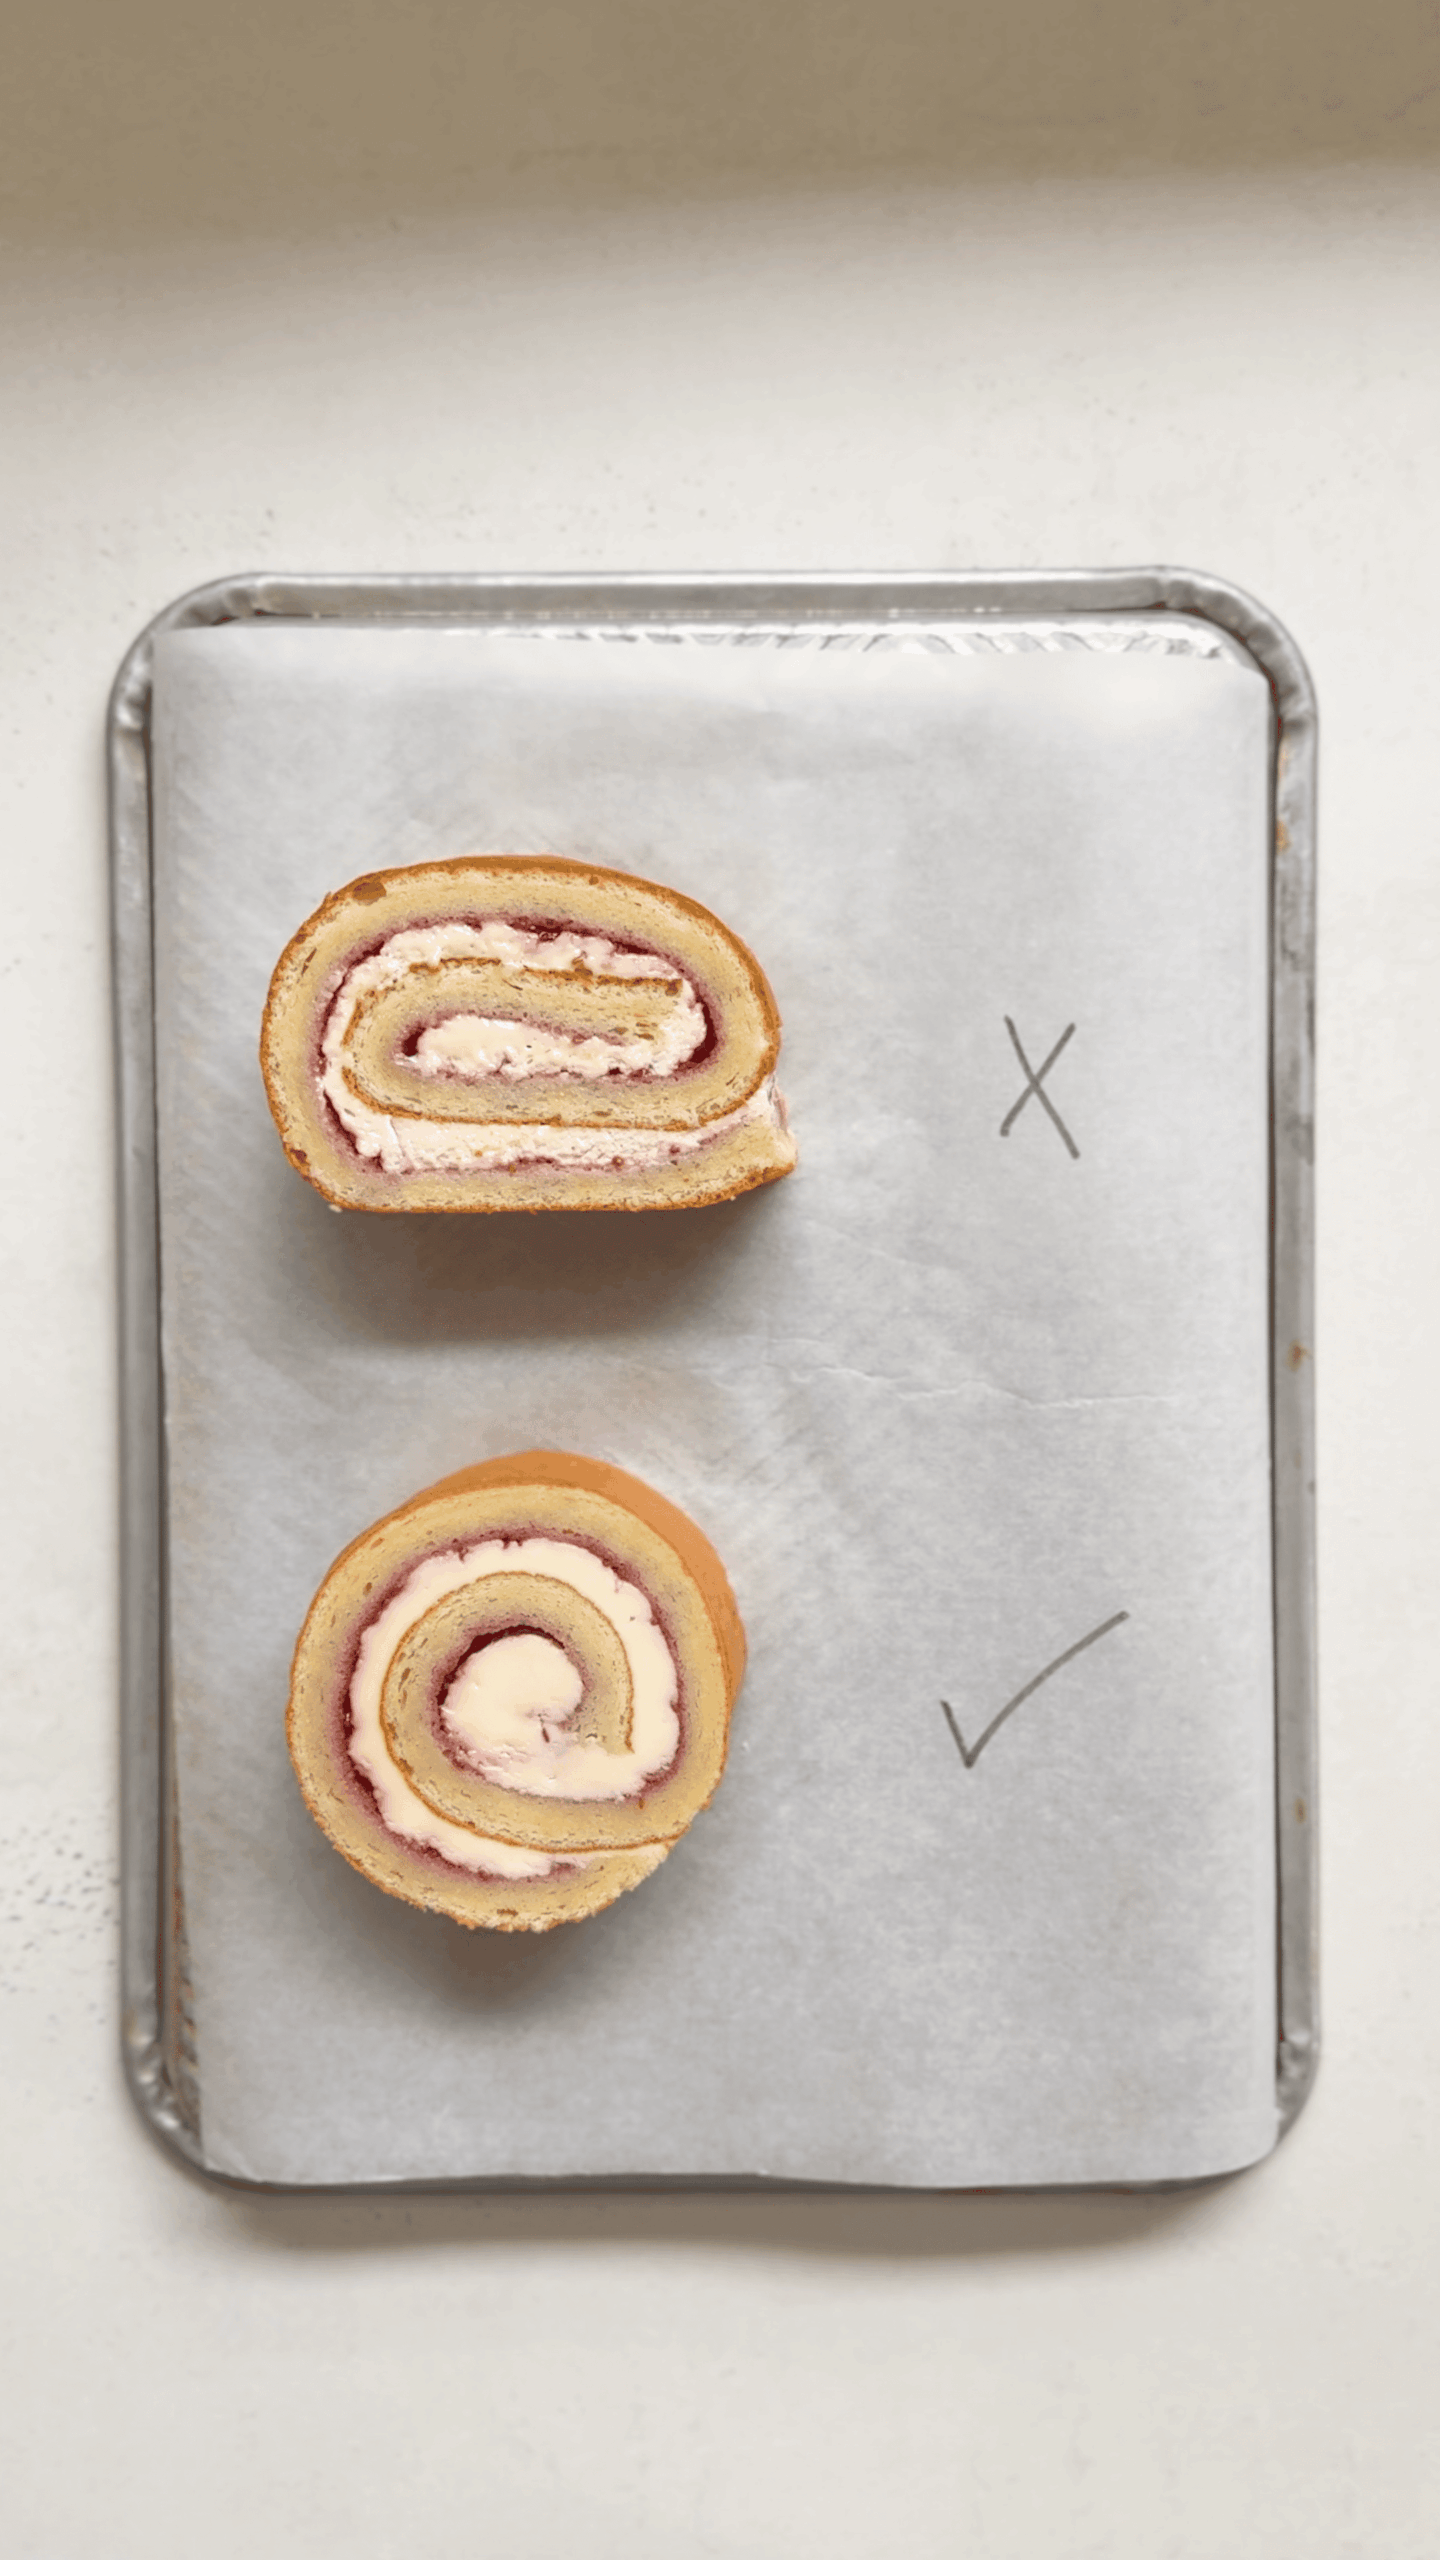
Now, in order to keep it in that shape, we need to get it very cold, by refrigerating it for 4-6 hours or freezing it for about 45-60 minutes. The risk when using the pipe, is that the cream is still quite soft, and when you remove it from the pipe, it settles slightly flat. This is by no means an issue, but if you want a really neat cylinder shape, it needs to chill. Freezing it briefly can really help, then it can be sliced and each slice can be flipped onto its side, where there is no longer any downward pressure which flattens the bottom. If you use a softer cream (like a whipped cream) that will also make it difficult for it to retain the shape. These are quite extreme details, but if you are searching for a perfect shape, these tips should help!
Once it has set, you can decorate it as you wish, then use a warm serrated knife to slice it.
