
Donut 101
Donut 101
Nothing beats a soft, fluffy donut and this recipe delivers just that. It’s simple to make and gives you the perfect base for either glazed or filled donuts!
The dough is enriched with eggs, milk, and butter but with a easy to handle hydration level, so it comes together easily and is straightforward to work with.
For me, the secret lies in two optional ingredients, milk powder and diastatic malt powder. I’ve explained how and why to use them in the recipe below.
This recipe yields around 7–8 glazed donuts or 12–14 filled ones!
Ingredients
Method
Into the bowl of a stand mixer, add the eggs (whisked) and the whole milk.

Add the remaining dry ingredients on top - bread flour, salt, sugar, yeast, milk powder, diastatic milk powder & lemon zest. Milk powder aids with the softness and browning, while diastatic malt powder helps to give a lighter texture/crumb but they are both optional. If you want, you can add the beans from a fresh vanilla pod too.

Attach the dough hook, and knead the dough for 10 minutes on a medium speed, scraping down the sides occasionally to ensure the dough is incorporating. The dough will look quite shaggy but that is fine. Turn the mixer off and cover the bowl. Allow the dough to rest for 5 minutes.

For the butter, ensure you have cut it into small cubes and it has been sitting out at room temperature for 15-20 minutes. It should be cool, not warm and overly soft.

With the mixer on a medium speed, add the butter, a few pieces at a time, waiting about 20s before adding the next few pieces. Scrape down the bowl if needed.
Once all the butter has been incorporated, the dough will only need another 2 minutes or so until it is smooth. Lift it out of the mixing bowl and onto your work surface. If you grab a small piece of dough it should pass the windowpane test. That is how you know you have developed enough gluten.

Shape the dough into a smooth ball, and lift it into a large, lightly oiled bowl. Very lightly oil the top of the dough (an oil spray is perfect for this) and cover the surface directly with clingfilm. Place another sheet of clingfilm around the bowl and refrigerate it for 12-24h. I prefer to make the dough at night and let it rise closer to 16 hours.

The next day, prepare a few baking trays, lightly oiling them, and then placing individual squares of baking paper on them. Lightly oil each piece of baking paper too, as this will allow the donut to release easily when you go to fry it.
Remove the dough from the fridge and depending on which type of donut you want to make, follow the below steps.
For a ring donut, lightly flour a large silicon mat, then lift the dough out of the bowl and flatten it gently on the silicon mat.
Place a pastry rod either side of the dough set to a height of between 12-14mm (0.45-0.55") (if you do not have pastry rods, you could also stack a few magazines together and use these as rough thickness guides!)
Lightly flour the top of the dough and roll out into a rough oval shape (the shape doesn't really matter), until it reaches the thickness of your pastry rods.

At this point, I prefer to slide the mat onto a baking tray, cover the dough with clingfilm and freeze it for about 20-30 minutes. This makes cutting them slightly easier as I find the dough can be quite soft, so if you cut them immediately, when you peel them off the mat/work surface, they stretch and lose their shape. So by chilling them, the dough is firmer, making it easier to move without ruining the shape! But this is optional you can cut them straight away if you want. The only reason I use the silicon mat underneath too, is it makes it easy to slide the dough onto a tray for the freezer.
When you’re ready to cut, remove the chilled dough. Lightly dust an 80mm (3.1") and 30mm (1.1") cookie cutter in flour to prevent sticking.
Start by pressing the 80mm (3.1") cookie cutter firmly into the dough, and then leave it in place, and press the 30mm cookie cutter directly in the centre. Carefully remove the 30mm (1.1") cookie cutter and pull out the piece of dough from the centre. At this point you can lift the donut out, or just carry on cutting the rest, and then peeling the excess dough away afterwards. You should get around 8 ring donuts. I would not recommend re-rolling the scraps.

Take the donut and lift it onto the lightly oiled baking paper.

With a very lightly oiled finger (or oil spray), gently oil the top of each donut to just stop it drying out. Cover the tray of donuts with lightly oiled clingfilm. You can also use the donut holes and cut the scraps up into small pieces which can be fried later too. Place these onto a tray to proof too if using.
The donuts need to proof now for anywhere from 1-3 hours. Most recipes just say 1 hour, but I find my kitchen has to be very warm in order for them to proof that quickly.
Proofing is really important as the donuts will be very dense, without the iconic white band across the middle, if they are underproofed. I would prefer you pushed the proof further than you think rather than have a dense donut. When they are proofed, they should look puffy and full. Light rather than dense! This can take some experience but I also like to sometimes sacrifice a test donut to fry to check if they are ready.
For the filled donuts, remove the chilled dough from the fridge, and using a bench scraper, cut the dough into 65g portions.
Cup your hand around the dough in a 'C' shape, and rotate it around the dough, to create a nice smooth ball. Lift each ball onto the oiled parchment squares.

With a very lightly oiled finger (or oil spray), gently oil the top of each donut to just stop it drying out, and then take your fingers, and carefully press the dough down, to form it into more of a 'puck' shape rather then a round ball. Cover the tray of donuts with lightly oiled clingfilm.

The donuts need to proof now for anywhere from 1-3 hours, just like the ring donuts. As there is more 'dough' in a filled donut, these will take slightly longer to proof compared to a ring donut. They should almost double in volume, and appear very full.

Just before they are proofed, it's time to get your fryer ready. In my opinion, you need to do this in a deep fat fryer. These have thermometers built in, which will regulate the temperature to ensure it stays consistent. This means when you fry the donuts with the same timings, you will ensure consistent results. By all means, you can heat a large pot on the hob and do it that way with a digital thermometer, but it will be harder to regulate the temperature. This more of an issue for filled donuts, where you can get a raw centre if not fried properly. Ring donuts, you have a lot more forgiveness.
Fill your fryer with vegetable oil and set the temperature to 170C/340F. I prefer to do 1 donut at a time as I have a small fryer, but you can fry more if you have the space.
Just before frying, prepare the glaze for the ring donuts by whisking together all of the ingredients until you have a smooth glaze, that is the consistency of runny glue. You don't want it to be too thin. The recipe makes a little more than you need, but you don't want to run out! Add it into a piping bag if you have one (alternatively you can spoon it on)
For the ring donuts, lift the donut off the tray and flip it over into the hot oil. Slowly peel of the baking paper which should release easily. Fry the donut for 90 seconds, then flip and fry for 60 seconds, then flip and fry for 20 seconds, flip and fry for a final 20 seconds. As long as your oil temperature is correct, they should be a very even golden brown colour.

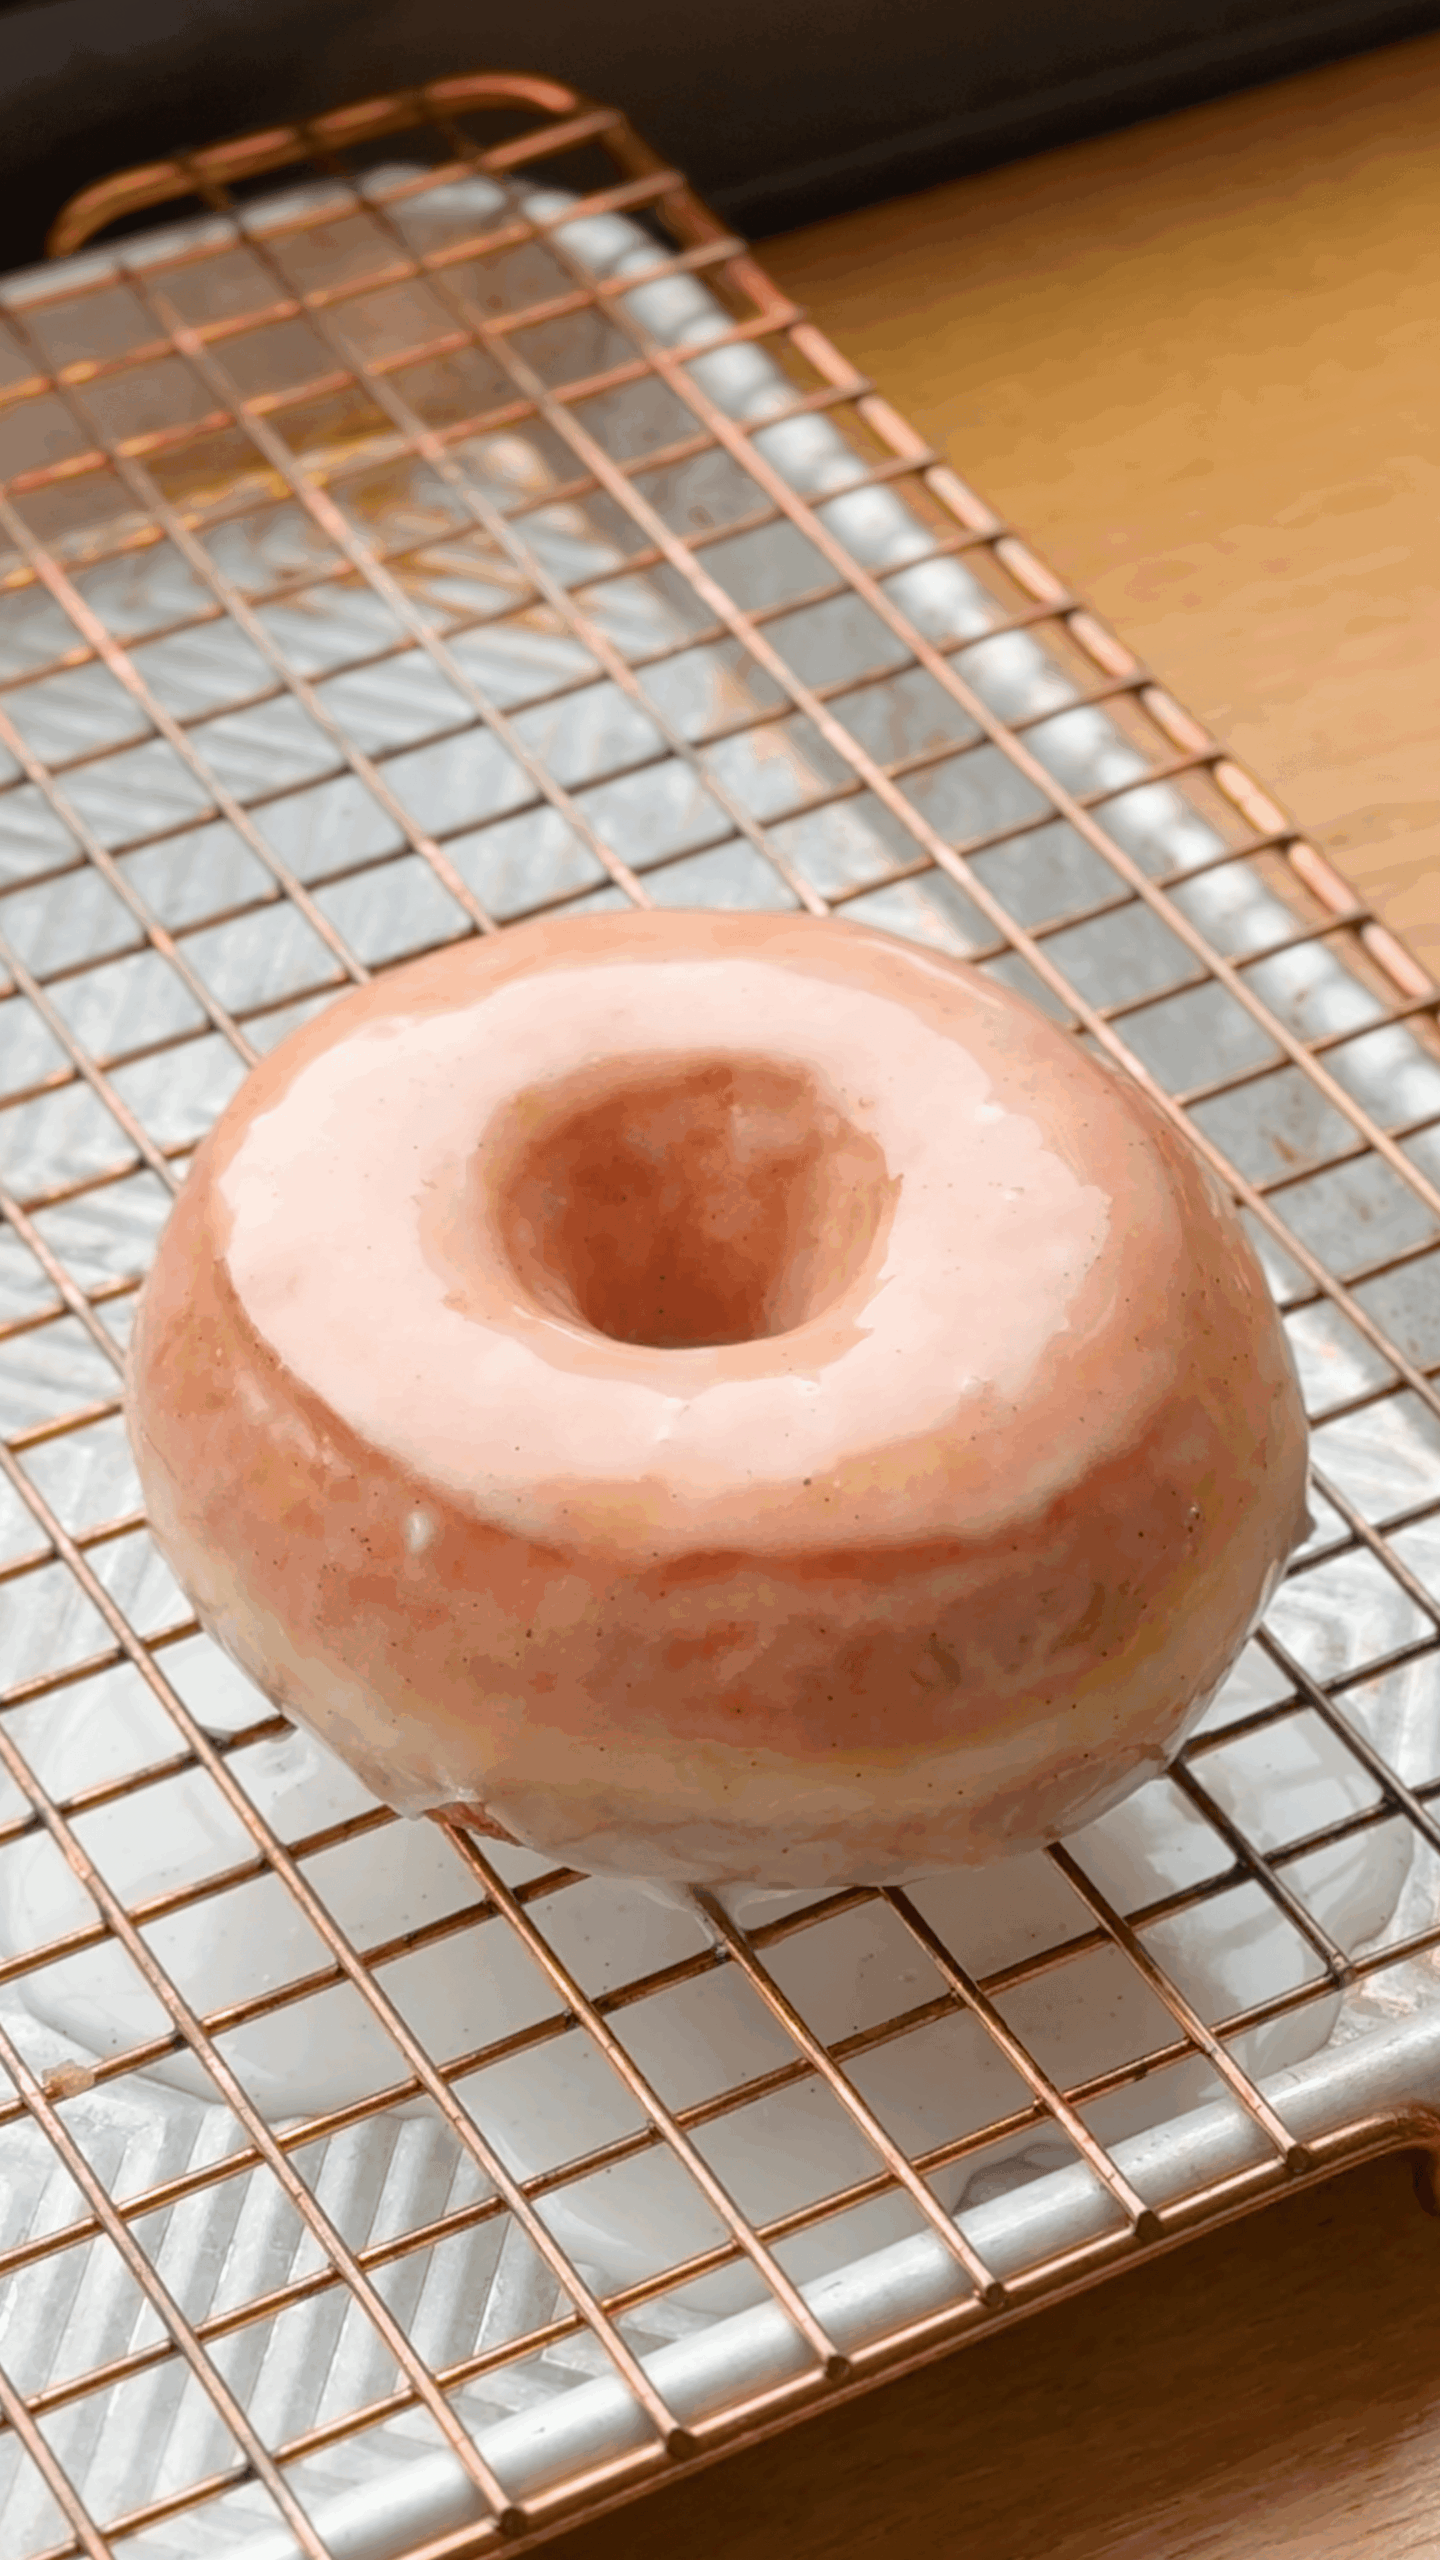
Immediately drain it from the oil and onto a wire rack on top of another tray. Let it cool for a minute, and then while still nice and warm, snip a large hole in the end of your piping bag, and cover the entire donut in glaze.

Let the excess glaze drip off and it should set into a nice thin glaze all over the donut! Keep frying the remaining donuts and one by one lift the set, glazed donuts onto your serving plate.

For the filled donuts, lift them from the tray, and flip them over into the fryer, slowly peeling off the baking paper. It should release easily. These take longer to fry, so we do 90 seconds, flip, 90 seconds, flip, 45 seconds, flip, 45 seconds. Lift them from the oil and onto a wire rack. they should be a very even golden brown colour.

While they are still warm, toss the donuts in a bowl of sugar and then with a piping bag, fill them with the filling of your choice! A little tip if you fancy it - try adding the tiniest tiniest pinch of citric acid into the sugar, especially if you are making a lemon filled donut. It will add a slight lip smacking tingle to the sugar glaze on the outside!

Troubleshooting:
- If the donut is raw in the middle but very dark on the outside, the oil was likely too hot. Lower the oil temperature.
- If you do not get a white band along the middle of the donuts, they were underproofed or the oil was too cold.
God bless you Mr. Matt Adlard!
Hi Matt, the doughnuts look fabulous, can’t wait to try your recipe, and thanks for all the very useful tips. My question, however, is; what kind of tip are you using to pipe filling into the doughnuts? A link to where to purchase would be helpful if you can.
I use a cupcake or donut filler nozzle!
Hello
Thanks for the recipe!
For the vanilla glaze, can i replace the 15 grams glucose with honey?
yes sure!
Hi there Matt,
How long in advance can you make these donuts?
If you can make it in advance, how would you store them?
Thank you
Hi Amy
They are always best fresh, but once fried and cooled, you could store them in an airtight tight container for 1-2 days before filling them but the texture will not be quite the same.