
Chocolate & Coffee Delice
Chocolate & Coffee Delice
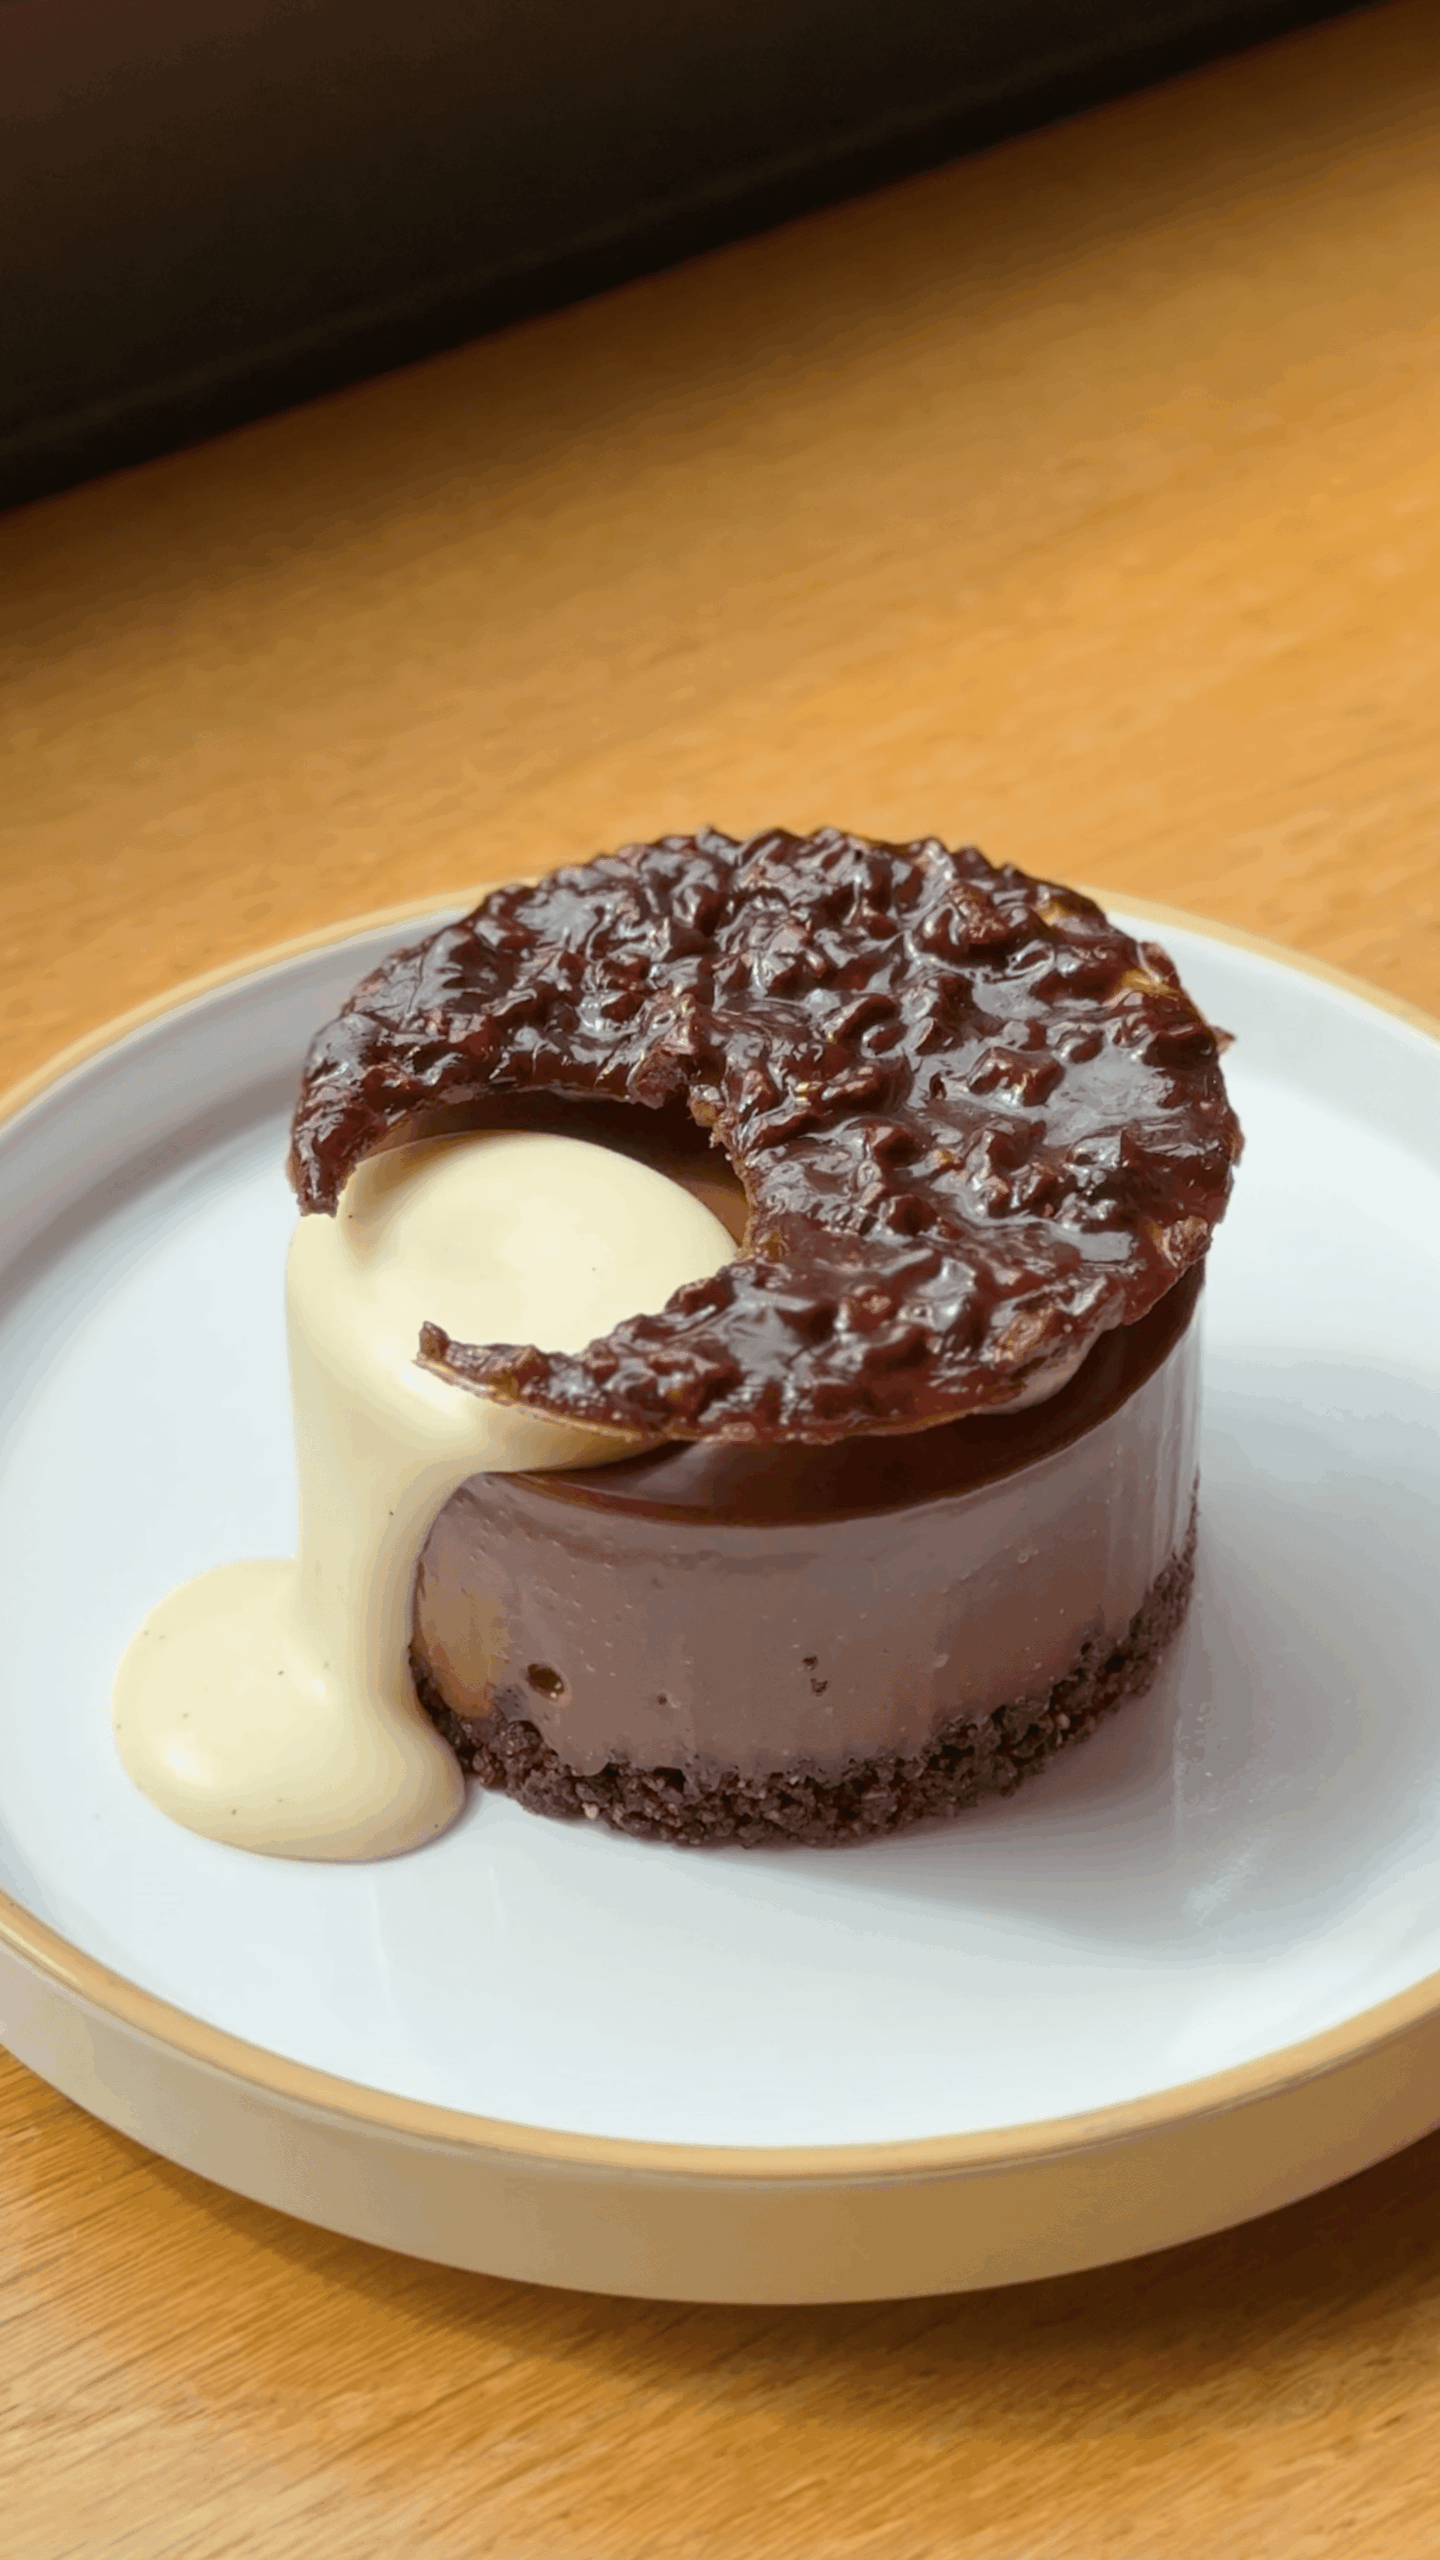
This chocolate & coffee delice is so well balanced, with a macadamia nut & orange crumble on the base, a chocolate coffee delice, cocoa nib tuile & crème anglaise.
It has quite a few components but can easily be prepared ahead of time, ready to be served later. The cocoa nib tuile is a nice extra, but totally optional!
The mousse makes enough for 4 desserts, but if your ring molds are bigger, you can easily scale up the recipe or even make one big delice instead.
Ingredients
Method
Pre-heat the oven to 175C/345F non-fan assisted (160C/320F Fan). Place the macadamia nuts onto a baking tray and bake for 10-15 minutes, or until they are a golden brown colour. Remove the oven and allow to cool completely.
Add the cooled nuts to a food processor and briefly blend to a fine crumb. It can be a little 'wet' when you blend it due to the high oil content.
Add these into a medium bowl along with the flour, ground almonds, salt, cocoa powder and flour. Whisk these to combine.

Pour in half of the melted butter and stir the mixture together with a spatula until it forms a chocolate, crumble like consistency. Add more butter if needed. You don't want the mixture to be overly wet. Note that if you are not using macadamia nuts, you can just use a total of 50g of ground almonds instead.

Tip the mixture onto a baking tray and bake for 12 minutes. Remove it from the oven and allow it to cool for 20-30 minutes.

Take the ring molds, and place them onto a baking tray lined with parchment or a silicon mat. There is no need to grease or line them.
Take 15g of the cooled soil, and scoop it into the base of the ring mold. Press it flat with your fingers (it doesn't need to be packed down really firm like a cheesecake). Be careful not to knock the ring molds out of place at this point as it will dislodge the crumble. Place the tray into the freezer while you make the delice.

Into a small bowl, add the chocolate, and melt this over a pan of gently simmering water, stirring occasionally. Once melted, I like to scoop the chocolate into a tall measuring jug, then set this to one side. Adding it into the jug makes it easier to blend/emulsify once you add the cream mixture.
Add 145g of cream to a medium saucepan, along with the milk and espresso. If you don't have espresso, just use 1-2 tsp of instant coffee (depending on how much coffee flavour you want). If you don't like coffee at all, just replace that amount with more milk.

Place the pan onto a medium low heat, stirring occasionally.
Meanwhile, add the egg yolks and sugar to a medium bowl and whisk together for 30 seconds to combine.
Once the cream mixture is steaming, slowly pour it over the egg mixture, whisking to combine.

Add the entire mixture back into the saucepan, and over a medium heat, whisk constantly until it reaches around 80C/175C on a digital thermometer.
Immediately remove it from the heat, and pass it through a sieve, over the melted chocolate.

Take a hand blender and blend it to emulsify, so that it is nice and smooth.

Pour the mixture from the jug, into a medium bowl and stir occasionally. This mixture needs to cool to between 35-40C (95-105F) on a digital thermometer before we add the cream.
Once it is close to temperature, whip the remaining 115g of cream to a medium soft peak. Do not over whip this as we need it to be a soft texture when incorporating it into the chocolate base.
Pour the softly whipped cream into the cooled chocolate mixture and fold it through with a spatula to combine. If there are any small lumps of cream, just switch to a whisk to help get rid of them. Finally, fold through a good pinch of flaked sea salt - don't skip this bit!
Remove the ring molds from the freezer, and fill them to the top with the delice mixture. This is a little easier if you pipe it in.

Carefully place the tray back into the fridge and chill for 2-4 hours or overnight if needed. If chilled overnight, once you remove the ring mold, leave them at room temperature for 15-20 minutes, just to soften the texture slightly before serving.
The tuile is optional, but gives a nice bitter, buttery crunch to the dish. The recipe is adapted from The Art of Flavor by Amaury Guichon.
Pre-heat the oven to 190C/375F non-fan assisted (175C/345F fan assisted).
Into a small bowl, whisk together the pectin NH and sugar. The pectin is important as it helps to add a little bit of flexibility so the tuile doesn't harden immediately. If you don't have it, you can leave it out, but the tuile will set quickly once it it out of the oven so you will have to work fast!
Into a small saucepan, add the milk, butter and liquid glucose. Bring it to a gentle simmer, then tip in the sugar mixture.
Whisk the mixture and bring it to the boil for 1-2 minutes.
Whisk in the cocoa powder and cook for a further minute.
Remove it from the heat and stir in the cocoa nibs. Pour the mixture onto a silicon mat and place a second silicon mat on top. If you don't have cocoa nibs, you could also used chopped nuts as an alternative.
Use a rolling pin, to roll it to a thin consistency, then lift the silicon mat onto a baking tray and into the freezer for 20 minutes.
Remove it from the freezer, peel off the top silicon mat, and place it into the oven to bake for 8-10 minutes. the mixture should have stopped bubbling once it is ready.
Pull it out of the oven and pay very close attention. Initially it will be too warm and gooey to cut, but within 1-2 minutes, it will be soft enough where you can press a cookie cutter firmly into the tuile. Cut one large circle (the same width as your ring mold), then another circle with a smaller cookie cutter to make a crescent shape. Work very quickly. If the tuile becomes too hard to cut, pop it back into the oven for two miutes to warm it slightly then carry on with the cutting process.
Let them set for 5 minutes, then very carefully flip the silicon mat over and peel it away. The tuile shapes should pop right out. Be very careful with them as they are fragile. Set them aside onto some kitchen paper to absorb some of the moisture.

To cook the anglaise, you can do it directly in the pan which will be much quicker or over a bain-marie if you are slightly less confident and worried it might scramble, but note it will take longer.
To cook it directly in the pan, add the cream, milk, sugar and yolks to a medium saucepan, Whisk to combine to ensure the yolks are fully incorporated.
Scrape the beans from the fresh vanilla pod and add this into the pan along with the pod.
Place the pan on a medium low heat and stir constantly with a rubber spatula until it reached around 82C (180F) on a digital thermometer, or it coats the back of a spoon. Be very careful not to scramble the mixture.
Immediately remove it from the heat, and pass it through a sieve into a clean bowl. Add a pinch of flaked sea salt, stir this through and then taste it, adding more if needed until you are happy with it.
Place this bowl over a larger bowl of ice water and stir occasionally until the anglaise has cooled down (about 10 minutes), but is still a nice pourable consistency. Alternatively you can serve it warm.

Remove the chilled delice from the fridge and lift it onto your serving plate. Use a blow torch to gently warm the sides of the ring mold, and carefully lift it off. If your delice has been chilling overnight, you want to leave it at room temperature for around 15/20 minutes to warm up slightly after removing the ring mold so the texture can soften slightly.
Take a small amount of cream, around 100g, and just whip it by hand to a medium peak. This is optional, but once it is whipped, add it into a piping bag, and pipe a semi circle of cream around the top of the delice. This will act as a ledge to place our tuile on top to give the dessert some height. You can sweeten the cream or add some vanilla but there is no need really.
Carefully lift the tuile onto the cream.

Take the chilled anglaise and add it into a small pouring jug. To serve, pour the anglaise into the small gap of the tuile, so it floods down the side of the delice for an elegant finish.

This was amazing! The crumble, with a hint of orange and subtle saltiness added so much to this. Thank you!
Oh I’m so glad!