
Guide to Bread
Guide to Bread
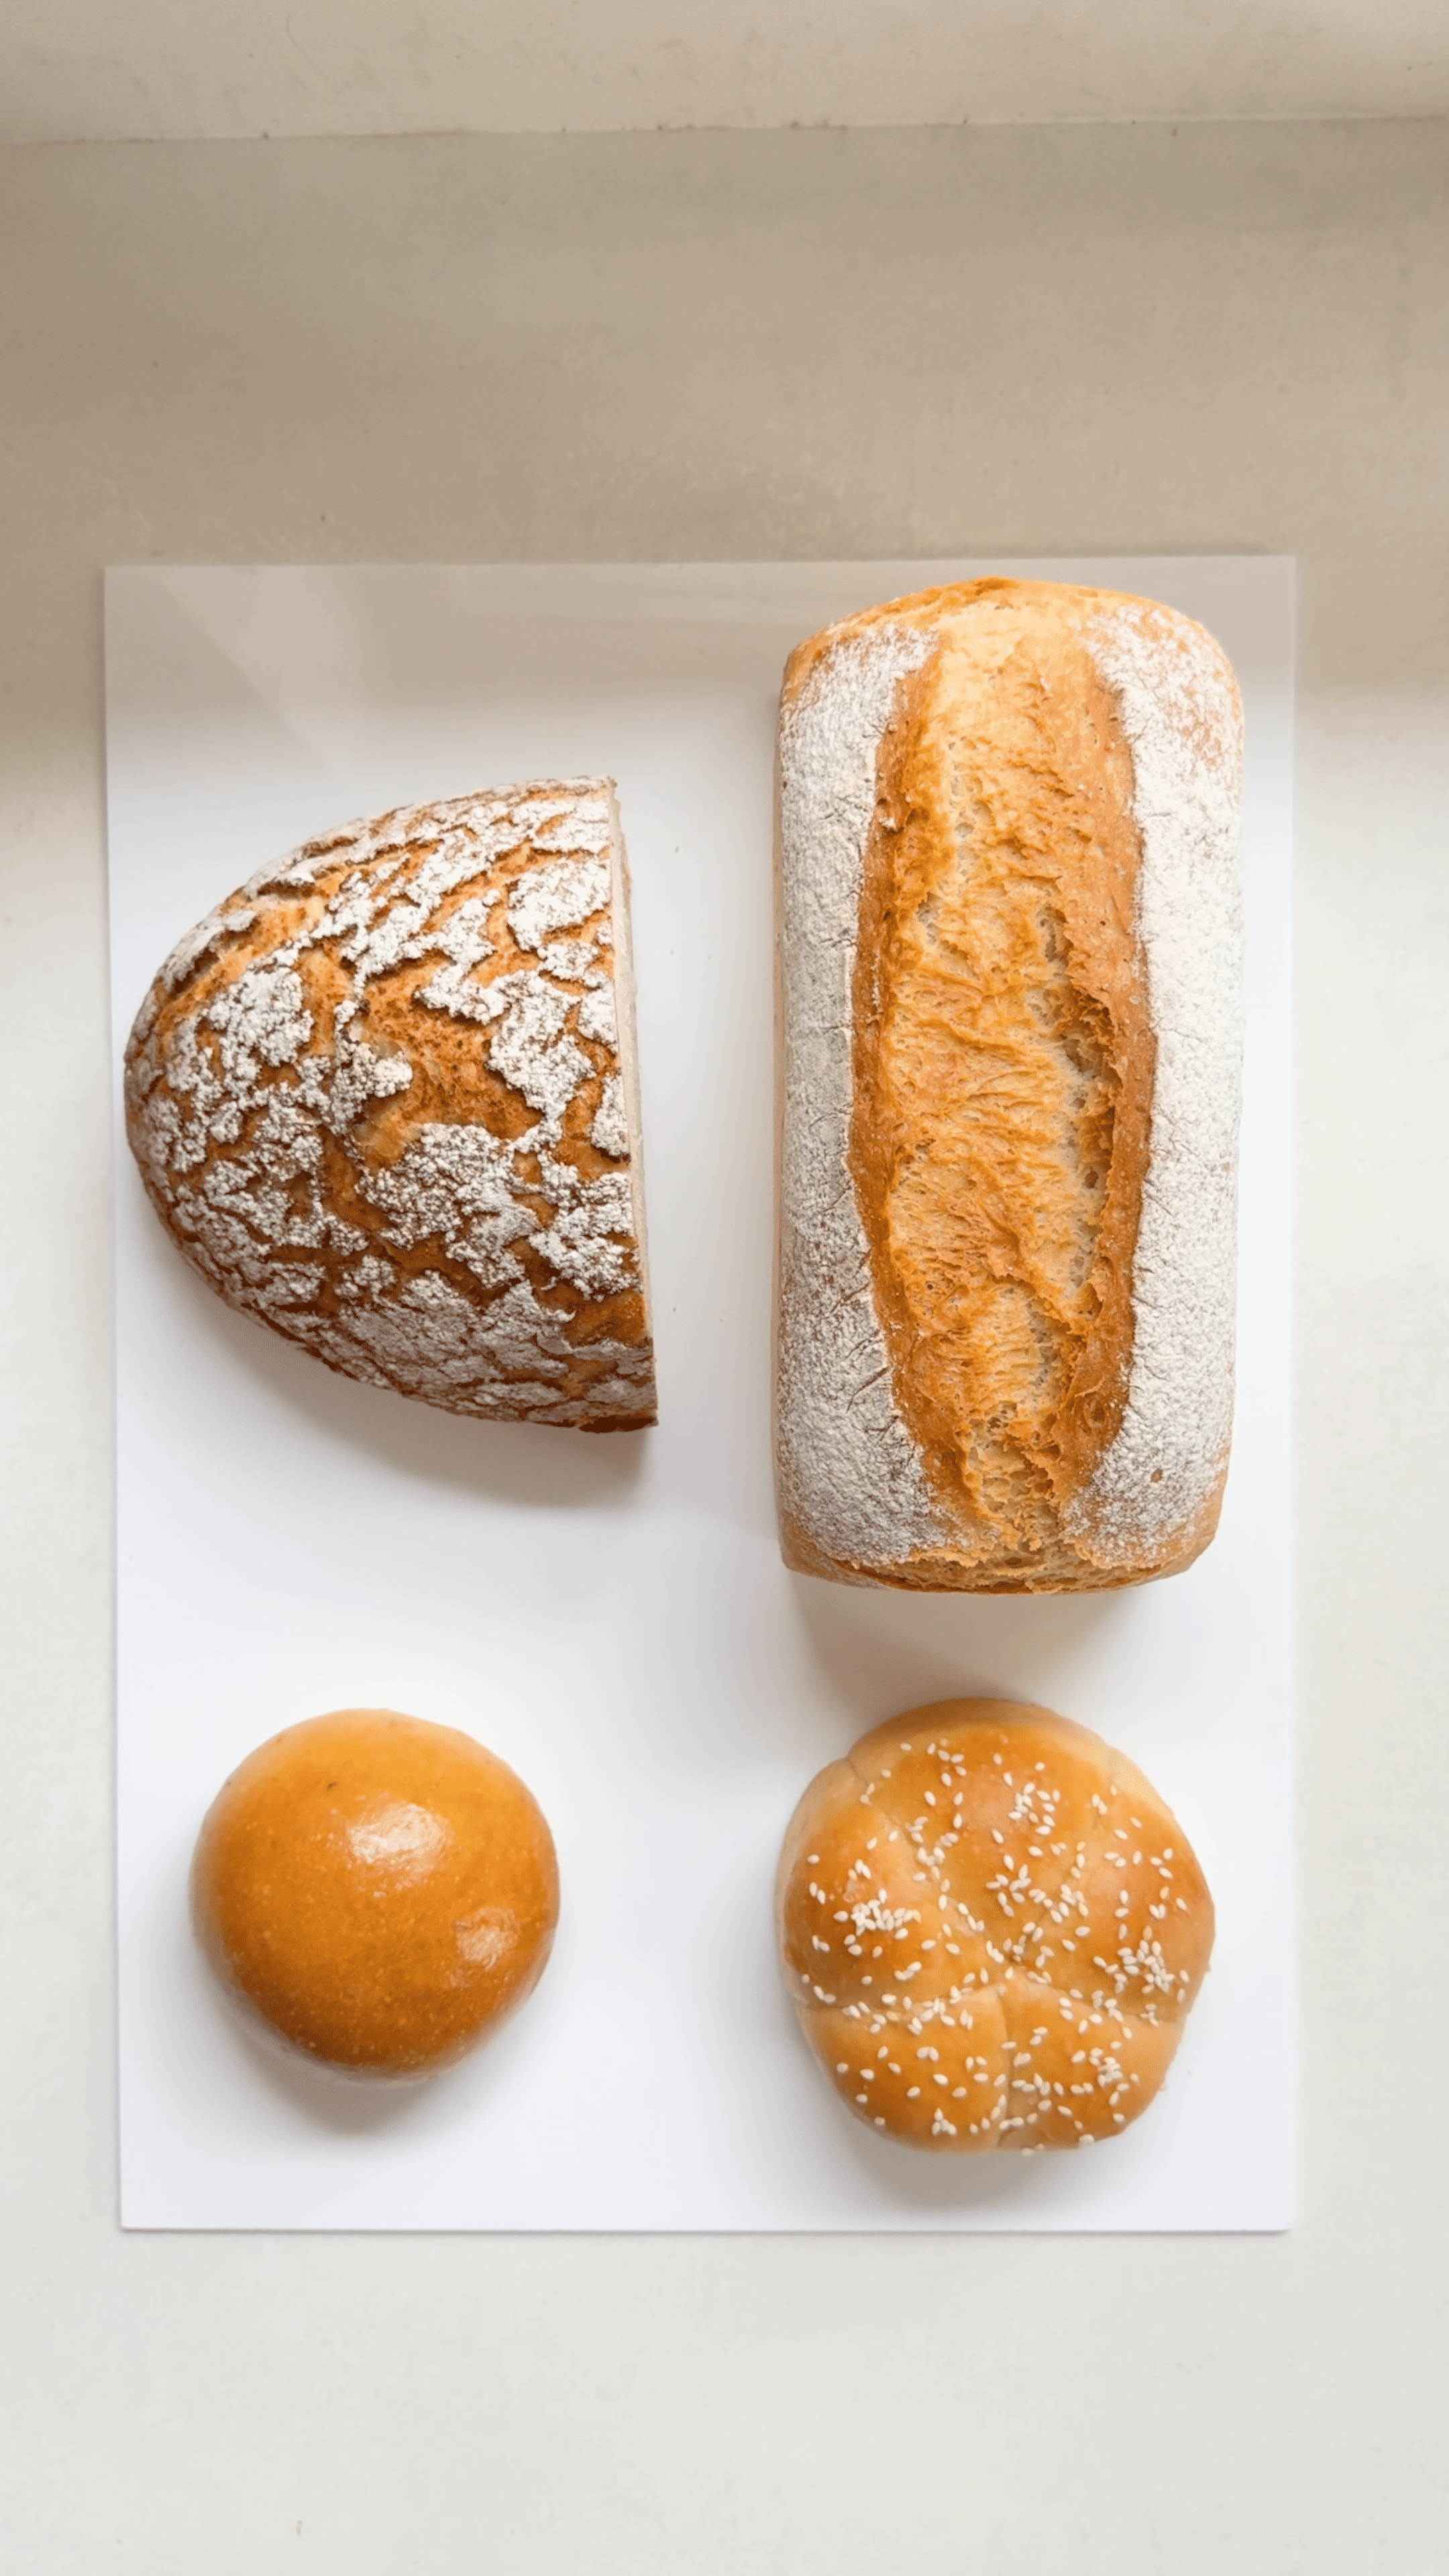
In these recipes I teach you how to make four different types of bread using one fundamental recipe.
By using the same foundational recipe to make a simple tin loaf, I’ll show you how a few simple tweaks can turn this into garlic dough balls, a tiger loaf, and rosemary & fennel buns.
This was a really fun one to play around with, and hopefully acts as a good introduction to bread for beginners.
If you’re looking for more tin loaf recipes, check out Bread 101.
Ingredients
Method
Into the bowl of a stand mixer, add all of the ingredients. If you are using active dry yeast, you will need to activate this in the water (stirring them together and leaving it to rest for 5 minutes), before adding it into the dough.

Knead the dough for 5-7 minutes, on a medium speed, until it is smooth and elastic. If you find the dough isn't developing into a smooth texture, let it rest in the mixer for 5 minutes, then knead again for a few minutes. This resting time will allow the gluten to develop further and it should pull together into a nice, cohesive dough. Remove it from the mixer and shape it gently into a nice tight ball shape on the work surface.
Lift the dough into a large, lightly oiled bowl, cover the bowl tightly with clingfilm, and proof at room temperature (around 21C) for about an hour, or until it doubles in volume.

Very lightly flour the top of the dough, and with a plastic dough scraper, or your hands, lift the dough out of the bowl, and flip it, smooth side down onto a lightly floured work surface.
Press the dough into a rough 'A' shape, with the tail at the bottom slightly wider than the top.

Using both hands, confidently roll the dough tightly on itself, into a neat log.

Lift the dough into a 2lb/900g loaf tin. If it isn't a non-stick tin, ensure it is greased and lined with parchment paper. Cover the tin with a tea towel and proof for 1-1.5h, or until the dough has doubled to the rim of the tin. Meanwhile, pre-heat the oven to 230C/445F non-fan assisted (215 Fan Assisted) and place a small tray on the bottom shelf. My tin was a little too big for this recipe which is why it doesn't quite reach the top once proofed! I've linked the correct size tin in the equipment list.

Lightly dust the top of the dough with flour.

Score the centre of the dough with a razor blade. This will control the expansion of the dough. Place it immediately into the centre of the oven, and splash a small cup of boiling water onto the pre-heated tray.

Immediately drop the oven temperature to 190C/275F non-fan assisted (175C Fan), and bake for 45 minutes.
Remove the dough from the tin, and place it onto a tray lined with a silicon mat, and place it back into the oven to bake for another 10-15 minutes. It should be a golden brown colour, and a instant read thermometer placed in the centre should register 90C/195F or above.

Place it straight onto a wire cooling rack, to cool for atleast 1 hour.
Start with the poolish. Add the water and instant yeast to a medium bowl and whisk them to combine. Then add the flour on top and stir it together with a spatula until there are no dry bits. Cover the bowl with clingfilm and leave it at room temperature for 12 hours. It is best to do this the evening before planning to bake the bread.

After 12 hours it should be nice and bubbly!

For the dough, add the poolish into the bowl of a stand mixer, along with the remaining dough ingredients. Knead with a the dough hook for 5-7 minutes, until the dough is smooth and elastic. Remove it from the mixer and shape it gently into a nice tight ball shape on the work surface. Lift the dough into a large, lightly oiled bowl, cover the bowl tightly with clingfilm, and proof at room temperature (around 21C) for about an hour, or until it doubles in volume.

Using a plastic dough scraper, lift the the dough out, smooth side down onto a lightly floured work surface and use your hands to press it gently into a rough circle shape.
Stretch the bottom edge out, and fold this halfway up.

Then take the left edge and stretch the out, folding it just over the centre and repeat this with the right edge. This should form a neat rectangle shape.

Stretch the top the dough and fold it down, 1/3 of the way.

Then, roll the dough tightly on itself, into a neat log shape.

Lift the dough, seam side up, into a lightly floured 750g banneton basket. Cover it with a tea towel and proof for 1-1.5h, or until the dough has doubled and filled the banneton basket. If you do not have a banneton basket, you can also shape this as a free form log. Just place the shaped dough, seam side down onto a baking tray lined with a silicon mat. Alternatively, it can be baked in a loaf tin like the recipe above.
30 minutes before the dough is ready, whisk together the tiger topping ingredients until it forms a loose paste. Cover and set to one side.

Pre-heat the oven to 230C/445F non-fan assisted (215 Fan Assisted).
Once the dough has doubled, flip it out onto a baking sheet lined with a silicon baking mat.

Use an offset spatula to spread the tiger paste in an even layer over the top of the dough.

Using a sieve, dust the loaf evenly with bread flour, then bake it in the centre of the oven for 35-40 minutes.

It is baked when it is a deep golden, orange colour. Immediately transfer it to a wire rack, and cool for atleast an hour.

Start with the poolish. Add the water and instant yeast to a medium bowl and whisk them to combine. Then add the flour on top and stir it together with a spatula until there are no dry bits. Cover the bowl with clingfilm and leave it at room temperature for 12 hours. It is best to do this the evening before planning to bake the bread.
Pre-heat the oven to 200C/390F (185 Fan).
Take 2 whole, medium garlic cloves and slice the tops off. Place them onto a piece of foil and drizzle extra virgin olive oil over the top, and add a pinch of flaky salt. Scrunch the foil around them and bake for 50-70 minutes, or until the garlic is soft, golden and caramelised. Allow it to cool for 10 minutes.

Add all of the dough ingredients, along with the poolish into the bowl of a stand mixer. Take 1 of the garlic cloves and squeeze the roasted garlic into the bowl. With the dough hook attached, knead the dough for 5-7 minutes on a medium speed until smooth and elastic. Remove it from the mixer and shape it gently into a nice tight ball shape on the work surface.

Lift the dough into a large, lightly oiled bowl, cover the bowl tightly with clingfilm, and proof at room temperature (around 21C) for about an hour, or until it doubles in volume.
While the dough proofs, prepare the garlic butter by adding the butter, olive oil, a grind of salt & pepper and some of the remaining roasted garlic to a small food processor (or pestle & mortar). Blitz until smooth, and add more roasted garlic & seasoning to your taste if needed. Set this to one side.
With a plastic dough scraper, lift the proofed dough out of the bowl, and cut it into 35g portions using a metal bench scraper (or 45g portions if baking the dough balls in one large tin). Holding you hand in a 'C' shape, cup the pieces of dough underneath your hand and rotate them to create smooth, taut, ball.

Lightly grease 5 ring molds with the garlic butter. Alternatively, you can make this in one large 25cm/10" round tin. If so, I recommend spreading some garlic butter on the base, and then also sprinkling some panko breadcrumbs in too to coat. They soak up all the butter as it melts in the oven, giving a delicious, buttery, crunchy bottom to the bread
Pre-heat the oven to 175C/345F non-fan assisted (160C fan).
Lift the dough balls into the ring mold (5 balls per mold) and allow them to proof, covered with a tea towel, for about an hour or until doubled in volume.

Using a pastry brush, apply an egg wash over the dough (just whisk together one whole egg with a splash of cream).

Bake in the centre of the oven for 35-40 minutes (it may take slightly longer if baking in a large tin). The dough balls should be an even golden colour.
Remove them from the oven and brush them with more garlic butter, and finish with an optional sprinkling of sesame seeds. Serve warm with the remaining garlic butter in a serving dish, to dip!

For the tangzhong, add the flour and milk into a saucepan and cook this over a medium heat, whisking until it forms a thick paste. Remove it from the heat and scrape it into a bowl. Set it to one side to cool for 15 minutes.

Meanwhile, add the fennel seeds into a dry saucepan and toast them over a medium heat until they smell fragrant. Immediately tip them into a pestle and mortar and grind them to a fine powder.
Chop the fresh rosemary, and then add this along with the olive oil and fennel seeds, into a small bowl.
Once the tangzhong is cool, add all the dough ingredients, tangzhong, and flavoured olive oil into the bowl of a stand mixer fitted with a dough hook. Knead on a medium speed for 5-7 minutes until the dough is smooth and elastic. Remove it from the mixer and gently shape it into a tight ball on the work surface.

Lift the dough into a large, lightly oiled bowl, cover the bowl tightly with clingfilm, and proof at room temperature (around 21C) for about an hour, or until it doubles in volume.
Remove the proofed dough from the bowl and cut it into 100g portions using a bench scraper.
 (400 x 400 px) (29)")
Flip the pieces of dough, smooth side down onto an unfloured work surface. Stitch the outer edges into the centre, then flip the dough ball over. Holding you hand in a 'C' shape, cup the pieces of dough underneath your hand and rotate them to create smooth, taut, ball.
Place the dough balls onto a lined baking tray and cover them with a tea towel. Proof for 1-1.5h or until doubled in volume. Meanwhile, pre-heat the oven to 175C/345F non-fan assisted (160C Fan). You should get around 8 dough balls. You can split them across two trays, or do 6 on one tray, 2 on another.

Once proofed, use a pastry brush to apply an egg wash over the buns (just whisk together a whole egg with a splash of cream), then bake them in the centre of the oven for 30-35 minutes or until an even golden colour.
 (400 x 400 px) (31)")
Remove them from the oven and lift them onto a wire rack. Immediately brush some soft butter over the top with pastry brush. Allow them to cool for 30 minutes before slicing.

- If you want to add in some wholemeal flour you can, but note that it is much more absorbent so the amount of liquid you need to add will be slightly higher to account for this.
- You can remove the butter and replace it with oil, or replace milk with water, if you want to make any of the recipes dairy free.
- You need to use a strong white bread flour, as plain/all-purpose flour's protein content is really too low to develop the amount of gluten you need to support the structure of the dough.
I thought water should be warm if we use the yeast. I did try with cold Water with yeast before the dough never rise for me. I don’t know why
Thank you
The heat of the stand mixer mixing will warm the dough, don’t worry too much about it for a simple bread recipe.