
Chocolate Burnt Basque Cheesecake
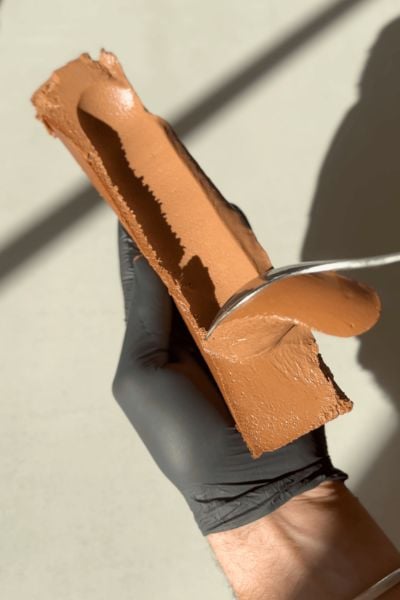
Chocolate Burnt Basque Cheesecake
A classic burnt basque cheesecake is a hot trend, and here we’re making a super creamy chocolate burnt basque cheesecake version.
The secret is wrapping the springform cake tin in wet tea towels when you bake the cheesecake. Almost like cake strips, these help to insulate the side of the tin and create an even bake, preventing the chocolate burnt basque cheesecake from rising up too high along the edges, and overcooking.
The bake time can definitely be something you adjust, 25 minutes results in a very very soft centre, but I’ve baked it firmer and still really enjoyed the texture! Play around with the timings and see what works for you.
Looking for a classic burnt basque cheesecake? Then check out my Cheesecake 101 recipes!

Ingredients
Method
Pre-heat the oven to 220C/430F Fan Assisted. Meanwhile, take a 9" springform cake tin and line the bottom with a circle of parchment paper and then line the sides with a long strip of parchment, slightly higher than the height of the tin. Remove the cream cheese from the fridge so it can sit at room temperature for 30 minutes.
Into a medium bowl, add the chocolate (ensure it is chopped so that is melts easily) and cream. Place this over a pan of gently simmering water, and stirring in small circular motions in the centre of the bowl, keep mixing it until you have a glossy smooth ganache and all the chocolate has melted. Set this to one side to cool slightly.
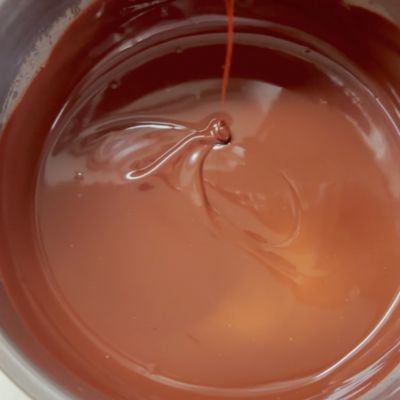
Into the bowl of a stand mixer, add the cream cheese, and then sift over the sugar, salt, cocoa powder and flour. (You can also use a food processor to make this recipe, see the notes)
With the paddle attachment, mix it on a low speed for 2 minutes. It's important to mix on a low speed to ensure we don't add too much air.
Scrape down the bowl, really ensuring you scrape anything stuck to the bottom and then place the mixer on a low speed again and slowly drizzle in the eggs.
Once you've added all the eggs, continue to mix for 1-2 minutes or until there are no more lumps of cream cheese. If you find there are still lumps, you can give it a very quick blend with a hand blender.
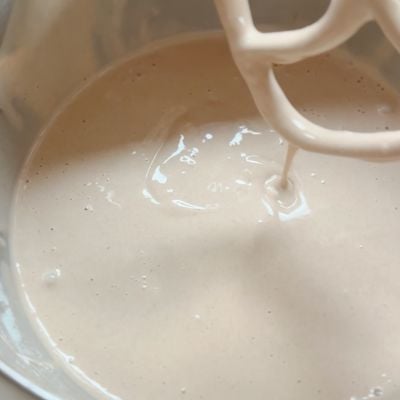
Finally, scrape down the bowl one final time and with the mixer on low, slowly drizzle in the cooled chocolate (which should be around 30-35C/86-95F on a digital thermometer). You should end up with a smooth chocolatey batter.
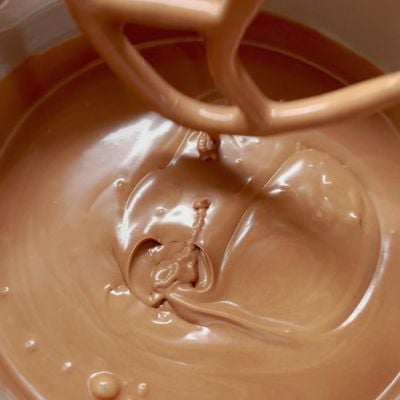
Take your lined tin and place it onto a large baking tray. Place two sheets of foil underneath, and then wrap the tin with two wet tea towels that you have lightly wrung the water out of. Wrap these around the outside of the tin and then fold the foil up around them. This will help to create an even bake and rise to the cheesecake, and help to prevent it from rising too high along the edges.
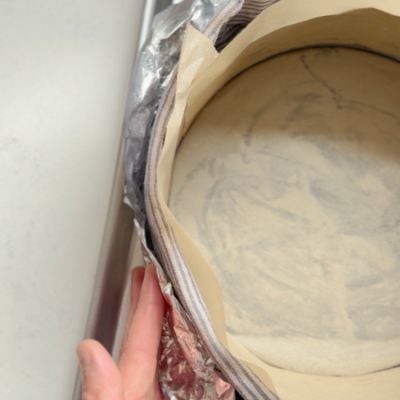
Pour the cheesecake bater through a sieve, into the lined tin.
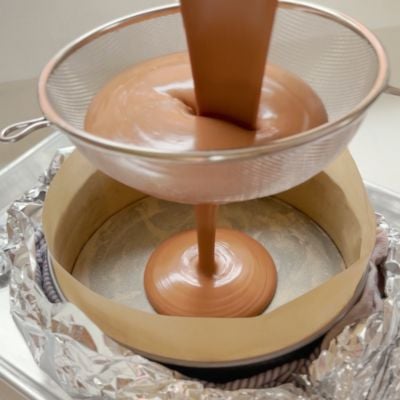
Place the tray into the oven and bake for 25 minutes - on the middle rack of the oven. It will be very wobbly when it comes out but that is expected!
Leave the cheesecake at room temperature for 30 minutes, then place it in the fridge for a minimum of 18 hours (ideally 24 hours). It's important to let is cool for this long so the cheesecake can set but stay creamy in the centre when you cut it. 25 minutes baking will result in a very very creamy centre, but if you want it slightly firmer you can increase the bake time.
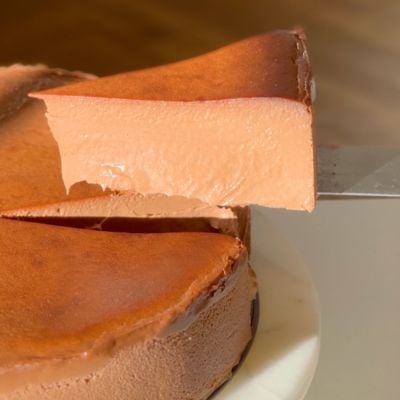
When serving, if you leave this out of the fridge the centre will begin to soften so it is best to serve it from the fridge if you want a creamy, but stable texture. Too long out of the fridge and it can become runny.
If you want to make this in a food processor, simply follow the same steps, but blending on a low speed (so as not to incorporate too much air) and scraping down the sides and bottom of the bowl to ensure everything gets incorporated.
For how long can you storage it in the fridge? 🙂
I didn’t try longer than 24 hours but I’m sure 2 days is fine!
Looks amazing! Been following your journey with this cheesecake! So excited to try it but It’s just two of us. Do you think I could half the ingredients and make it in a 6 inch pan? Thanks so much!!
Yes totally! The bake time I’m not quite sure on though as it is smaller….maybe 21m?! Just needs to be wobbly 🙂
Mine did not filter through the sieve! There were no lumps so I just poured it straight into the tin. Any issues with that, as the consistency was similar to yours in the video.
No totally fine!
Caveat, I have tried about 7 of your recipes and thoroughly enjoyed every one of them.
How do I salvage this?
I did not do the base and am not a big fan of cheesecake or cream cheese! So, I was hesitant to do this recipe. I did wait the 24 hours. My daughter asked me for a slice. We were both disappointed.
Can I use it like Nutella to spread on toast. What do you think?
Thank you Matt! Followed on Instagram and was eagerly waiting for the recipe! Can’t wait to try it this weekend. Cheers!
Enjoy!
At what temperature should I cook the chesechake?
220c fan
Natural or Dutch processed cocoa powder or doesn’t it matter?
I use dutch!
Matt. I can’t find the recipe of the classic version😅
Check my cheesecake 101 recipe, it’s in the recipe section of the website!
I love your classic cheesecake recipe – just made it again last weekend but THIS one looks so delicious 😋 can you pls do a pistachio one next? 🤩
oh yum!!
If one wanted to have a crust on it, what would you suggest
Yes you could do an oreo crust! 140g oreos, filling removed, crushed, with 60-70g melted unsalted butter stirred through. Press it into the base, then bake for 10m at 180c. leave to cool then make the cheesecake filling!
Will making half quantity mess with texture?
You will need to use a smaller tin! If you use the same size tin it will most likely over cook very quickly
Covered or uncovered in the fridge? Thanks for a great recipe!
uncovered!
Can’t wait to try it out! Can you please also do a non-chocolate, classic version!
I have a link in the caption to my classic basque if you want to try that 🙂
Can you freeze it?
I’m afraid I didn’t test that!
What would be the temperature if my oven had bo fan?
200c
Yes, you can. Just tried it. Absolutly amazing. Just make sure to defroze it slowly.
I have a question, if I want to make this without chocolate, what would the ratios be please? I want to try this today!!
Check out my ‘cheesecake 101’ recipe on the recipe section of the website!
How much 70% dark chocolate would I have to use to still achieve the same product?
1:1 swap will be totally fine!
Can we make this eggless.?
Any alternative for eggs.pls.
Thank you
No I’m afraid not
Is there a minimum time for the cake to chill? Might have missed the 18h and would like to gift this cake to someone for their birthday
Really needs 15+ hours
You can perfectly fine. It’s amazing . We do it every week for a restaurant!
I loved watching you perfect this and appreciate the number of attempts it took to perfect!
Could it work with a traditional bain marie rather than wet tea cloths?
You can skip the towel but it will just rise up around the edges! no big deal though. Worth trying with a bain marie!
Hi! How it would be the proportion of cornstarch if I want tomake it gluten free version?
I’m afraid I haven’t tested that