
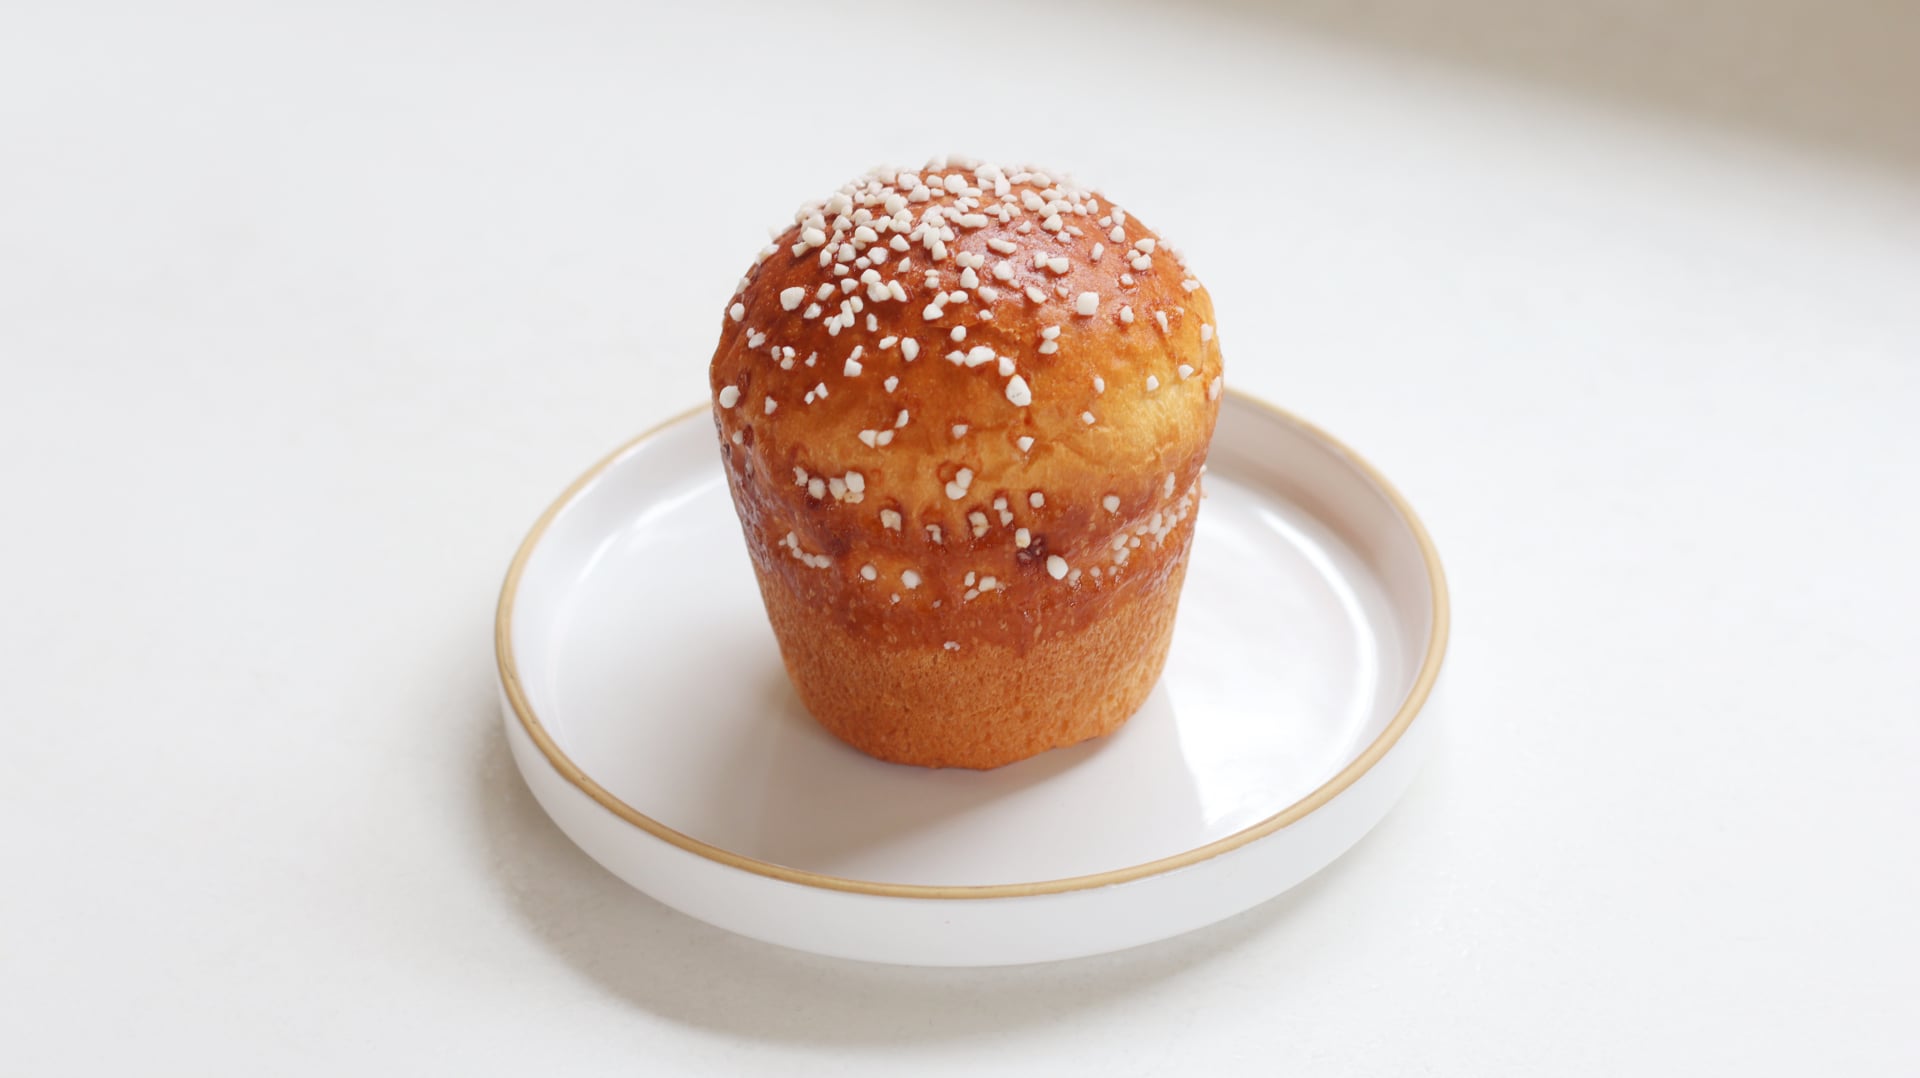
Sugar Brioche
TIER 1
Sugar Brioche
In Tier 1 we tackle the fundamentals of the dough. It’s not overly enriched so it’s nice and easy to handle, and the addition of a yudane gives it extra bounce and structure, resulting in a beautifully soft, springy finish. The buttery crumb and bursts of sweetness from the pearl sugar on top make it an amazing breakfast pastry. I like mine served warm with a little butter and jam.

10-12
INDIVIDUAL BRIOCHE
Ingredients
Makes 10-12 individual brioche
Yudane
50g Boiling Water
50g Strong White Bread Flour
Brioche Dough
150g Whole Eggs
100g Whole Milk
420g Strong White Bread Flour
12g Fine Sea Salt
40g White Sugar
6g Instant Dry Yeast or 12g Fresh Yeast
140g Unsalted Butter, Cubed (Remove from the fridge 15 minutes before)
Egg Wash
30g Egg Yolk
30g Double/Heavy Cream
Pearl Sugar To Decorate
Special equipment
Stand mixer
Muffin tin (I use the Wilton 2105-9921 6-Cup Giant Muffin Pan)
Method
1. Into a small bowl, add 50g of strong white bread flour. Boil the water and pour this over the top, stirring it together to form a paste. Cover this and set it aside to cool for 1 hour (or 20 minutes in the fridge)
- 50g Strong White Bread Flour
- 50g Boiling Water
2. Into the bowl of a stand mixer, add the cooled Yudane (above) with the wet ingredients on top.
- 150g Whole Eggs
- 100g Whole Milk
3. Add the remaining dry ingredients on top and with the dough hook attached, knead for 8-10 minutes on a medium speed. The dough should be more cohesive in consistency, but the gluten will not have fully developed, so it will not be completely smooth.
- 420g Strong White Bread Flour
- 12g Fine Sea Salt
- 40g White Sugar
- 6g Instant Dry Yeast or 12g Fresh Yeast
4. Add the cubed butter, a few pieces at a time, waiting around 20 seconds in between each addition.
- 140g Unsalted Butter, Cubed
5. Once all the butter has been incorporated, knead for a further 1-2 minutes. By which point the dough should feel very smooth and elastic.
6. Remove the dough from the mixer and lift it onto your work surface. Shape it into a smooth ball, and lift it into a medium bowl which has been lightly oiled.
7. Place a sheet of cling film directly on the surface of the dough, and another around the bowl. Refrigerate the dough overnight. 12-16 hours.
8, The next day, remove the dough from the fridge and cut it into 95g pieces if using a jumbo muffin tin, or 65g pieces, if using a regular muffin tin. Note – you may need to lightly grease the tin with butter if you think it might stick. A non-stick cooking spray works really well for this. Alternatively, if you are using a regular muffin tin, you can use paper muffin liners.
9. Place the smooth side of dough down on the work surface and flatten it slightly. Fold the edges towards the centre, to create a dumpling-like shape.
10. Flip the dough over and with your hand cupped around in it in a ‘C’ shape, rotate the dough underneath your palm, to create tension, and a smooth ball.
11. Lift each dough ball into your tin.
12. Place the tray of dough balls into the oven, switched off, and place a small pot of boiling water in the corner, changing it every 30-45 minutes.
13. The dough will take 2-3 hours to proof. It is ready when it has doubled in size. For the jumbo tin, it will rise to about ⅔ of the tin, whereas in a regular muffin tray, it will balloon slightly above the rim of the tin.
14. Just before the dough has finished proofing, remove it from the oven and pre-heat it to 185C/365F non-fan assisted (170C/340F fan-assisted).
15. Whisk together the egg wash ingredients, then brush a light layer of egg wash over the top of each bun. Finally, add a generous sprinkling of pearl sugar on top.
16. Bake them in the oven for 25 minutes (jumbo muffin tin) or 18-20m if using a smaller muffin tin. They should be an even golden brown colour on top.
17. Remove the trays from the oven and allow the dough to cool for a minute before carefully lifting them out of the tray and onto a wire cooling rack. If they are not coming out, carefully run a knife around the outside of the dough, then tap the tray firmly on its side, and they should drop out.
18. They can be eaten warm or cooled to room temperature before serving.
Shop the Equipment


Brioche au Craquelin
TIER 2
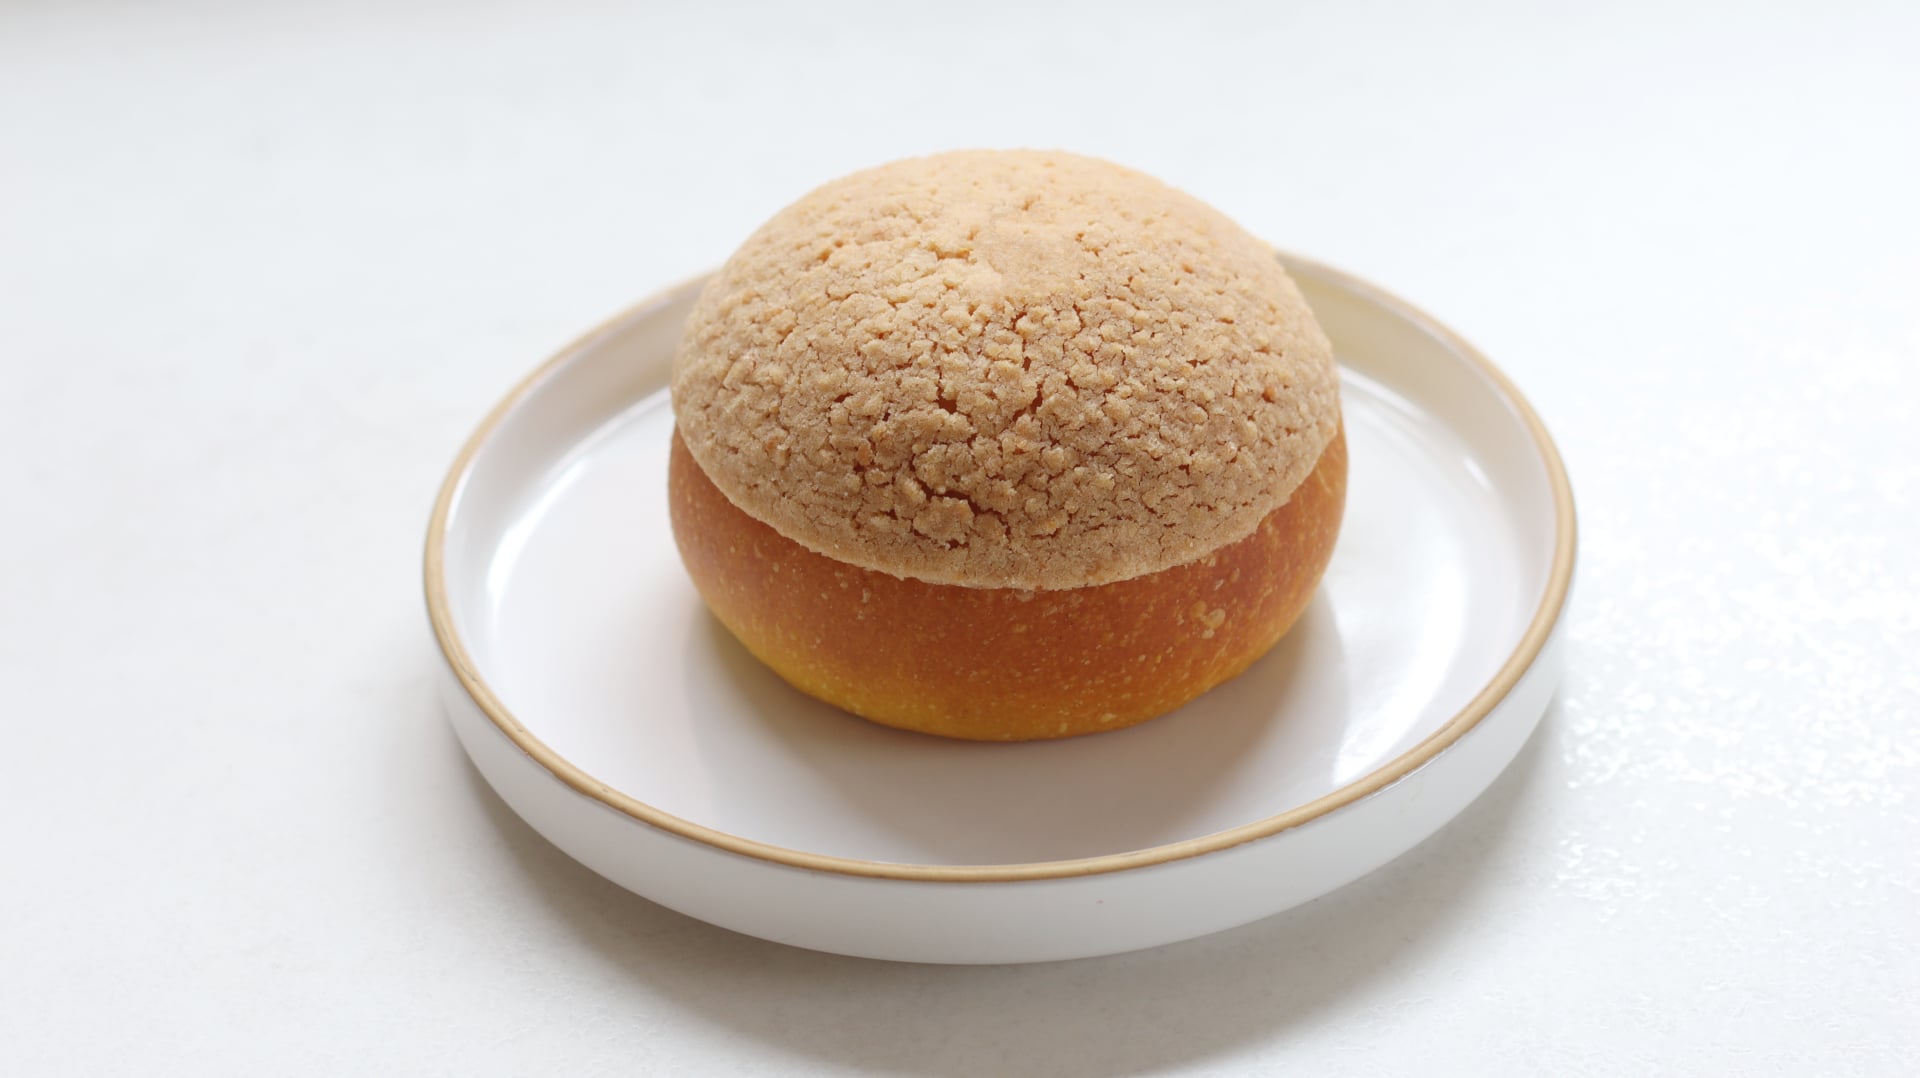
Brioche Au Craquelin
In Tier 2 we follow the same technique for the dough as Tier 1. Then, similar to a concha, we top this brioche with a crisp craquelin layer (one we’ve made plenty of times during choux pastry month!). Just like with choux, it adds a sweet, crunchy texture while also helping control the bake, giving you a neat, professional finish. I show you how to fill the brioche with a simple raspberry compote, but feel free to get creative with your fillings!
14-16
INDIVIDUAL BRIOCHE
Ingredients
Makes 14-16 Individual Brioche
Yudane
50g Boiling Water
50g Strong White Bread Flour
Brioche Dough
150g Whole Eggs
100g Whole Milk
420g Strong White Bread Flour
12g Fine Sea Salt
40g White Sugar
6g Instant Dry Yeast or 12g Fresh Yeast
140g Unsalted Butter, Cubed (Remove from the fridge 15 minutes before)
Craquelin
75g Plain/All-Purpose Flour
75g Caster/White Sugar
75g Ground Almonds
85g Unsalted Butter, Cold & Cubed
1g Fine Sea Salt
Raspberry Compote
400g Raspberry Puree
40g Caster/White Sugar*
8g Pectin NH
10g Fresh Lemon Juice
Special equipment
Stand mixer
Silicon mats
7cm cookie cutter
Digital thermometer (optional)
Piping bag
Long cream filling piping tip
Method
Dough
1. Into a small bowl, add 50g of strong white bread flour. Boil the water and pour this over the top, stirring it together to form a paste. Cover this and set aside to cool for 1 hour (or 20 minutes in the fridge)
- 50g Strong White Bread Flour
- 50g Boiling Water
2. Into the bowl of a stand mixer, add the cooled Yudane (above) with the wet ingredients on top.
- 150g Whole Eggs
- 100g Whole Milk
3. Add the remaining dry ingredients on top and with the dough hook attached, knead for 8-10 minutes on a medium speed. The dough should be more cohesive in consistency, but the gluten will not have fully developed, so it will not be completely smooth.
- 420g Strong White Bread Flour
- 12g Fine Sea Salt
- 40g White Sugar
- 6g Instant Dry Yeast or 12g Fresh Yeast
4. Add the cubed butter, a few pieces at a time, waiting around 20 seconds in between each addition.
- 140g Unsalted Butter, Cubed
5. Once all the butter has been incorporated, knead for a further 1-2 minutes. By which point the dough should feel very smooth and elastic.
6. Remove the dough from the mixer and lift it onto your work surface. Shape it into a smooth ball, and lift it into a medium bowl which has been lightly oiled.
7. Place a sheet of cling film directly on the surface of the dough, and another around the bowl. Refrigerate the dough overnight. 12-16 hours.
Craquelin
1. Add all of the ingredients into the bowl of a stand mixer, and beat using the paddle attachment until it forms a smooth paste.
- 75g Plain/All-Purpose Flour
- 75g Caster/White Sugar
- 75g Ground Almonds
- 85g Unsalted Butter, Cold & Cubed
- 1g Fine Sea Salt
2. Scoop the mixture out and place it in between two large silicon mats (or pieces of parchment paper). Using a rolling pin, roll the dough to around 2-4mm thick. Place it in the freezer for at least 30 minutes.
3. Remove the dough from the freezer and working quickly, peel off the silicon mats/parchment paper and cut discs, using a 7cm/2.75” cookie cutter. Cut as many discs as possible and lift these onto a baking tray lined with a silicon baking mat. Place them back in the freezer until you need them.
4. You will need to re-roll the scraps of dough and then repeat steps 2-3 to cut enough discs. You will need around 16 in total.
Dough Continued
1. The next day, remove the dough from the fridge and cut it into 50g pieces.
2. Place the smooth side of dough down on the work surface and flatten it slightly. Fold the edges towards the centre, to create a dumpling-like shape.
3. Flip the dough over and with your hand cupped around in it in a ‘C’ shape, rotate the dough underneath your palm, to create tension, and a smooth ball.
4. Lift each dough ball onto a lined baking tray – you will need 2-3 trays. Depending on the size of the tray, you should be able to fit 6 per tray (or 8 if you have large baking trays) Ensure they have enough space to proof.
5. Place the trays into the oven, switched off, and place a small pot of boiling water in the corner, changing it every 30-45 minutes.
6. The dough will take 2-3 hours to proof. It is ready when it has doubled in size.
Raspberry Compote
1. Into a small bowl, whisk together the sugar and pectin and set aside.
- 40g Caster/White Sugar*
- 8g Pectin NH
2. Add the raspberry puree into a medium saucepan, and heat it to around 45C (or just until it is slightly warm), then tip in the sugar/pectin mixture.
- 400g Raspberry Puree
3. Whisk until the mixture comes to a boil, then remove it from the heat and whisk in the lemon juice.
- 10g Fresh Lemon Juice
4. Pour the mixture into a bowl, cover the surface with clingfilm, and refrigerate until needed. It will need a few hours to cool, so do this while the dough is proofing. Note – the amount of sugar will depend on the sweetness of your raspberries, so if you find the mixture is not sweet enough as it is cooking (have a little taste!), then you can add more.
Baking & Assembly
1. Just before the dough has finished proofing, remove the trays from the oven and preheat it to 185C/365F non-fan assisted (170C/340F fan-assisted). You may not be able to bake all the trays at once which is fine, just cover one of the trays with a tea towel while the first two trays bake.
2. Remove the discs of craquelin from the freezer and place them into the centre of each bun.
3. Bake them in the oven for 20 minutes. The craquelin should be an even golden brown colour on top.
4. Remove the trays from the oven and lift them straight onto a wire cooling rack, to cool for at least 30 minutes.
5. Once cooled, quickly whisk the raspberry compote together to smooth it, and place it into a piping bag with a long “cupcake filler” nozzle.
6. Pierce a hole in the base of the bun, and pipe some compote in. Flip the buns back over and serve.
Shop the Equipment


Kugelhopf
TIER 1
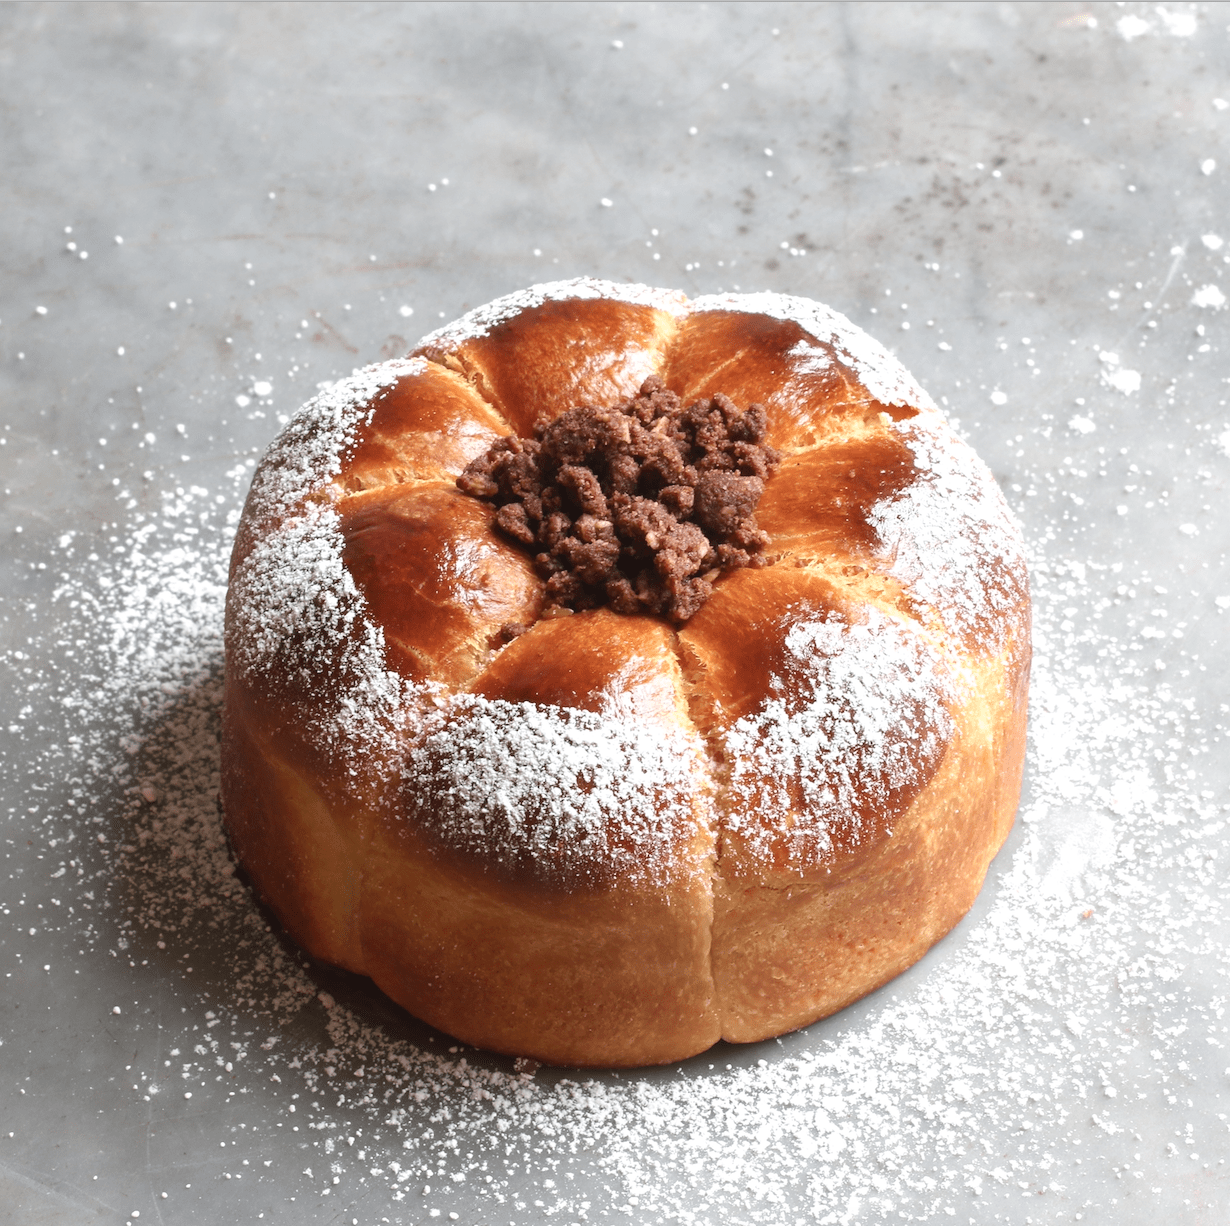
Kugelhopf
This bread has ties to Germany, Austria and France and is a popular bread served around the holidays. Think of it like giant hot cross bun in a bundt tin! The dough is a soft, buttery brioche flavoured with soaked raisins that have been steeped in orange, lemon and vanilla. When the cake is finished it is soaked in melted butter and then coated in sugar. I have to say, this is one of the most delicious recipes I’ve made ALL year! I’ve used a Kugelhopf tin, but the dough can also be made in a classic bundt tin.
2
400G LOAVES
Ingredients
Makes 2 400g Loaves
Soaked Raisins
100g Sultanas
20g Sugar
150g Water
Peels of 1/2 Lemon
Peels of 1 Medium Orange
Brioche Dough
425g Strong White Bread Flour (13-14% Protein)
10g Salt
50g Sugar
17g Fresh Yeast or 8.5g Instant Dry Yeast
190g Eggs
65g Whole Milk
Zest of 1 Lemon
Zest of 1 Orange
210g Unsalted Butter, Slightly Cold & Cubed
To Finish
Melted Butter
Caster/White Sugar
Special equipment
Stand mixer
Dough scraper
Kugelhopf tin/Bundt tin
Digital thermometer
Method
Soaked Raisins
1. Into a small saucepan, add all the ingredients for the soaked raisins. Bring it to a boil and then pour the mixture into a tupperware. Cover and refrigerate for a minimum of 6 hours, ideally overnight.
Brioche Dough
1. For the brioche dough, add all the ingredients, except the butter, to the bowl of a stand mixer fitted with the dough hook.
2. Mix for 10 minutes on a medium speed, scraping down the sides of the bowl occasionally.
3. After 10 minutes, add the butter slowly, a few cubes at a time. It helps to squeeze the cold butter in between your fingers gently just before you add it into the mixer.
4. Once all the butter has been added, continue to mix the dough until it is pulling away from the sides of the mixer and the dough passes the windowpane test.
5. Right at the end, drain the soaked raisins and briefly mix these in. We don’t want to knead them for too long or it will discolour the dough.
6. Scoop the dough out of the bowl, and shape it into a round ball using a dough scraper before lifting it into a lightly oiled bowl.
7. Allow the dough to proof for 2 hours at room temperature. It should double in size.
8. While it is proofing, lightly butter your Kugelhopf tin and coat the inside with flour, before tipping out the excess.
9. Once the dough has proofed, remove it from the bowl, knocking out the air.
10. Cut it into two equal 400g pieces of dough.
11. Carefully shape each piece into a ball, then with one of the dough balls, use your fingers to press a hole in the middle, creating a donut shape.
12. Confidently lift it into the greased tin and cover the tin with cling film.
13. With the other piece of dough, simply shape it into a ball and place it back into the bowl. Cover the surface of the dough and the bowl with cling film. Place both the tin and the bowl in the fridge overnight.
14. The next day, leave the tin at room temperature and proof for 2-3 hours, while leaving the other dough in the fridge.
15. Before baking, preheat the oven to 170C/355F Non-Fan Assisted.
16. Once proofed, the dough should have doubled, to just below the top edge of the tin. Bake the dough for around 35 minutes, it should be a golden colour and register 95C/203F when a digital thermometer is inserted in the middle.
17. Allow it to cool in the tin for 5 minutes, then flip it out and use a pastry brush to cover the entire dough in melted butter, before rolling in sugar.
18. Allow to cool before serving.
19. You can now remove the second dough from the fridge, and re-use the tin. Shape it into a donut again by piercing a hole in the centre and lift it into a the lightly greased tin.
20. Cover the tin with a tea towel and allow it to rise again until doubled – about 2-3 hours at room temperature. Bake as per step 16/17.
Shop the Equipment


Coffee Brioche
We would love to see your Bake It Better creations!
Show off your skills by sharing your desserts
#BakeItBetter

Brioche Feuilletée
We would love to see your Bake It Better creations!
Show off your skills by sharing your desserts
#BakeItBetter