
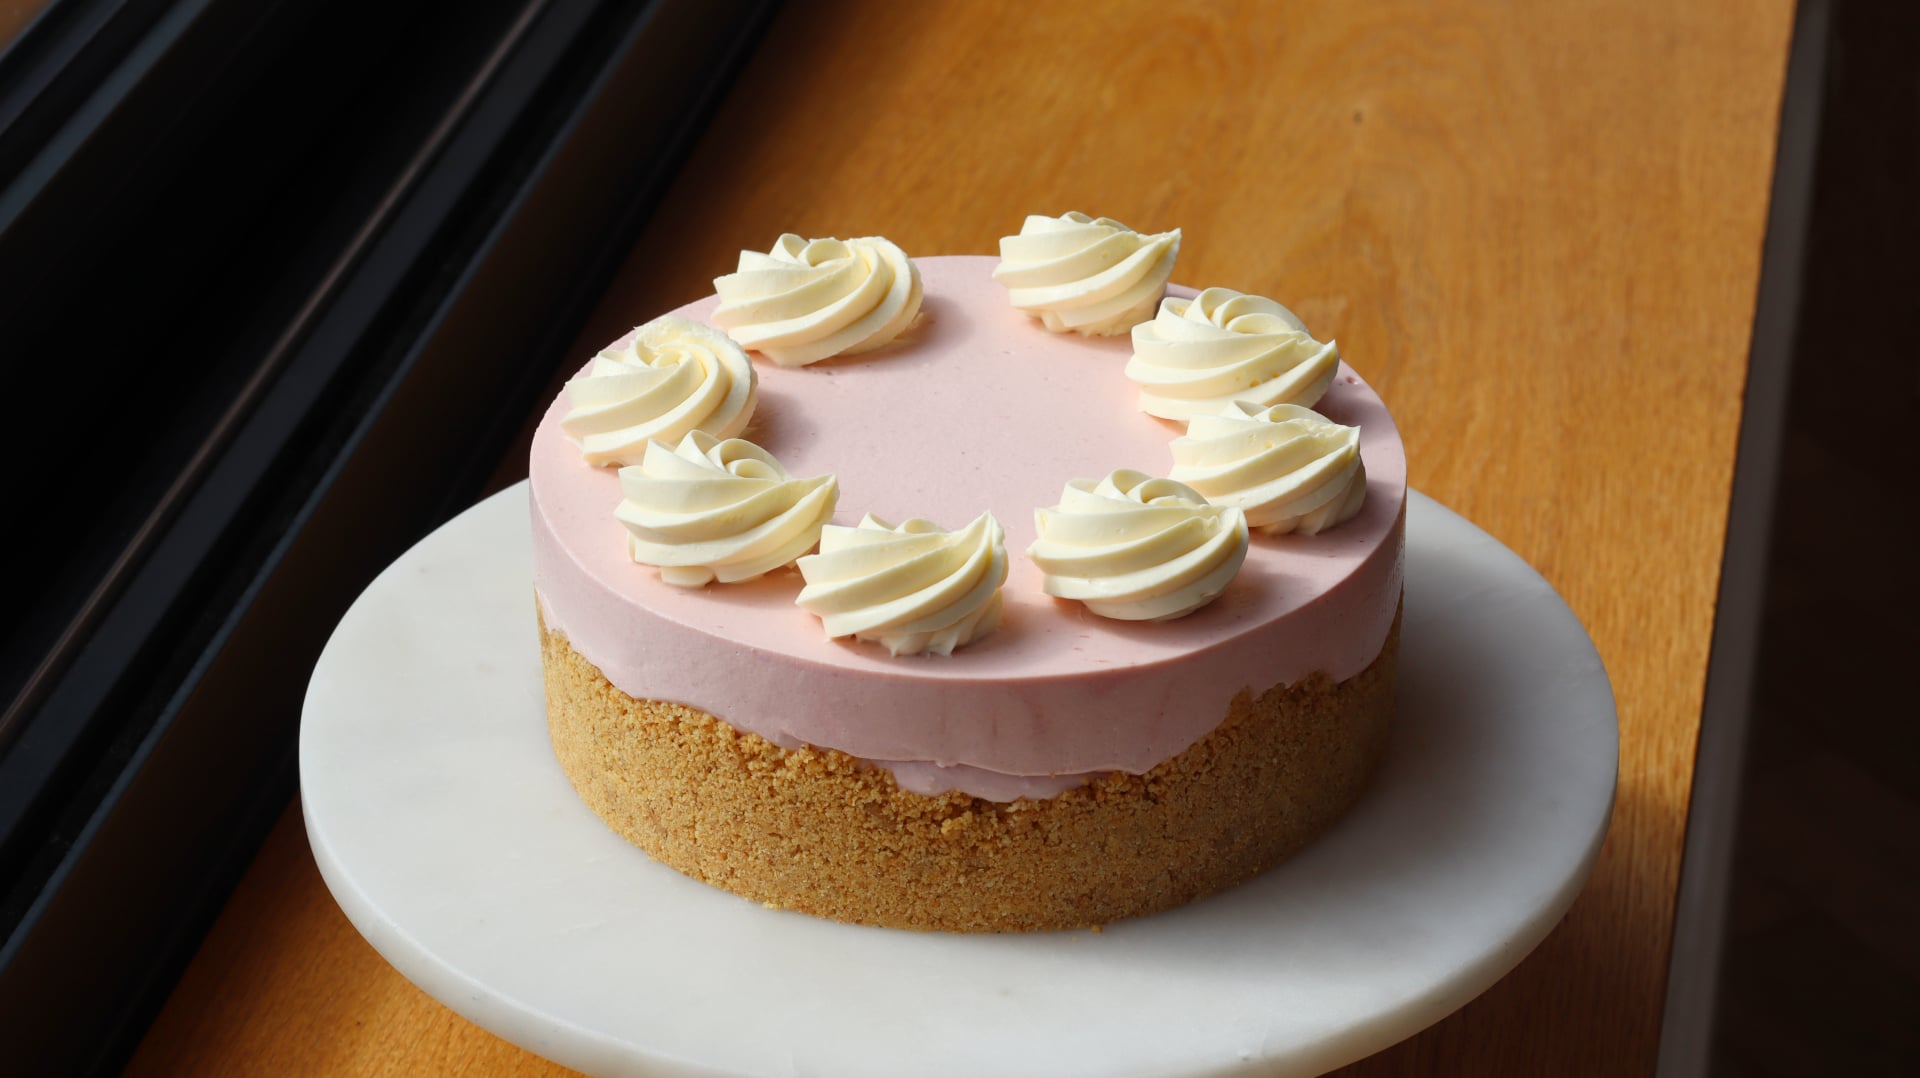
No-Bake Strawberry Cheesecake
TIER 1
No-Bake Strawberry Cheesecake
Everyone needs a foolproof, no-bake strawberry cheesecake recipe, and this one is quick to make with a smooth and creamy texture. It’s a simple biscuit base teamed with a brightly coloured strawberry cheesecake filling, which holds its texture really well. We make it in a ring mold for a more professional finish, and pipe mascarpone cream on top for a final touch of elegance.

1
7-INCH CAKE
Ingredients
Makes 1 7-inch cake
Gelatin Mass
10g Powdered Gelatin (Platinum/Knox Bloom)
60g Cold Water
Biscuit Base
180g Digestives/Graham Crackers
70g Unsalted Butter, Melted
Pinch of Flakey Sea Salt
Zest ¼ Lemon
Strawberry Cheesecake
50g Gelatin Mass (or 2.5 gelatin leaves, any grade)
230g Strawberry Puree
125g Caster/White Sugar
500g Full Fat Cream Cheese
325g Double/Heavy Cream
Mascarpone Cream
300g Double/Heavy Cream, Divided
20g Gelatin Mass (or 1 gelatin leaf, any grade)
50g Mascarpone
30g White Chocolate
Special equipment
Hand blender
Food processor (optional)
18x6cm ring mold
Silicon mat
Digital thermometer
Stand mixer or Electric hand whisk
Blow torch or Heat gun
Piping bag
Star tip nozzle
Method
Gelatin Mass
1. Add the powdered gelatin and water to a small bowl and stir together to combine. Set this aside in the fridge to bloom for 15 minutes.
- 10g Powdered Gelatin (Platinum/Knox Bloom)
- 60g Cold Water
Mascarpone Cream
1. Into a tall measuring jug, add gelatin mass, white chocolate and mascarpone. Set this aside.
- 20g Gelatin Mass
- 30g White Chocolate
- 50g Mascarpone
2. Add 200g of the cream into a small saucepan and place it over a medium heat. Stir until the mixture is steaming then remove it from the heat and pour it into the measuring jug.
- 200g Double/Heavy Cream
3. Allow it to sit for 2 minutes before blending until smooth. Add in the remaining 100g of cream and blend again.
- 100g Double/Heavy Cream
4. Pour the mixture onto a baking tray and cover the surface with clingfilm. Refrigerate it for a minimum of 3 hours.
Biscuit Base
1. Into a blender, add the biscuits, and blend to a fine crumb. Pour these into a medium bowl.
- 180g Digestives/Graham Crackers
2. Add the butter into a small saucepan and stir until melted.
- 70g Unsalted Butter
3. Add the salt and lemon to the bowl, then stir in the melted butter, starting with about half and stirring just until the mixture is sticking together. You don’t want it to be too soggy.
- Pinch of Flakey Sea Salt
- Zest ¼ Lemon
4. Line a baking sheet with a silicon mat and place a 18x6cm ring mold in the centre.
5. Line the tart ring with the biscuits, starting with the sides so they go up about halfway up the side of the ring, then fill in the base. Ensure it is quite thin and smooth. We don’t want an overly thick base/sides so if there is any left over you can eat it!
6. Set this in the freezer while you make the cheesecake filling.
Strawberry Cheesecake
1. Into a small saucepan, add the strawberry puree and gelatin mass. Stir this over a low heat until the gelatin mass has melted. It should be around 50/60C (122-140F). If it doesn’t get warm enough the gelatin won’t melt and you will get chunks! If you are using gelatin leaves, just soak them in cold water until soft, then add them to the pan along with the puree and heat until melted as above. Set the pan aside to cool, it needs to be around 40C/104F when we use it, or just above body temp.
- 50g Gelatin Mass (or 2.5 gelatin leaves, any grade)
- 230g Strawberry Puree
2. Into the bowl of a stand mixer or a large bowl if using an electric hand mixer, add the cream cheese and sugar and beat for a minute until smooth.
- 125g Caster/White Sugar
- 500g Full Fat Cream Cheese
3. Add in the cooled strawberry mixture and beat again until combined, scraping down the bowl as needed.
4. Add the cream into the bowl of a stand mixer or a large bowl if using an electric hand whisk, and whisk to medium/soft peaks.
- 325g Double/Heavy Cream
5. Working quickly as the cheesecake mixture will be beginning to thicken as the gelatin activates, fold the cream in, in two parts.
6. Remove the chilled base from the freezer and pour the cheesecake mixture in, right to the top. Use a palette knife to smooth it, so it is flush with the top of the ring mold. Refrigerate the cheesecake for 3 hours.
Assembly
1. Once chilled remove it from the fridge and lift it onto your serving plate. Use a blow torch or heat gun to gently warm the sides of the ring mold and carefully lift it off.
2. Remove the chilled mascarpone cream from the fridge and add it to the bowl of a stand mixer fitted with a whisk attachment (or a large bowl if using an electric hand whisk). Whisk it until it reaches a medium peak, then add it into a piping bag fitted with an open star tip nozzle.
3. Pipe 6 swirls around the outside of the cheesecake and then serve.
Shop the Equipment


Chocolate Orange Tiramisu
TIER 1
Chocolate Orange Tiramisu
I couldn’t make ladyfingers and not use them in a tiramisu! In Tier 1 we keep the technique of a tiramisu very classic – no cream! But I’ve mixed things up with a chocolate orange flavour. You soak your homemade ladyfingers biscuits in espresso, and layer them between orange mascarpone cream and chocolate shavings. This is a great dessert you can make ahead of time.
8-10
SERVINGS
Ingredients
Makes 8-10 Servings
Savoiardi Biscuits
115g Egg Yolks
25g Whole Eggs
40g Caster/White Sugar (A)
100g Plain/All-Purpose Flour (A)
260g Egg Whites
100g Caster/White Sugar (B)
1.5g Fine Salt
35g Plain/All-Purpose Flour (B)
Icing Sugar To Finish
Orange Mascarpone Cream
600g Mascarpone
65g Egg Yolks
50g Caster/White Sugar (A)
Zest 2 Oranges
145g Egg Whites
50g Caster/White Sugar (B)
Coffee Soaking Syrup
150g Freshly Brewed Coffee
15g Kahlua
Dark Chocolate, Grated
Special equipment
10mm round tip nozzle
Piping bag
Stand mixer
Method
Savoiardi Biscuits
1. Pre-heat the oven to 160C/320F non-fan assisted.
2. Take 2 large sheets of baking paper and draw two sets of train track lines on the baking sheets, 90mm/3.5” tall. Flip these upside down (so the ink doesn’t touch the pastry) and place them on a baking sheet.
3. Take a small round tip nozzle (10mm) and add it into a piping bag. The piping nozzle needs to be smaller than you think, as the batter will spread slightly as it is piped.
4. Into a medium bowl, add the egg yolks, whole eggs, and sugar (A). Whisk this to combine, then add the flour (B) and whisk to form a thick paste. Set this to one side.
5. Into the bowl of a stand mixer, add the egg whites (room temperature) along with the salt.
6. With the whisk attachment, whisk on a medium-low speed until it becomes frothy, with small bubbles on top (this will take a few minutes).
7. Slowly add in the sugar (B), about a tablespoon at a time. Once you have added all the sugar, whisk until you have a stiff peak.
8. Take about ⅕ of the meringue mixture and whisk it through the egg yolk mixture. This will be quite stiff, so it needs to be whisked firmly to smooth it out.
9. Add the remaining meringue in 2-3 parts, gently folding it through to ensure you don’t beat out too much air.
10. Once smooth, sift over the remaining flour (B) and fold through until there are no more lumps.
11. Add the mixture into your piping bag and let it rest for a few minutes; this will just make it slightly easier to pipe.
12. Using the guides on your baking tray, pipe individual lines, ensuring they’re not too close together, as they will spread slightly.
13. Once piped, add a good dusting of icing sugar over the top, wait 1-2 minutes, and then repeat.
14. Place them directly into the oven and bake until a deep golden brown colour – be sure not to underbake them. It should take around 30 minutes, but it can depend on how big you’ve piped them and your oven.
15. Remove them from the oven and then allow them to cool at room temperature. If you want to make these ahead of time, you can place them in an airtight container and freeze them for up to 2 months.
Orange Mascarpone Cream
1. Into a medium bowl, add the sugar (A) and zest of 1 orange, then massage this zest into the sugar.
2. Add the egg yolks and whisk by hand for a minute until thickened slightly.
3. Add the mascarpone and remaining orange zest, and whisk again until completely smooth. Set this to one side.
4. Into the bowl of a stand mixer, add the egg whites and whisk on a medium-low speed until frothy.
5. Slowly add the sugar about a tablespoon at a time. Once you’ve added all the sugar keep whisking until it reaches a stiff peak.
6. Take the meringue, and fold it through the egg yolk mixture in three parts until smooth and evenly combined.
Coffee Soaking Syrup
1. Combine the two ingredients in a shallow dish.
Assembly
1. Take the cooled lady fingers and check to see how they fit into your chosen dish. If you need to cut them down to size, use a knife or a microplane to shave them down so that they fit snugly in the dish.
2. Take the lady fingers and soak them one by one, then, lay them into the base of your tiramisu dish.
3. Once the bottom of the dish is covered, take a few large spoonfuls of the mascarpone cream mixture and spread this evenly across the lady fingers with an offset spatula.
4. Using a microplane, grate a fine layer of dark chocolate over the cream (or cocoa powder)
5. Repeat this two more times, finishing with a layer of the mascarpone cream. Use an offset spatula to completely smooth the top so that it is flush with the rim of the dish.
6. Place the tiramisu into the fridge to chill – ideally 4-6 hours, but overnight is absolutely fine too.
7. When ready to serve, remove it from the fridge and grate over one final layer of dark chocolate (or cocoa powder) and serve.
Shop the Equipment


Berry Charlotte Cake
TIER 2
Berry Charlotte Cake
In Tier 2 we take the precision of the ladyfingers to another level, using them to decorate the outside of this berry charlotte cake. When piping them, we want to get them as neat and as even as possible so making the Tier 1 tiramisu is a great place to build your confidence. The charlotte cake has a light berry mousse, with two layers of the lady fingers covered in raspberry jam, and it’s finished with a smooth mascarpone cream. This is frozen overnight and takes a little while to defrost, so keep those timings in mind!
8-10
SERVINGS
Ingredients
Makes 8-10 Servings
Savoiardi Biscuits
115g Egg Yolks
25g Whole Eggs
40g Caster/White Sugar (A)
100g Plain/All-Purpose Flour (A)
260g Egg Whites
100g Caster/White Sugar (B)
1.5g Fine Salt
35g Plain/All-Purpose Flour (B)
Caster/White Sugar To Coat
Berry Bavarois Mousse
6g Gelatin Powder (220-250 Bloom) + 36g Cold Water (or 2 Sheets of Gelatin, soaked)
75g Egg Yolks
30g Caster/White Sugar
50g Whole Milk
300g Double/Heavy Cream (A)
250g Fruit Puree (Raspberry or Strawberry)
400g Double/Heavy Cream (B)
Mascarpone Cream
3g Powdered Gelatin + 18g Cold Water (or 1 Gelatin Sheet, Soaked)
250g Double/Heavy Cream (A)
100g Mascarpone
15g Icing/Powdered Sugar
50g Double/Heavy Cream (B), Cold
To Assemble
Crushed Pistachios
Raspberry/Strawberry Jam
Fresh Strawberries/Raspberries, Sliced
Special equipment
10mm round tip nozzle
Piping bag
Stand mixer
Digital thermometer
Hand blender
7” ring mold
1M star tip nozzle
Method
Savoiardi Biscuits
1. Pre-heat the oven to 160C/320F non-fan assisted.
2. Take 2 large sheets of baking paper and draw two sets of train track lines on the baking paper, each 90mm/3.5” tall. Flip these upside down (so the ink doesn’t touch the pastry) and place them on a baking sheet.
3. Take another baking sheet and draw two 7” circles on baking paper. Flip this upside down.
4. Take a small round tip nozzle (10mm) and put it into a piping bag. The piping nozzle needs to be smaller than you think, as the batter will spread slightly as it is piped.
5. Into a medium bowl, add the egg yolks, whole eggs, and sugar (A). Whisk this to combine, then add the flour (B) and whisk to form a thick paste. Set this to one side.
6. Into the bowl of a stand mixer, add the egg whites (room temperature) along with the salt.
7. With the whisk attachment, whisk on a medium-low speed until it becomes frothy, with small bubbles on top (this will take a few minutes).
8. Slowly add in the sugar (B), about a tablespoon at a time. Once you have added all the sugar, whisk until you have a stiff peak.
9. Take about ⅕ of the meringue mixture and whisk it through the egg yolk mixture. This will be quite stiff, so it needs to be whisked firmly to smooth it out.
10. Add the remaining meringue in 2-3 parts, gently folding it through to ensure you don’t beat out too much air.
11. Once smooth, sift over the remaining flour (B) and fold through until there are no more lumps.
12. Add the mixture into your piping bag and let it rest for a few minutes; this will just make it slightly easier to pipe.
13. Using the guides on your baking tray, pipe two large 7” circles and then individual lines for the lady fingers. You will need 25-30 lady fingers, depending on the size of the ring mold you are using for the mousse. The more you can make, the better! But remember, they need to be baked immediately or the meringue will begin to collapse.
14. Once piped, sprinkle a thin coating of caster/white sugar over the top.
15. Place them directly into the oven and bake until a deep golden brown colour.
Note – as we are baking multiple trays of ladyfingers and sponge discs for the charlotte cake, the placement in the oven affects browning. The top tray will turn golden first because it’s directly exposed to the heat from the top of the oven, while the lower trays are shielded, preventing them from browning properly. We don’t care about the 7” disc brownings, but we need both sets of lady fingers to be golden, so rotate the trays halfway through baking, bringing the lower trays to the top and vice versa. Just do it very very quickly, so we don’t deflate the lady fingers.
16. Bake everything for around 30 minutes, being sure not to underbake the lady fingers especially. They need to be firm to the touch. What I like to do is pop the 7” circles back in the oven just to get them slightly more golden.
17. Remove them from the oven and then allow them to cool at room temperature. Leave the 7” discs out at room temperature but freeze the remaining lady fingers in a sealed tupperware as we won’t need these until the next day.
18. If you want to make these ahead of time, you can place them in an airtight container and freeze them for up to 2 months.
Berry Bavarois Mousse
1. Add the powdered gelatin into a small bowl and pour the cold water over the top. Let it bloom for 5-10 minutes. If using a gelatin sheet, soak this in ice-cold water.
2. Into a medium bowl, add the egg yolks and sugar and whisk briefly to combine.
3. Meanwhile, add the cream and milk to a medium saucepan and heat just until it is steaming.
4. Slowly pour the hot cream over the egg yolk mixture and whisk to combine.
5. Pour it back into the pan and whisk constantly, cooking until it reaches 82C/180F on a digital thermometer, then immediately remove it from the heat. You need to do this quickly or it will begin to scramble.
6. Pour it straight through a sieve into a tall measuring jug.
7. Scoop in the bloomed gelatin powder (or squeeze the water out of the gelatin sheet), and then use a hand blender to blend until smooth.
8. Pour in the fruit puree and blend to combine.
9. Pour this mixture into a tray and cover the surface with cling film. We need this to cool to around 30C/86F on a digital thermometer, so refrigerating it can be the quickest way to chill it.
10. Once at temperature, add the remaining cream to the bowl of a stand mixer and whisk on a medium speed until you have a medium stiff peak.
11. Pour the chilled fruit mixture into a bowl, and then whisk in the whipped cream in 3 parts until you have a smooth mousse.
Assembly Part 1
1. Take the cooled 7” savaordi biscuit discs and, using your 7” ring mold, trim them down to size.
2. Line the inside of the 7” cake ring mold with acetate and place this onto a tray lined with a baking mat.
3. Take a few tablespoons of jam and spread this evenly across each disc, then place one into the base of the ring mold.
4. Take the berry bavarois mousse and fill the ring mold up halfway.
5. Add the second savoiardi disc.
6. Pour the remaining mousse in, filling it to the top of the rind mold. It should settle evenly, but if it needs it, flatten it with a palette knife.
7. Place this into the freezer, ideally overnight, but a minimum of 6 hours.
Mascarpone Cream
1. Add the powdered gelatin into a small bowl and pour the cold water over the top. Let it bloom for 5-10 minutes. If using a gelatin sheet, soak this in ice cold water.
2. Into a medium saucepan, add the cream and heat until it is steaming.
3. Remove it from the heat, and add the bloomed gelatin into a tall measuring jug and pour over the hot cream.
4. Blend to combine, then add the sugar and mascarpone and blend again.
5. Finally, add the remaining cold cream and blend one more time.
6. Cover the surface with clingfilm and refrigerate for 6 hours or overnight.
Note – there is no vanilla in this, but you can absolutely add it, if you want that flavour! Add it to the cream when you are heating it.
Assembly Part 2
1. Remove the frozen berry bavarois from the freezer, and lift it onto your serving dish. Peel off the acetate.
2. Leave it at room temperature for about 30 minutes – 1 hour to soften, this will make it easier to stick the lady fingers on. Alternatively, you can use a heat gun/blow torch to warm the sides and press the lady fingers on.
3. Once the edges have softened slightly, remove the lady fingers from the freezer, and then trim them down slightly so they are all of identical height. You can also use a microplane to lightly shave the edges to get them nice and straight.
4. Press them into the side of the cake – just note that the longer you leave them on the cake, the softer they will become. So if you want them to be a bit more crunchy, then it is best to place them on the cake just as you are serving. But note the cake needs quite some time to defrost!
5. Remove the mascarpone cream from the fridge and add it to a stand mixer fitted with a whisk attachment.
6. Whisk on a medium speed until it holds a medium peak, being careful not to over whip it.
7. Add the mixture into a piping bag fitted with a 1M star tip nozzle.
8. Pipe a spiral border around the edge of the cake.
9. Finish the cake by decorating it with some crushed pistachios and freshly sliced fruit.
10. The cake needs around 3-4 hours in total once removed from the freezer to defrost so just take those timings into consideration before serving.
Shop the Equipment


Salted Caramel Cookies
TIER 2
Salted Caramel Cookies
In Tier 2 we step things up by adding a brown sugar streusel and salted caramel to the basic cookie dough recipe. The roasted hazelnuts in the dough add an amazing flavour, and the texture combination of this with the streusel and salted caramel is next level! The salted caramel centre can be swapped out for other fillings too – ganache, lemon cremeux, hazelnut praline etc!
8
COOKIES
Ingredients
Makes 8 Cookies
Hazelnut Sablé
350g Plain/All-Purpose Flour
190g Unsalted Butter, Cold & Cubed
120g Icing/Powdered Sugar
45g Ground Hazelnuts (or Almonds)
1g Fine Sea Salt
65g Whole Eggs
Streusel
60g Cold Unsalted Butter, Cubed
60g Light Brown Sugar
75g Ground Almonds/Hazelnuts
60g Plain/All Purpose Flour
Pinch of Sea Salt
Zest ¼ Lemon
Salted Caramel
175g Double/Heavy Cream
45g Whole Milk
135g Liquid Glucose Syrup, Divided
80g Caster/White Sugar
2g Flakey Sea Salt
60g Unsalted Butter
Special equipment
78mm Tart Ting
50mm Cookie Cutter
Stand mixer
Rolling pin
Silcon mats (optional)
Piping bags (optional)
Method
Salted Caramel
1. In a medium saucepan on the stovetop over medium heat, combine the milk, heavy cream, and 45 grams of corn/glucose syrup. Bring to a gentle simmer, whisking the mixture to ensure the syrup has fully dissolved. Remove the saucepan from the heat but ensure the mixture stays warm.
2. In a medium saucepan on the stovetop over medium heat, combine the superfine/caster sugar and the remaining 45 grams of glucose sugar. Cook until the mixture turns a deep caramel colour, whisking slowly to help disperse the sugar.
3. Once golden, immediately pour in the hot cream mixture, being very careful as it will bubble up violently. Whisk the mixture and cook for 1 minute.
4. Remove the saucepan from the heat and pour the mixture through a sieve and into a large bowl. Let the mixture cool for 2 minutes. Add the sea salt flakes and butter. Blend or whisk until smooth.
5. Pour the mixture into a container and leave at room temperature.
Streusel
1. Into the bowl of a stand mixer, fitted with the paddle attachment, add all of the ingredients.
2. Mix on a low speed until the butter has broken down and the mixture is sandy in texture. This will take a few
3. Transfer this to a baking tray and place it into the freezer while you make the sablé.
Hazelnut Sablé
1. Into the bowl of a stand mixer, fitted with the paddle attachment, add all of the ingredients except the egg.
2. Pour in the whole egg and mix on low speed for 30 seconds, then stop the mixer and use your hands to squeeze the dough together to form a dough.
3. Place the dough in between two silicon mats or pieces of parchment paper, and using a rolling pin, roll it to around 7mm/0.25” thick.
4. Place this in the freezer for 20 minutes.
5. Once chilled, work quickly and use the 78mm tart ring to cut out discs, then cut the middle of the dough out with a 50mm cookie cutter to leave you with donut shape. Place these onto a tray lined with parchment paper, ensuring you keep the tart rings around the outside of the dough. Place these back into the freezer for 15 minutes, meanwhile preheat your oven to 160C/320F Non-fan assisted.
6. Place the dough into the oven and bake for 12 minutes – it should turn a very light golden colour.
7. Once baked, let them cool for a few minutes before pressing the sables out of the tart ring and letting them cool completely.
8. Use the same tart ring and place it back onto the baking tray. Add a few tablespoons of the chilled streusel and press it down with the back of a spoon so you have an even layer.
9. Take the chilled hazelnut sablé and press this on top of the streusel, it should fit snugly into the tart ring. You need to make sure the sablé is touching the streusel. (If you find it won’t touch – when it is baking, it will soften, so after a few minutes you can press it down while it is in the oven).
10. Place the cookies into the oven and bake for around 20 minutes, or until they are a golden colour.
11. Remove them from the oven and allow to cool for a few minutes before pressing them out of the tart rings.
12. Ensure the caramel is a soft, almost runny honey-like texture, and pipe this into the centre of the biscuits. The caramel will be soft and runny if served immediately but will thicken the longer they sit at room temperature.
Shop the Equipment


Chocolate Orange Swirl Cookies
TIER 1
Chocolate Orange Swirl Cookies
These stunning cookies use the same base dough, one flavoured with orange and the other flavoured with cocoa powder. The doughs are laid on top of each other and carefully rolled into a tight log to create the spiral effect. You can get creative and colour one of the doughs, or even make a quick ganache and sandwich the cookies together!
18-20
COOKIES
Ingredients
Makes 18-20 Cookies
Chocolate Dough
170g Plain/All-Purpose Flour
2g Fine Sea Salt
30g Cocoa Powder
80g Icing/Powdered Sugar
30g Ground Almonds
110g Unsalted Butter, Cold & Cubed
40g Whole Eggs
Orange Dough
200g Plain/All-Purpose Flour
2g Fine Sea Salt
80g Icing/Powdered Sugar
30g Ground Almonds
110g Unsalted Butter, Cold & Cubed
Zest 1 Medium Orange
40g Whole Eggs
Egg Wash
1 whole egg, whisked
Special equipment
Stand mixer
Silicon mats (optional)
Rolling pin
Method
Chocolate Cookie Dough
1. Add all of the dry ingredients into the bowl of a stand mixer, along with the cubed butter.
2. Mix on a medium low speed for 2-4 minutes, until the butter has broken down, and the mixture has a breadcrumb/sandy-like texture.
3. Pour in the egg mixture and mix for about 20 seconds, the dough will not pull together however, so remove the bowl from the mixer and squeeze the dough with your hands, until it forms a dough.
4. Place the dough in between two silicon mats or pieces of parchment paper and roll it to about 3-5mm thick – the thinner the better really. You want to roll it as best as possible into a neat rectangle shape as that will reduce the wastage later on.
5. Place the dough into the fridge for a minimum of 3 hours.
Orange Cookie Dough
1. Add all of the dry ingredients into the bowl of a stand mixer, along with the cubed butter.
2. Mix on a medium low speed for 2-4 minutes, until the butter has broken down, and the mixture has a breadcrumb/sandy-like texture.
3. Pour in the egg mixture and mix for about 20 seconds, the dough will not pull together however, so remove the bowl from the mixer and squeeze the dough with your hands, until it forms a dough.
4. Place the dough in between two silicon mats or pieces of parchment paper and roll it to about 3-5mm thick – the thinner the better really. You want to roll it as best as possible into a neat rectangle shape as that will reduce the wastage later on.
5. Place the dough into the fridge for a minimum of 3 hours.
Assembly
1. Once the doughs have chilled remove them from the fridge, and apply a light egg wash to the chocolate dough. Then, lift the orange dough on top, gluing it in place.
2. Leave them at room temperature to soften for just a few minutes – this will make them easier to roll.
3. Once softer, with the chocolate dough on the bottom, carefully roll the dough, lengthways (with the short side of the rectangle of dough facing you), into a tight log. Wrap this in clingfilm and then refrigerate for at least 1 hour
4. Before they are done chilling, preheat the oven to 150C/300F, non-fan assisted.
5. Once chilled, use a very sharp knife to cut the log into discs of equal thickness – about 5mm, then lift the biscuits onto a tray lined with a silicon baking mat.
6. Immediately place the tray into the oven and bake until lightly golden around the edges – about 20-25 minutes. Allow to cool then serve.
Shop the Equipment

Sablé Viennois
TIER 1
Sablé Viennois
In Tier 1 we tackle a simple Sablé biscuit, and learn the foundations of a Sablé dough. A spin on the recipe I share in my book, the biscuits are elevated by piping the dough into a zigzag pattern! Although the piping can be a little bit tricky, it’s worth the effort as it holds its shape really well, resulting in a stunning biscuit. To finish, I’ve dipped mine in a little dark chocolate, but you can get creative here with the toppings.
12-14COOKIES
Ingredients
Makes 12-14 Biscuits
140g Unsalted Butter, Soft
80g Icing/Powdered Sugar
2g Fine Sea Salt
20g Egg White
120g Plain Flour
40g White Bread Flour
20g Cornflour (Cornstarch)
Chocolate Variation:
140g Unsalted Butter, Soft
80g Icing/Powdered Sugar
2g Fine Sea Salt
20g Egg White
115g Plain Flour
30g Bread Flour
20g Cornflour (Cornstarch)
15g Cocoa Powder
To decorate:
200g Dark Chocolate (50-60% Cocoa Solids), Melted
Special equipment
Basket Weave Piping Nozzle
Stand Mixer
Piping Bags
Silicon Baking Mat
Method
1. Into the bowl of a stand mixer fitted with a paddle attachment (or a large bowl), add the soft butter, sugar and salt.
2. Beat this on a medium-low speed for 2 minutes until lighter and fluffier in consistency. If doing this by hand, simply use a rubber spatula to beat the ingredients together.
3. Add in the egg white and beat again to combine. The egg white, won’t fully incorporate so don’t worry if the butter is slightly lumpy/separated.
4. Finally, sift in the flours & cornflour. Mix this until the dough is soft and slightly sticky. We need the dough to be quite soft otherwise it will be very difficult to pipe. Add this mixture into a piping bag fitted with a basket weave piping nozzle (or any other nozzle you prefer!). Massage the dough in the bag to soften it further.
Note: If you want to make chocolate cookies, simply follow the same steps, but add the cocoa powder in with the flours.
5. If you want to be accurate, draw a stencil on some parchment paper, with pairs of lines, about an inch apart, and place this under your silicone mat.
6. With firm pressure, pipe tight zig zags, roughly 3-4” long. Then, use a bench scraper or sharp knife, neaten the top and bottoms of the biscuits by trimming off the shaggy ends.
7. Place the tray of cookies into the freezer, while you preheat your oven to 175C/350F Non-Fan Assisted.
8. After the cookies have chilled for 20 minutes, place the tray into the middle shelf of the oven and bake the cookies for 15 minutes or until lightly golden around the edges.
9. Remove them from the oven and allow them to cool on the tray for 5 minutes.
10. To decorate, melt some dark chocolate, and dip the edges of the biscuits before placing them carefully on a silicon mat. Let the chocolate set before serving.
Shop the Equipment


Pistachio & Raspberry Cookies
We would love to see your Bake It Better creations!
Show off your skills by sharing your desserts
#BakeItBetter

Chocolate Peanut Butter Cookies
We would love to see your Bake It Better creations!
Show off your skills by sharing your desserts
#BakeItBetter

Thick Milk Chocolate Chip Cookies
We would love to see your Bake It Better creations!
Show off your skills by sharing your desserts
#BakeItBetter

Scones
We would love to see your Bake It Better creations!
Show off your skills by sharing your desserts
#BakeItBetter

Macarons
We would love to see your Bake It Better creations!
Show off your skills by sharing your desserts
#BakeItBetter

Chocolate Chip Cookies
We would love to see your Bake It Better creations!
Show off your skills by sharing your desserts
#BakeItBetter