
Pastry Garnishes
Pastry Garnishes
Garnishes are a great way to elevate desserts with height, texture and a touch of elegance!
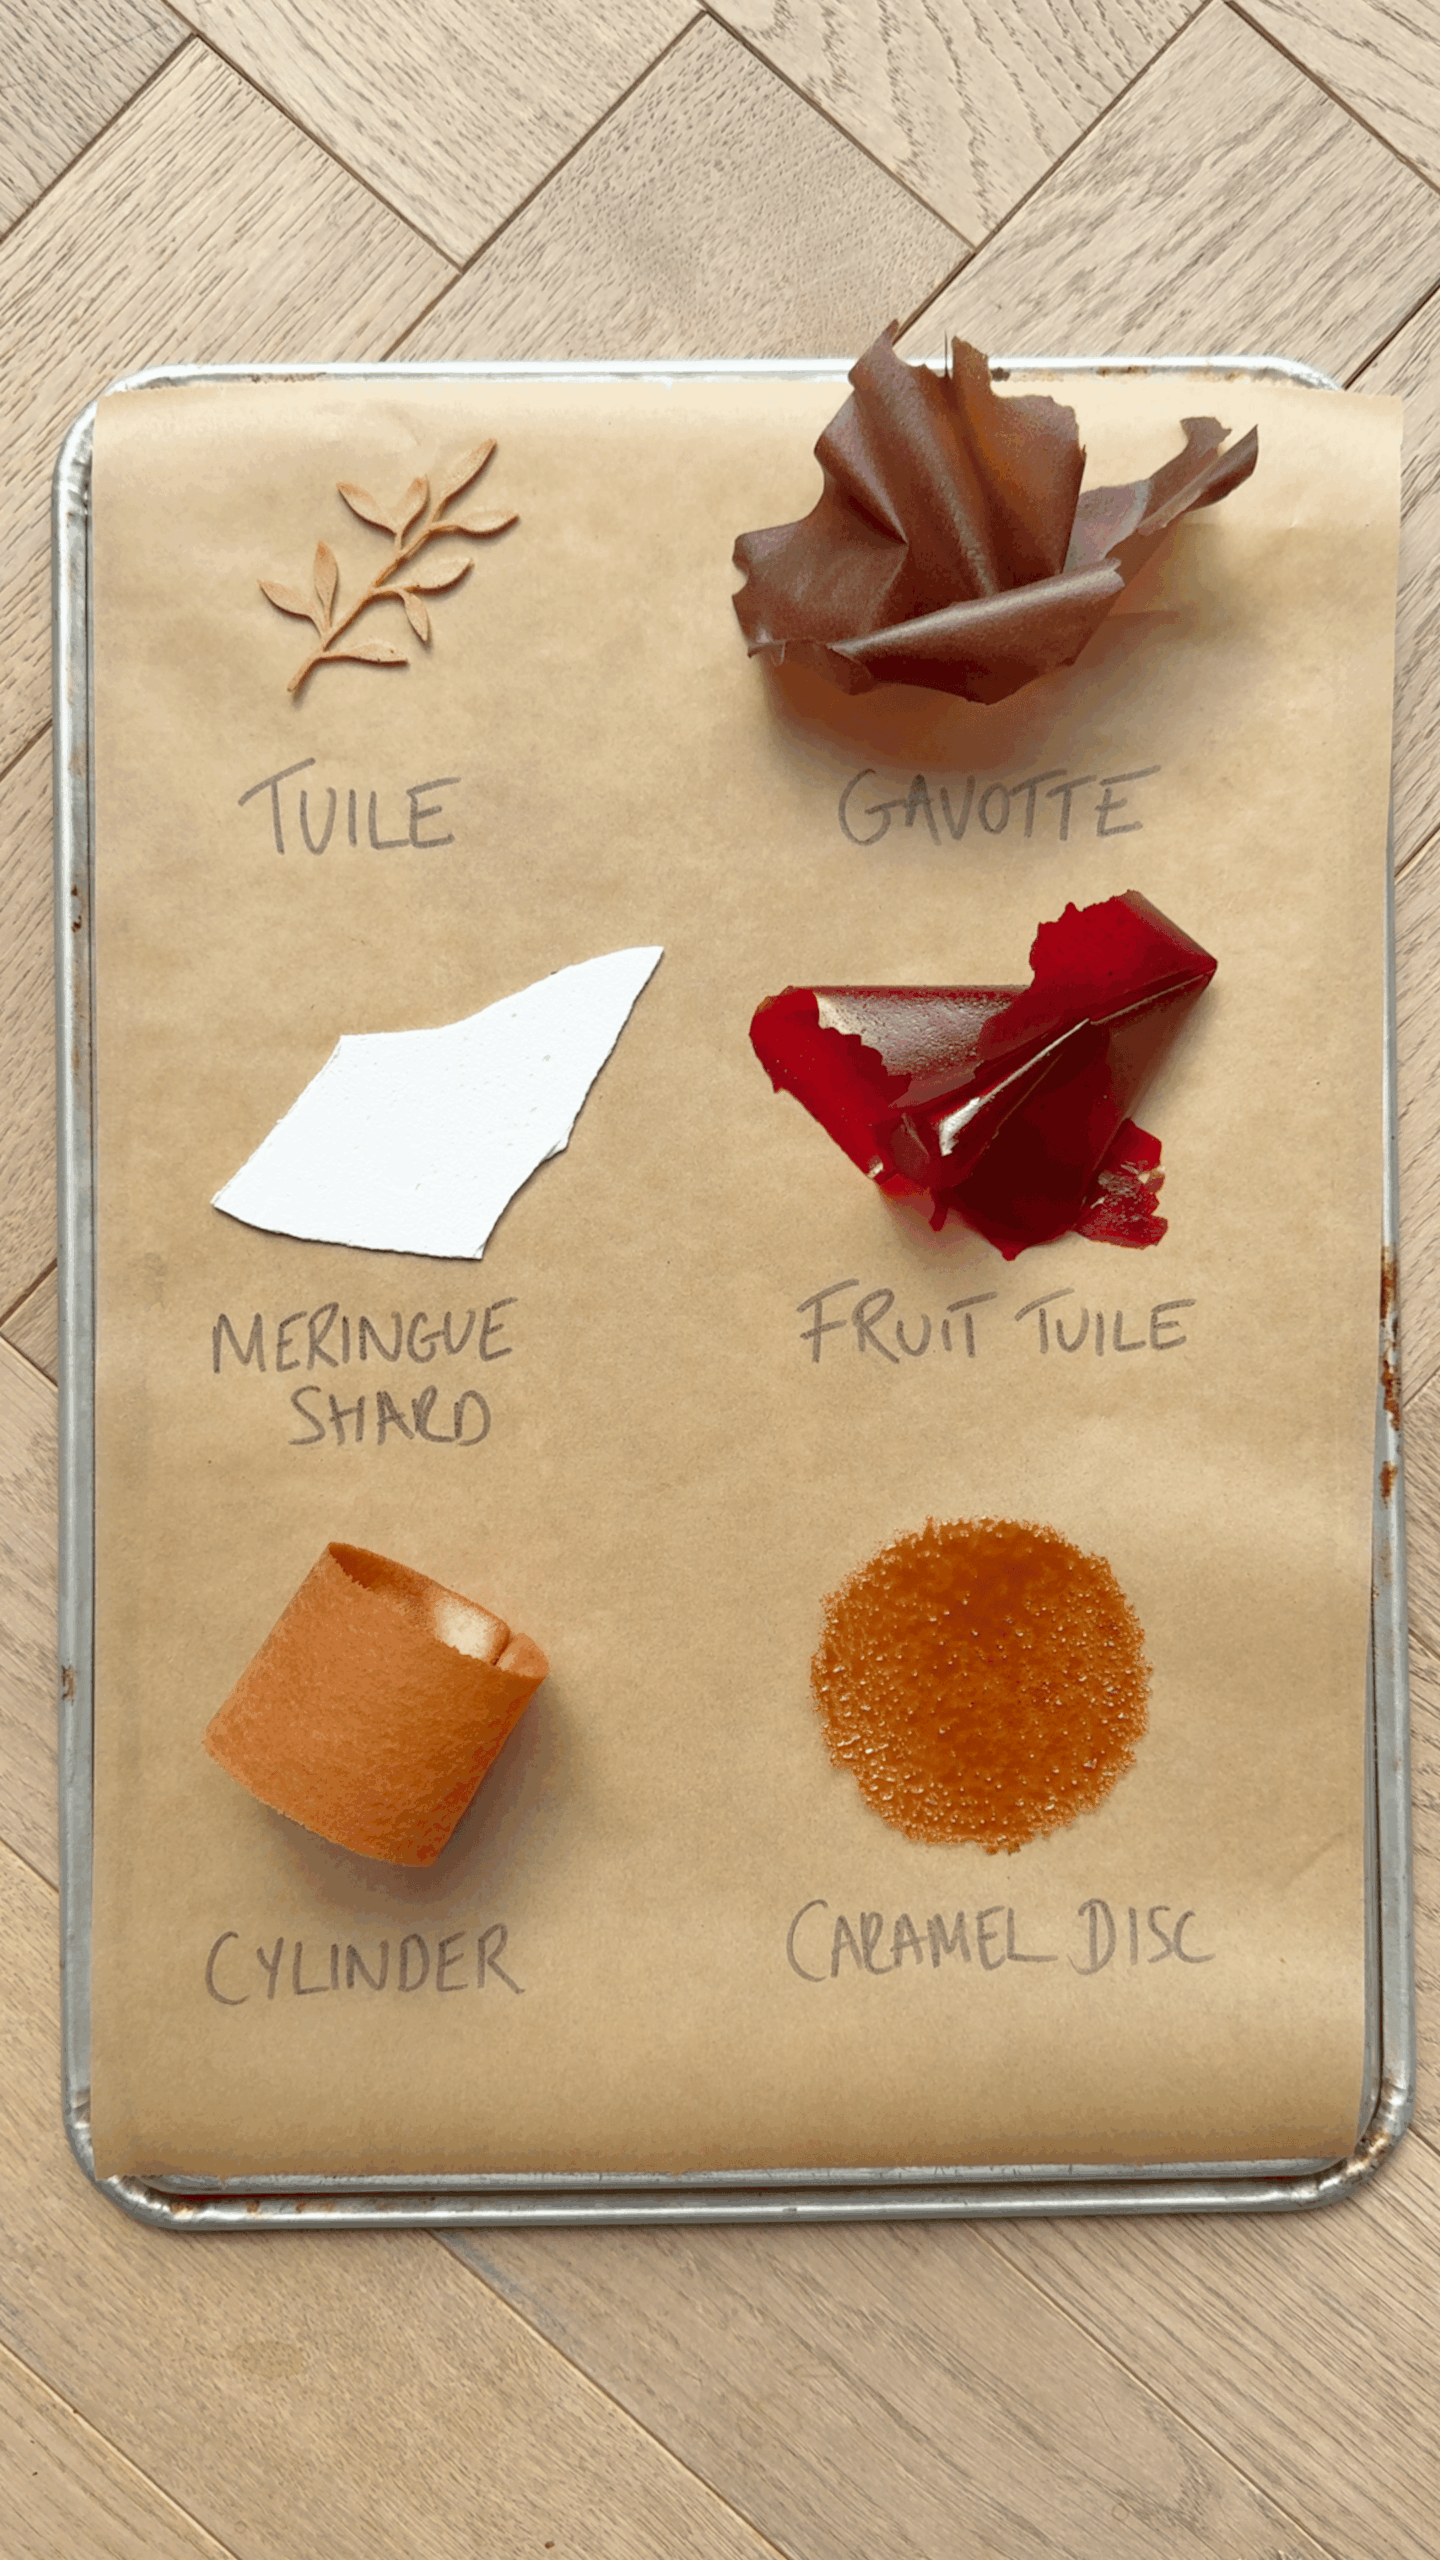
Here we are looking at 6 different garnishes from meringue shards which are great for a plated pavlova to caramel discs designed for a dramatic crack open moment. Each one is relatively simple to prepare, but quite a few need to be shaped quickly while still warm from the oven. For the best texture and finish, these garnishes are best served on the day they are made.
If you’re looking for a dessert to decorate, try the cocoa gavotte with my chocolate & coffee delice!
Ingredients
Method
Pre-heat the oven to 90C/195F non-fan assisted (75/165F fan assisted)
Add the egg whites and caster/white sugar to the bowl of a stand mixer (or a medium bowl if using an electric hand whisk).

Place this over a pan of gently simmering water and whisk by hand until it reaches 50C/122F on a digital thermometer.
Add it to a stand mixer fitted with a whisk attachment, and whisk for 5-7 minutes, or until cool to the touch and the meringue has a stiff peak.

Remove the bowl from the stand mixer and sift in the icing/powdered sugar. Fold it through with a spatula until there are no more lumps.

Spread the mixture evenly across a silicon baking mat, as thin as you would like the shards to be. A Raplette is a great piece of equipment (albeit a bit pricey) to get the meringue a consistent, even thickness.

Bake it in the oven for 1 hour. It should be completely dry to the touch. If your meringue is thicker, it may need slightly longer.
Remove it from the oven and gently peel flip the silicon mat over, onto another silicon mat. Peel off the silicon mat, and break the meringue into shards. These can be stored in an airtight container with silicagel packets to stop it from softening.

Into a medium bowl, whisk together the dry ingredients, then add the egg whites on top and whisk to form a smooth paste.

Add the water and unsalted butter to a medium saucepan, and place it on a medium low heat until the butter has melted and the mixture is steaming.
Slowly pour the hot water over the cocoa paste, whisking to combine.

Add the mixture back into the saucepan, and whisk over a low heat until it thickens to a custard like consistency.
Pass it through a sieve, and onto a small tray. Cover the surface with clingfilm and refrigerate for 30 minutes or until cool to the touch.

Pre-heat the oven 160C/320F non-fan assisted (145/295F fan assisted).
Remove the chilled mixture from the fridge and spread it evenly across a silicon baking mat. You don't want it to be too thick or the texture will be quite soft and leathery once it bakes.

Bake it in the centre of the oven for around 12-15 minutes. The mixture should feel dry to the touch, but still soft and pliable. If they are baked for too long they will become brittle and break when shaping.
Remove them from the oven and working quickly, tear the gavotte into pieces and gently scrunch them up to create a jagged, free form design. If they have begun to harden, place them back in the oven just for a minute to soften them, then repeat the process. Again, if they are overbaked, they won't be able to be reheated and will break. It is a little bit of a delicate balance to work out the timings!
These are best served the same day for the ideal texture but they can also be made ahead of time and stored in an air tight container.

Pre-heat the oven 150C/300F non-fan assisted (135/275F fan assisted).
Into a small blender, add all of the ingredients and briefly blend to form a smooth paste.

If you are using a silicon tuile mold, spread the batter thinly across the silicon mold and bake for around 10 minutes until an even golden brown colour.

Once baked, quickly lift the tuiles out of the mold as they will harden quickly, and place them flat onto a tray to set. These are best served the same day.
To make the cylinders, spread the batter evenly onto a silicone mat in a rough rectangle shape. Use a bench scraper to remove the excess batter and create a neat rectangle, roughly 2 x 7".
Alternatively, you can make a simple stencil by cutting a rectangle out of a piece of acetate. Place it on the silicon mat, spread the batter evenly over the stencil, then lift it away to leave a clean, perfectly shaped rectangle.

Bake for 10–12 minutes, until the tuiles are an even golden brown. Remove the tray from the oven and, working quickly while they are still hot and pliable, wrap each tuile around a cylindrical object such as a spice jar or ring mould. Hold it in place for 15–30 seconds until firm and set.
They harden very quickly, so I find it easiest to shape them one at a time.

Add the liquid glucose onto the bottom of a small saucepan, then pour the sugar on top.

Place the pan on a medium heat, and allow the glucose to bubble up before you start stirring it.
Cook the mixture until it reaches a deep golden colour, then immediately remove it from the heat and pour it onto a silicon mat. Allow it to set for 30 minutes at room temperature.

Pre-heat the oven 175C/345F non-fan assisted (160/320F fan assisted). Line a baking tray with a silicon mat.
Blend the caramel into a fine powder.
Place a round acetate stencil onto a silicon mat, then sift a relatively thick, even layer of powder over the stencil.

Carefully lift away the acetate to leave behind a clean disc shape.

Place the discs into the oven for 5-7 minutes or until the caramel has melted into an even golden brown caramel. Let them cool for about 2 minutes, then very carefully slide a palette knife underneath to release them. These are best used immediately as the caramel will gradually absorb moisture and soften.
The caramel powder can be made ahead of time, but needs to be stored in an airtight container ideally with silicagel packets to stop it absorbing moisture.

Pre-heat the oven to 80C/175F non-fan assisted (65C/150F fan assisted)
Add the water and fruit puree into a saucepan and heat it to 40C/104F on a digital thermometer.

Whisk in the pectin and sugar (previously whisked together) and then bring it to a boil.

Pour the mixture onto a tray and cover the surface with clingfilm. Allow it to set in the fridge, about an hour.
Take the mixture from the fridge and spread it onto a silicon mat.

Take your time to spread it relatively thin.

Bake for 75-90 minutes, or until it is dry to the touch.
Working quickly, remove it from the oven and tear it into pieces and crumple them gently to shape them. If it begins to harden before you can shape it, pop the tray back in the oven for a minute or two to soften it, then repeat. The batter can be prepped ahead of time but once baked they are best served the same day and stored in an airtight container.
