
Perfect Eclairs
Perfect Eclairs
This is the perfect eclairs recipe for crack free choux pastry.
I’ve done a lot of recipe testing and shared all my tips and tricks for making choux pastry for eclairs below. These eclair shells are super light and airy, the perfect eclair shape, and most importantly – no cracks! It really is the perfect eclair recipe.
The perforated eclair mats are a game changer, allowing for even air flow, and giving you precise guidelines for piping, I’d highly recommend them!
Follow my video and step-by-step recipes to make these choux pastry eclairs. Then for show stopping classic chocolate eclairs, follow my recipe for a chocolate crème pâtissière (pastry cream) filling, and a chocolate glaze topping. Or simply fill them with whipped cream and dig in!

Ingredients
Method
Ensure you start by weighing all your ingredients in separate bowls, and preparing your equipment. This will make the entire process much smoother.
Into a medium saucepan, add the milk, water, sugar, salt and butter.
Place this on a low heat, stirring occasionally until the butter has completely melted.
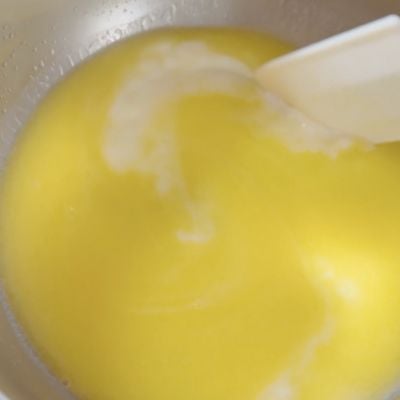
Increase the heat to medium-high, and bring the mixture to a boil.
As soon as it begins to boil, remove the pan from the heat, and sieve in your flour. It’s important to sieve it to ensure there are no lumps.
Use a hand whisk to pull it together into a dough (you might need to tap the whisk firmly on the pan to get any dough that is caught inside the whisk).
Place the pan back on a low heat, and stir it continuously with a rubber spatula for 2 minutes.
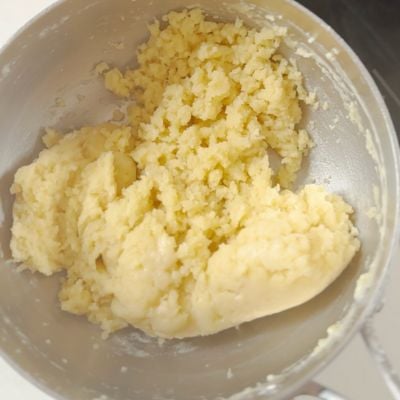
Immediately scoop the dough into the bowl of a stand mixer, fitted with a paddle attachment.
Mix on a low speed for about a minute, or until it reaches 50-55C (122-131F) when a digital thermometer is inserted into the dough.
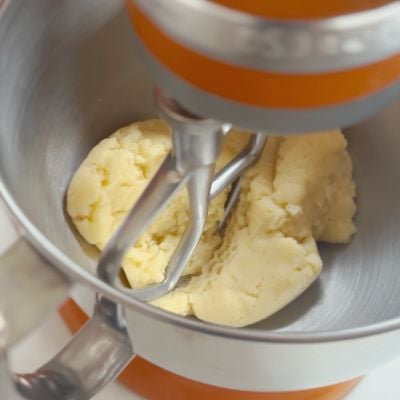
Next, increase the speed just slightly, and slowly start adding the eggs. It is really important to incorporate them slowly so that the dough can absorb the liquid. Mix for about 20 seconds before adding the next addition of egg. Once you have added about half of the egg mixture, scrape the bowl down just to ensure everything is fully incorporated.
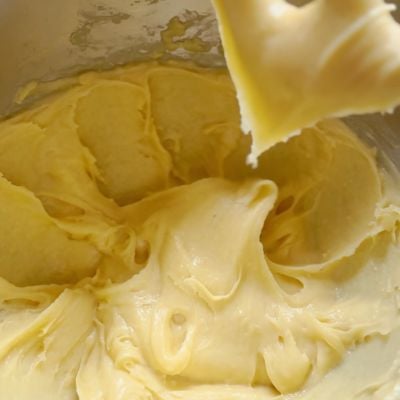
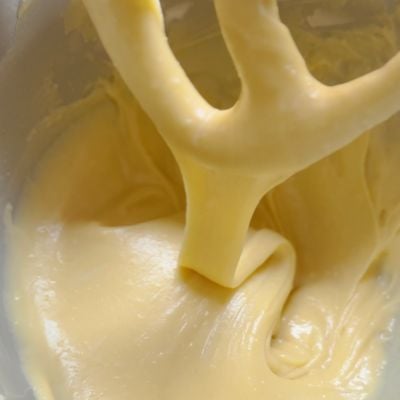
Keep adding the eggs, just a little at a time, until the mixture is glossy, smooth and falls off the paddle in a nice ribbon. The amount of egg you need to reach this consistency will depend on the flour you have used, so you may not need all the egg mixture. As you get closer to the consistency you are looking for, add the egg in very very small increments. It may take some practice, but eventually, you will learn the visual consistency you are looking for. Check the video for the consistency I am referring to.
Cover the surface of the choux dough directly with clingfilm and cool it at room temperature for 1 hour. Meanwhile, pre-heat your oven to 165C/330F Non-Fan Assisted
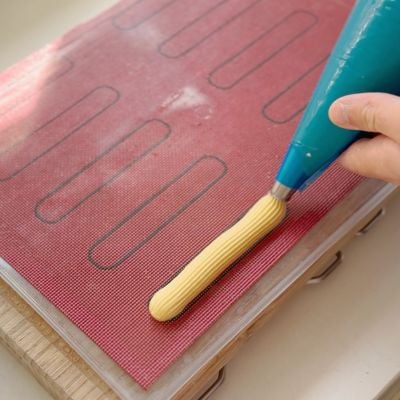
After an hour, line a baking tray with a perforated eclair mat. The perforated baking sheet will ensure even air flow and allow any steam to escape.
Add the choux into a piping bag fitted with a large star-tip nozzle, such as a JEM 3ES.
Applying even pressure, pipe lines of choux dough along the mat. Once you reach the end of the line, stop applying pressure and gently flick the bag back to create a small tail.
Using the cooking oil spray, apply an even layer across the choux dough, then dust a light coating of icing sugar over the top.
Immediately place them into the preheated oven, on the middle shelf, and bake for around 40-45 minutes, or until they are a deep golden brown colour. Do not open the oven door while they bake or they will collapse.
Remove from the oven to cool, before filling.
Are you using Pavoni micro perforated baking mat that you cut it to fit in the oven?
I see other brands on Amazon but I like this one as it is used in bakeries and does the job
Yes I cut it in half!
Do you have to use a perforated mat? Can you just use a regular mat?
Has to be perforated for the best result! Allows a more even air flow
Hi, I used the same recipe for profiteroles and they came out perfectly. However, when I baked the eclairs they were a little doughy inside. I did bake them for 5 min longer. Do you think I should have baked them longer?
Yes just bake for longer
How can we push the boundaries of traditional eclair recipes to create innovative and unconventional flavor combinations that will impress even the most experienced pastry chefs?
Great thx. I did with fan at 180 for 15 mins and at 160 for 20 mins and it works .
Great!
Does the recipe change when you use all purpose flour?
I don’t have access to bread flour.
Yes they won’t work as well as the AP flour doesn’t have enough protein
Hello, can I make profiteroles with the same dough? How long should the cooking time be and how should the chocolate sauce and filling be, thank you
yes you can! cooking time might be closer to 30-40m!
Great recipe! I’ve struggled with choux in the past, but these turned out wonderfully! We had fun stuffing and topping them with all manner of things 🙂
So glad!
I would like to know what temperature I have to use if my oven it s fan assisted and for how long ?! End what level, 2 or 3. I know how much important is so that s way I asked you! Thank you in advance!
I’m afraid I didn’t test this with fan assisted, but I would try 150C.
Hello and thanks for the great recipe, got any tips for storage?
Cheers
I freeze them after baking and then just pop them back into the oven for a few minutes to crisp them back up when I want to use them!
Hey hey Matt, your talking reminds me of your Dad🤩. Thanks for sharing and have a blessed and happy 2024
Ah thank you!