
Authentic French Croissants
Authentic French Croissants Recipe
Mastering a croissant at home is the ultimate baking achievement. I have spent the last 10 days making batch after batch of homemade french croissants, and after trying so many different recipes I think I have finally done it – I’ve mastered the perfect french croissants!
This french croissant recipe is a bit of a beast, but don’t be scared! Even if if it’s your first time making croissants, if you follow the recipe closely and use the right ingredients I promise, with a bit of practice you can make those classic french croissants you get in a boulangerie!
These homemade croissants have a beautiful flavour, shape and honeycomb structure. Good flour and butter make a huge difference here.
Don’t forget to watch puff pastry 101 as this also gives you a great guide on laminating dough.

Ingredients
Method
We need to start by calculating the ‘Base Temperature’. This is a very simple calculation to work out the temperature you need your liquid (in this case water + milk) to be, to reach the ‘desired dough temperature’, which for a croissant is 24C. This final dough temperature affects things such as fermentation time and the overall results of the croissant.
To calculate this we follow this simple formula: Base Temperature = Liquid Temperature + Room Temperature + Flour Temperature
The base temperature we are aiming for is 48C (Base temperature is different to desired dough temperature so don’t worry, we haven’t mixed up the numbers here). To calculate the room temperature, we simply leave a digital thermometer probe out at room temperature for a few minutes. This will give you the temperature of the room. To read the flour temperature, simply place the digital thermometer probe into your flour and take the reading.
So for example, if the room temperature is 18C and the flour is 20C, then the temperature of our liquid (water + milk) needs to be: Base Temp = Room Temp + Flour Temp + Liquid Temp 48 = 20 + 18 + ? 48 = 20 + 18 + 10
Therefore we need to combine our milk and water, and heat it to a temperature of 10C. Then, once we are done mixing, the dough should reach our desired dough temperature of 24C. It is slightly confusing, but following that formula should give you the correct dough temperature.
Add all of your ingredients except the liquid into the bowl of a stand mixer fitted with a dough hook.
Heat your milk and water in a saucepan to the desired temperature. It will only take a very brief amount of time so don’t walk away and make sure to place it on a very low heat.
Pour in the liquid over the top, and mix on a low speed for 7 minutes.
After 7 minutes, increase the speed to medium, and mix for a further 7 minutes. At this point, check the dough temperature, it should be just around 23C hopefully.
Finally, increase the speed to high, and mix for another minute or two. Remove the dough, it should now read 24C (or around there) and when you stretch a small piece of the dough out, it should pass the windowpane test.

Gently knead the dough on your work surface very briefly so the dough comes together, then use a rolling pin to roll it into a rough rectangle shape, don’t worry too much about the size, we just want a relatively even thickness, so that the dough has a consistent temperature throughout (if you were to chill the dough into one large ball - when you roll it the next day, the inner temperature will be different to the edges of the dough so you will have a very inconsistent dough temperature which affect your laminating and fermentation).
Wrap the dough in cling film and chill it for 12 hours - it is best to do this the night before, so you can laminate the dough the next morning.

For the beurrage/butter block - it is really best to use a laminating butter. This is a professional butter that is designed especially for laminating dough as it has a higher fat content, and a higher plasticity, then means it is considerably more flexible when rolling, making it much less likely to crack. I cannot recommend it enough - it will the whole process 100x easier. It is usually available from specialist online grocers, but if you search for ‘Isigny Pastry Sheet Butter’ (there are also many other brands) you will hopefully find it.
If you're using laminating butter, leave 250g at room temperature, then take a large sheet of parchment paper and use a pen to draw a rough rectangular outline, 17.5x20cm (7x8”).

Flip the paper over and place the 250g block of butter into the middle of the square you drew. Wrap the excess parchment around the butter, folding the edges in to match the guides of the neat square you drew. It can help to tape the edges together to stop the parchment paper from moving around or opening up as you roll.
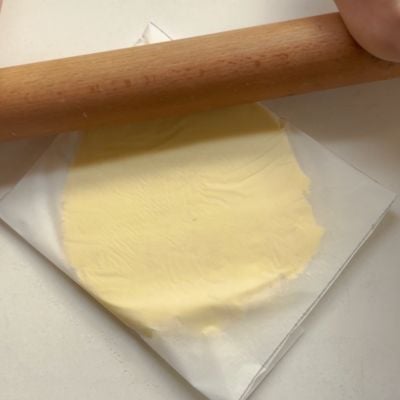
Flip it back over and use a rolling pin to roll the butter, pushing it to the edges and creating an even layer of butter across the rectangle of parchment. Place this in the fridge to chill for at least an hour or again, ideally overnight.
If you do not have professional butter, we can ‘cheat’ the flexibility by adding a touch of flour to regular butter. Add the soft butter and flour into a stand mixer, and beat it to form a paste, ensuring there are no streaks of unincorporated butter.
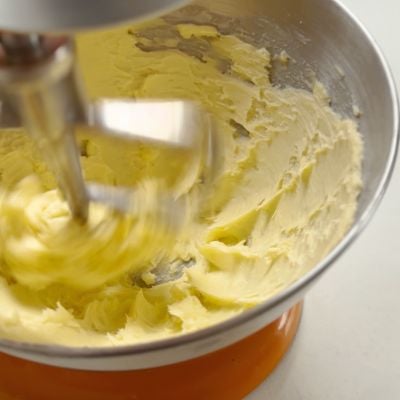
Follow the same steps as above, shaping the butter into a neat rectangle. Chill it for one hour or ideally overnight.
Temperature is key now - when laminating croissants, if your butter is too cold when you go to roll it, it will crack. If it is too warm, it will simply leak out. Remove your butter from the fridge - it is ready to use when it reaches a temperature of 12C/54F. At this temperature, you will see that the butter is slightly firm but flexible. You can test the temperature by placing a digital thermometer into the butter.
Just before it is at temperature, remove your dough from the fridge. We need this to be at around 4C/40F. Very lightly flour the dough, and give it a quick roll, to make the rectangle of dough slightly larger, around, 35x20cm (13.5”x8”).
Place your butter into the centre of the dough so that the height of the dough and the butter match (20cm/8”).
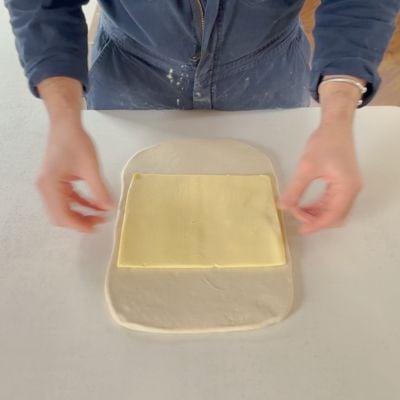
Fold the exposed sides of dough into the centre so they meet in the middle.
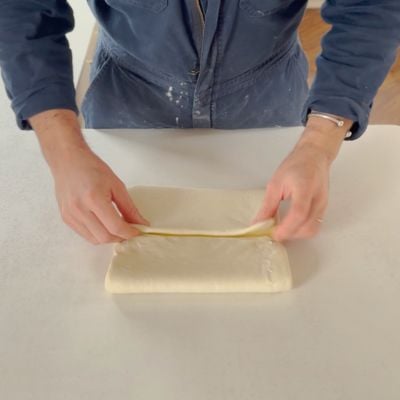
Use your fingers to pinch the dough together to form a seam down the centre.
Using a sharp knife, carefully score the edges of the dough, where it is folded over the butter - this will release tension and make it easier to roll.
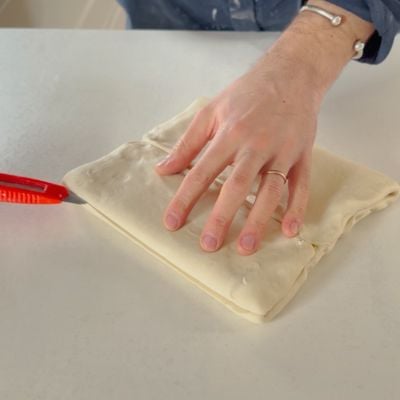
With this seam facing towards you, turn the dough 90 degrees so the seam is now horizontal to your body and give the dough a quick roll, to give it a little bit of width.
Turn the dough 90 degrees again so the seam is vertical in line with your body and begin to roll the dough. Working relatively quickly. Apply even pressure and roll the dough into a long even rectangle, flouring very lightly if needed.
Don’t focus too much on the length of the rectangle, but more on getting it into an even rectangle that ends up around 5mm thick (0.2”).
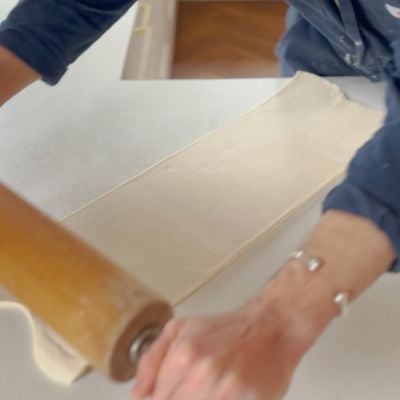
Once you are happy with the thickness and shape, dust off any excess flour with a brush, and if the ends of the dough have gone a bit wonky, cut them off so you have straight edges on either side.
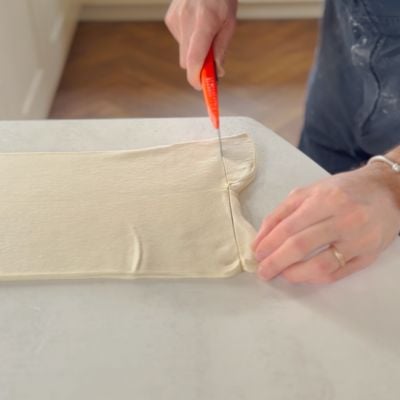
Perform a single fold of the dough, where you take one-third of the dough and fold it up, then take the other third of dough and fold this over the top. This is called a ‘single fold or ‘single turn’.

Wrap the dough tightly in cling film, and place it in the freezer for 15 minutes, then into the fridge for 10 minutes.
Remove the dough from the fridge, and with the open seam facing you (i.e if you were looking at the dough straight on, you would be able to see where it has been folded over itself), use a sharp knife again, to score the edges of the dough where it is folded.
Turn the dough 90 degrees so the open seam is now horizontal to you and give the dough a quick roll, to give it a little bit of width.
Turn the dough 90 degrees again so the open seam is facing you again and begin to roll the dough. Roll the dough into a long even rectangle, very very lightly flouring it, just as we did in step 25.
Trim off the wonky edges, and perform a second single fold. Wrap the dough in cling film and chill it again for 15 minutes in the freezer, and 10 minutes in the fridge.
Remove the dough and roll it out again, following the exact same steps, and performing your final single turn. Wrap the dough tightly in clingfilm and place it in the fridge for 30 minutes. The technique I prefer uses 3 single folds, however for a more open honeycomb structure you could do one double fold and one single fold.
Once chilled, with the open seam facing your body, roll the dough out so that it is around 37cm/14.5” tall, then rotate it 90 degrees, and roll it into a rectangle that is around 3.5mm thick - you will ideally want to use a digital caliper to measure this. Don’t worry about the length of the rectangle, all we are concerned about is the height and the thickness.
Once you have the rectangle, use a sharp knife to cut off any wonky ends, so that it is a neat rectangle that is 33cm/13” tall.
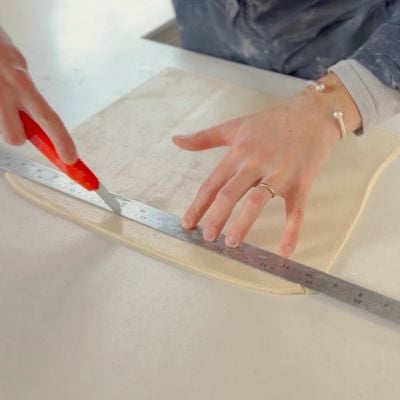
Then using a ruler, with the long edge of the dough facing you, mark intervals along the bottom of the dough, every 8cm/3.1”. Find the midpoint of each 8cm mark (so 4cm in) and use a ruler to mark that interval at the very top of the dough. What we are doing is marking the tip of the triangle.

Use a ruler and a sharp knife or box cutter, to cut the dough into triangles. You should get 7-8 croissants if you rolled them to the right thickness, 6 if things are a little thicker!
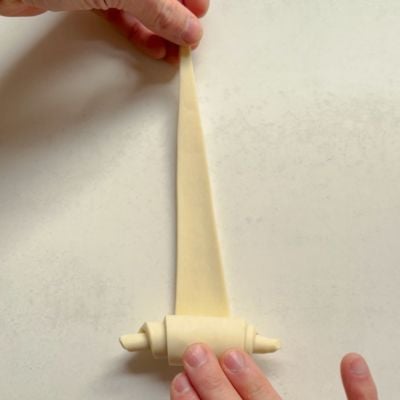
Pick up the triangle and gently stretch it with your hands then place it on the work surface. Starting from the 8cm edge, roll the dough up on itself, and press the tip quite firmly into the dough when you finish rolling.

Line a baking tray with parchment paper, and place the croissants, 4 per tray, on the tray, ensuring the tip you just pressed in, is on the bottom, touching the tray. Give them enough space to proof.
Place the trays in the oven, with it turned off, and place a cup with a very small amount of boiling water in the corner - about 3 tbsp. Change this water every 45 minutes.
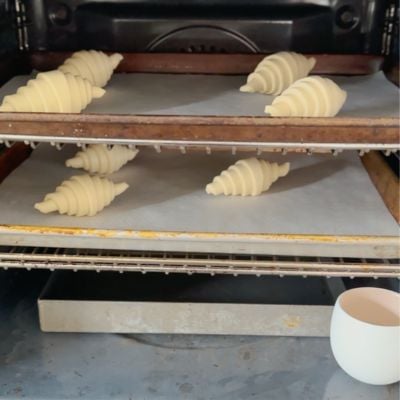
Proof the croissants until they look very fat, and when you shake the tray they wobble. This can take anywhere from 2-4 hours, so keep an eye on them.
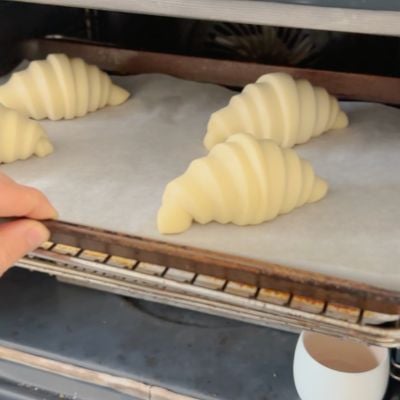
Remove them from the oven, and leave them at room temperature to form a skin while you preheat the oven. Set the oven to 185C/365F Fan Assisted.
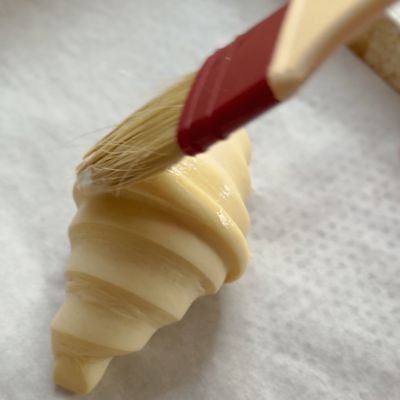
Whisk the egg-wash ingredients together until smooth and there are no streaks of egg white and then use a pastry brush to gently brush one tray of croissants with egg wash (or use a fence paint sprayer as suggested in the video). I prefer to only bake one tray at a time - it is fine if the other tray proofs for a little longer.
Place the tray in the middle of the oven and immediately drop the temperature 170C/340F Fan Assisted. Bake for 22-24 minutes or until a nice deep golden brown colour.

Egg wash and bake the remaining tray, then serve warm or allow to cool slightly.
Hi Matt,
Loved your explanation but was wondering if I live in the tropics where temperatures soar to 31-33C above, how to we get base temperature of 48C. Does it mean that the flour has to be chilled to get the temp of 21C and the water chilled to 10C?
Well no aircon in my home and the only solution if I correctly understand your explanation should be so. Thanks in advance.
Anne
You can use some ice water too! Lots of bakeries do that too to keep the dough cold 🙂
🙌
I’ve been making croissants for a year now and every time the butter comes out when baking, until your advice to mix flour into the butter for lamination. Thanks for the helpful advice and better croissants
So so glad!!
Hi Matt
Can i leave the croissants to proof for the next day? The process of laminating and folding takes a long time
-Then proofing in the oven.
At what point can I place in the fridge so I can bake them fresh in the morning.
It would be better to roll the croissants then freeze them, and proof them. It is hard to proof them to bake fresh in the morning as you don’t have a professional proofer. The best thing would be to freeze them and proof them overnight, but I haven’t tried it so not exactly sure how long it will take!
Hi Matt,
I wanted to ask, I made the dough and I’ve put it to rest in the fridge as per your method. The dough has already doubled in size, is that normal?
It shouldn’t necessarily double but will increase in size as it has yeast in it!
Hi Matt! Why are you using mix of t45 and all-purpose flour? Is this to reduce strength of gluten slightly and improve rolling?
Yes that! And it was a ratio I used from someone who taught me about croissants so I never changed it!!
Great recipe! It is the third one I tried and by far the best. I need to figure out when to start day 2 so I can eat them before dinner time though. My only question is: what is the best way to know they are done baking?
So glad! They should be a nice golden colour really. Once they are golden they are cooked it just a matter of then how dark you want them!
Hi Matt, love the recipe! I don’t have a stand mixer so I usually knead by hand, any idea how long it should take to knead that way? I haven’t mastered the perfect croissant yet and I’m hoping this recipe leads me there!
I think about 10-15 minutes! Just knead till you pass the windowpane test 🙂
Hi! I am a busy stay at home mom and made these over 3 days. They still turned out fabulous. I think if I actually do it in 2 days they will be similar to the ones we ate in France and Switzerland. Thank you so much for all the hard work you put into the directions. So many of your recipes are fabulous!
So so glad Erin! Thanks for letting me know how well it worked!
Hi what are the egg-wash ingredients?
oh sorry I missed that! 2 Whole eggs + 2 egg yolks whisked together!
So when do we add the honey in?
Oh sorry in with the liquid at the start 🙂
I have tried this recipe and works like a charm. The taste and appearance of my croissant are divineee. It was my first time to have the honeycomb structure too. I love it so much!
Ah I’m so so pleased!!
I just tried this recipe. The taste and the appearance are divineee. It was my first time to have the honeycomb inside. Thank you so much for creating this recipee 🥰
Hey Matt, it’s hard for me to find T45 flour, are there any good replacements for it?
I’m afraid I would only recommend t45 with this recipe