
Pistachio Marble Travel Cake
TIER 1
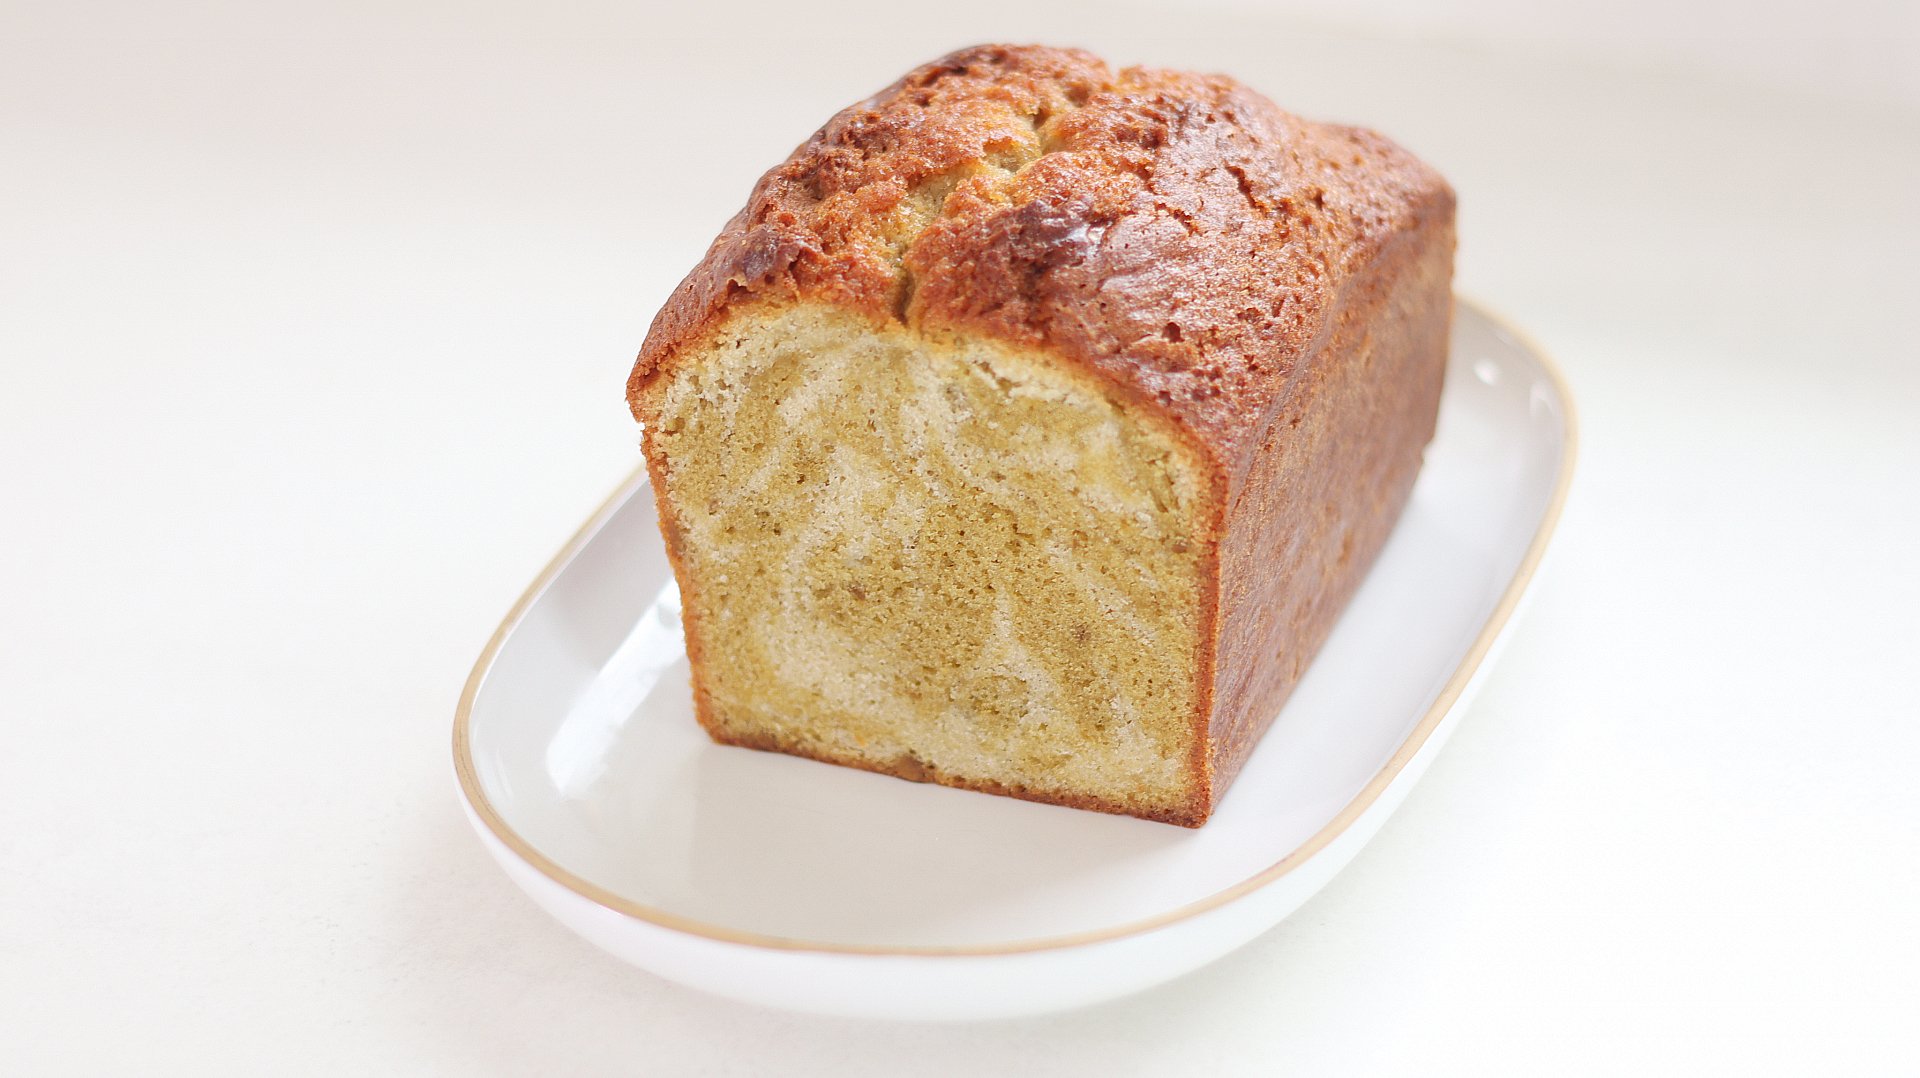
Pistachio Marble Travel Cake
The beauty of this cake lies in the pistachio, a flavour that’s hugely popular right now. Two batters, vanilla and pistachio, are gently swirled together to create a stunning natural green, with the added excitement of discovering what the pattern will be when you slice it! The cake is lovely on its own, but can be elevated with a really simple chocolate glaze too (try this one, with pistachios instead of peanuts!).

1
2lb CAKE
Ingredients
Makes 1 2lb cake
Vanilla Sponge
105g Unsalted Butter, Soft
175g Caster/White Sugar
1 Fresh Vanilla Bean or ½ Tsp Vanilla Bean Paste
130g Whole Eggs
175g Plain/All-Purpose Flour
6.5g Baking Powder
Pinch of Fine Sea Salt
70g Whole Milk
Pistachio Sponge
120g Whole Eggs
145g Caster/White Sugar
65g Double/Heavy Cream
110g Plain/All-Purpose Flour
Pinch of Fine Sea Salt
5g Baking Powder
130g Pure Pistachio Paste
90g Unsalted Butter to make 50g Brown Butter
Soft Butter To Pipe
Special equipment
2lb loaf tin
Stand mixer (optional)
Piping bags
Method
1. Preheat the oven to 165C/330F Non-fan Assisted (150C Fan). Lightly grease a 2lb/900g loaf tin with butter and coat the sides and base with parchment paper. Set to one side.
2. Start by making the brown butter for the pistachio sponge as this will need some time to cool. Add the unsalted butter into a small saucepan and place it onto a medium heat. Cook the mixture until the butter has melted and begins to smell nutty and caramelised. Immediately remove it from the heat and pour it into a bowl to cool.
3. For the vanilla batter, into the bowl of a stand mixer, or a large mixing bowl if you are using an electric hand mixer, add the soft butter, sugar and vanilla. Beat on a medium speed for 1-2 minutes, with the paddle attachment until it is a smoother consistency, scraping down the bowl as needed.
4. Next, add the eggs in 3-4 additions, slowly incorporating them as the mixer is beating. Once you have added all the eggs, scrape the bowl again.
5. Into a bowl, sift together the flour, baking powder and salt, and then tip this in a mix on a low speed until there are no more dry ingredients.
6. Finally, add in the milk and mix just until you have a smooth cake batter.
7. Scrape the mixture out of the bowl and into a piping bag and set this to one side.
8. For the pistachio cake batter, add the eggs and sugar into the bowl of a stand mixer, fitted with a paddle attachment and beat for 2 minutes on a medium speed. Then, pour in the cream and mix to combine.
9. Meanwhile, sift together the flour, salt and baking powder. Tip this into the bowl and mix just until there are no more dry ingredients.
10. Add in the pistachio paste and mix until it is completely combined.
11. Finally, weigh 50g of brown butter that you made earlier and pour this in, mixing until there are no streaks. Add the cake batter into a piping bag.
12. Pipe alternate lines of the pistachio and vanilla cake batter into the tin, filling it up until you have used all of the batter in the cake bags.
13. Take a skewer, and starting at one end of the cake tin, zig zag this through the batter until you get to the other end, and then drag the skewer vertically, through the centre of the cake.
14. Take a small amount of soft butter and add this into a piping bag. Pipe a thin line down the centre of the cake.
15. Place it into the centre of the oven and bake for around 75 minutes, or until a skewer inserted into the centre comes out clean.
16. Once baked, tip it out of the tin onto a wire rack, and immediately wrap it in clingfilm. Refrigerate the cake overnight.
17. The next day, allow the cake to come to room temperature for at least 45 minutes before serving.
Shop the Equipment


Lemon & Olive Oil Travel Cake
TIER 2
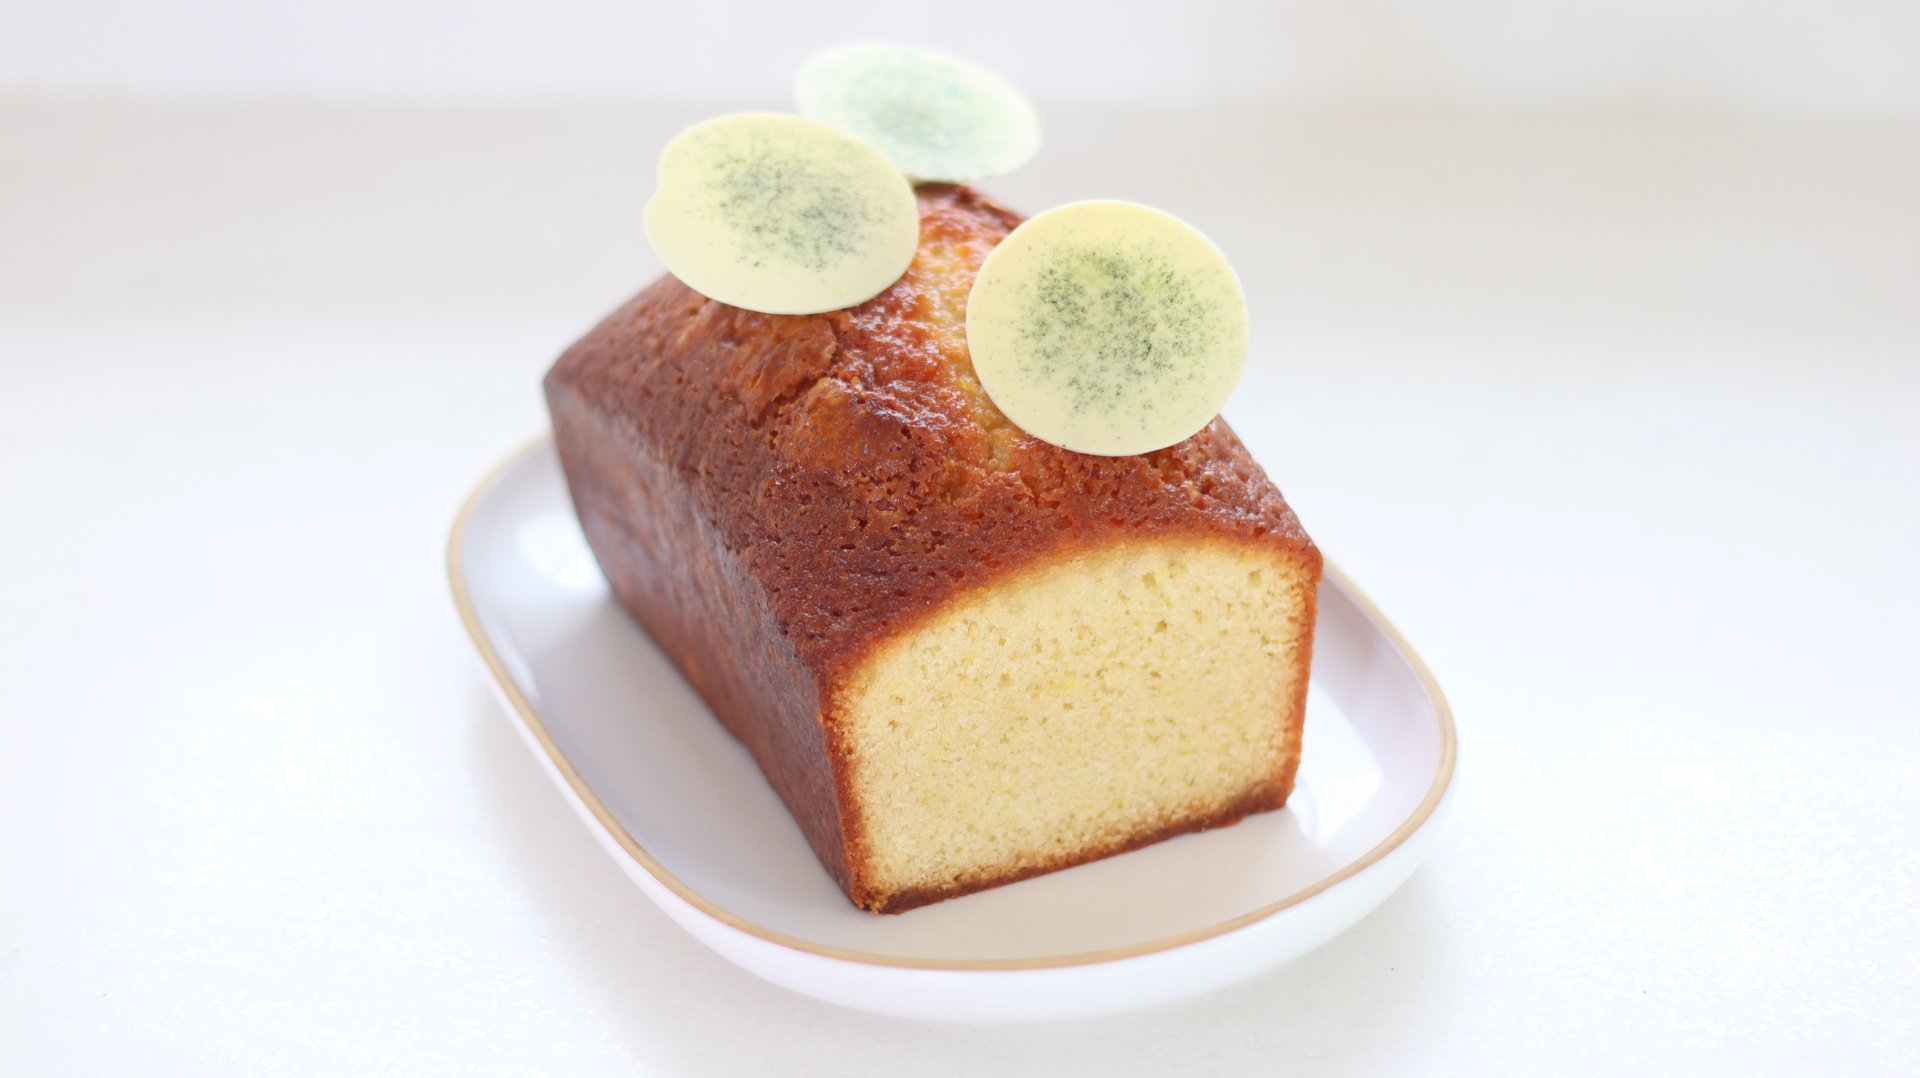
Lemon & Olive Oil Travel Cake
Now I usually just stick to olive oil in my focaccia, but it really works in this cake, adding a subtle fragrance that works so well with the citrus. The cake is so soft and, in my opinion, tastes even better after a few days! The cake batter is simple to pull together, but we’re elevating it with a professional white chocolate decoration that you’d find in most Parisian bakeries. If you’re new to tempering chocolate, check out my video from the archives.
1
2lb CAKE
Ingredients
Makes 1 2lb Cake
Lemon & Olive Oil Sponge
300g Caster Sugar
Zest 3 Lemons (4g)
200g Whole Eggs
140g Double/Heavy Cream
240g Self Raising Flour, Sifted (or 240g Plain/All Purpose Flour with 2 Tsp Baking Powder)
2g Fine Sea Salt
80g Olive Oil (or a neutral oil)
Soft Butter, To Pipe
Lemon Soaking Syrup
60g Lemon Juice
60g Water
120g Caster/White Sugar
White Chocolate Decoration
150g Tempered White Chocolate
Green Food Colour Powder
Lemon Whipped Ganache
350g Double/Heavy Cream
70g White Chocolate, Chopped
3g Powdered Gelatin (250 Bloom) + 18g Cold Water (or 1 Sheet of Leaf Gelatin, any strength)
Zest ½ Lemon
Special equipment
2lb loaf tin
Stand mixer
Piping bags
Large round tip nozzle
Hand blender
Acetate
Method
1. Preheat the oven to 165C/330F Non-fan Assisted (150C Fan). Lightly grease a 2lb/900g loaf tin with butter and coat the sides and base with parchment paper. Set to one side.
2. Into the bowl of a stand mixer, add the sugar and lemon zest. Rub these together for a minute to release the citrus oils.
3. Add the eggs on top and whisk for 2 minutes on a medium speed. Then pour in the cream and mix just to combine.
4. Scrape any lemon zest off the whisk, back into the bowl, then add in the sifted flour & salt on top and whisk on a low speed just until the dry ingredients have been incorporated.
5. Finally, pour in the olive oil and whisk again just until combined and there are no streaks of oil.
6. Pour the batter into the tin, then add some soft butter to a piping bag and pipe a very thin line, lengthways down the centre of the cake.
7. Place it into the centre of the oven and bake for 75-80 minutes, or until a skewer inserted into the centre comes out clean.
8. While the cake is baking, prepare the sugar syrup by placing all of the ingredients into a small saucepan and bring to the boil. Set to one side.
9. Remove the cake from the oven and immediately tip it out of the tin onto a wire rack with a tray underneath.
10. Pour the syrup all over the cake, then immediately wrap it tightly in clingfilm and refrigerate overnight.
11. For the lemon cream, add the powdered gelatin into a small bowl and pour the cold water over the top. If using a gelatin sheet, soak this in a bowl of cold water. Let this sit for 10 minutes.
12. Add the white chocolate into a tall measuring jug and set to one side.
13. Add 250g of the cream to a small saucepan, along with the lemon zest. Place this over a medium heat until it is steaming.
14. Remove it from the heat and pour this over the white chocolate, and scoop the bloomed gelatin on top (or squeeze the water out of the leaf gelatin and add this in). Let this sit for 2 minutes.
15. Blend with a hand blender until smooth. Then pour in the remaining 100g of cold cream and blend again. Transfer the mixture to a bowl, cover the surface with clingfilm and then place it in the refrigerator, ideally overnight.
16. The next day, remove the cake from the fridge and allow it to come to room temperature for an hour.
17. Prepare the tempered white chocolate and add this into a small piping bag. You only need a small amount of white chocolate for the decorations, but if you are tempering the chocolate by hand, it is easier to temper a larger quantity (like 300-400g). With the leftover tempered white chocolate, just pipe it into small discs and then once they are set, add them back into your bag of white chocolate to use again another time!
18. Onto a long strip of acetate, dust a series of very small patches of green food colour powder. Pipe a small dollop of tempered white chocolate on top of each patch of colour powder, about 1” wide.
19. Place a second strip of acetate on top, and then use the back of a cup or something flat and round, and press it gently until the chocolate forms a disc shape.
20. Lift the acetate onto a baking tray and place it into the fridge for 10 minutes. You may need to put another baking tray gently on top just to stop the chocolate from curling up as it sets (but this doesn’t really matter!)
21. Add the lemon whipped ganache into the bowl of a stand mixer (or a large bowl if you are using an electric hand mixer). Whisk on a medium speed until it reaches a medium stiff peak. Add the mixture into a piping bag fitted with a large round tip nozzle.
22. Pipe a few dollops of the cream over the top of the cake, then remove your chocolate discs from the fridge, peeling off the acetate to reveal the discs.
23. Gently press them onto the cream. The cake is now ready to serve. You can serve slices with more of the remaining cream.
Shop the Equipment


Pistachio Cake
We would love to see your Bake It Better creations!
Show off your skills by sharing your desserts
#BakeItBetter

Almond & Orange Cake
We would love to see your Bake It Better creations!
Show off your skills by sharing your desserts
#BakeItBetter

Lemon Cake
We would love to see your Bake It Better creations!
Show off your skills by sharing your desserts
#BakeItBetter