
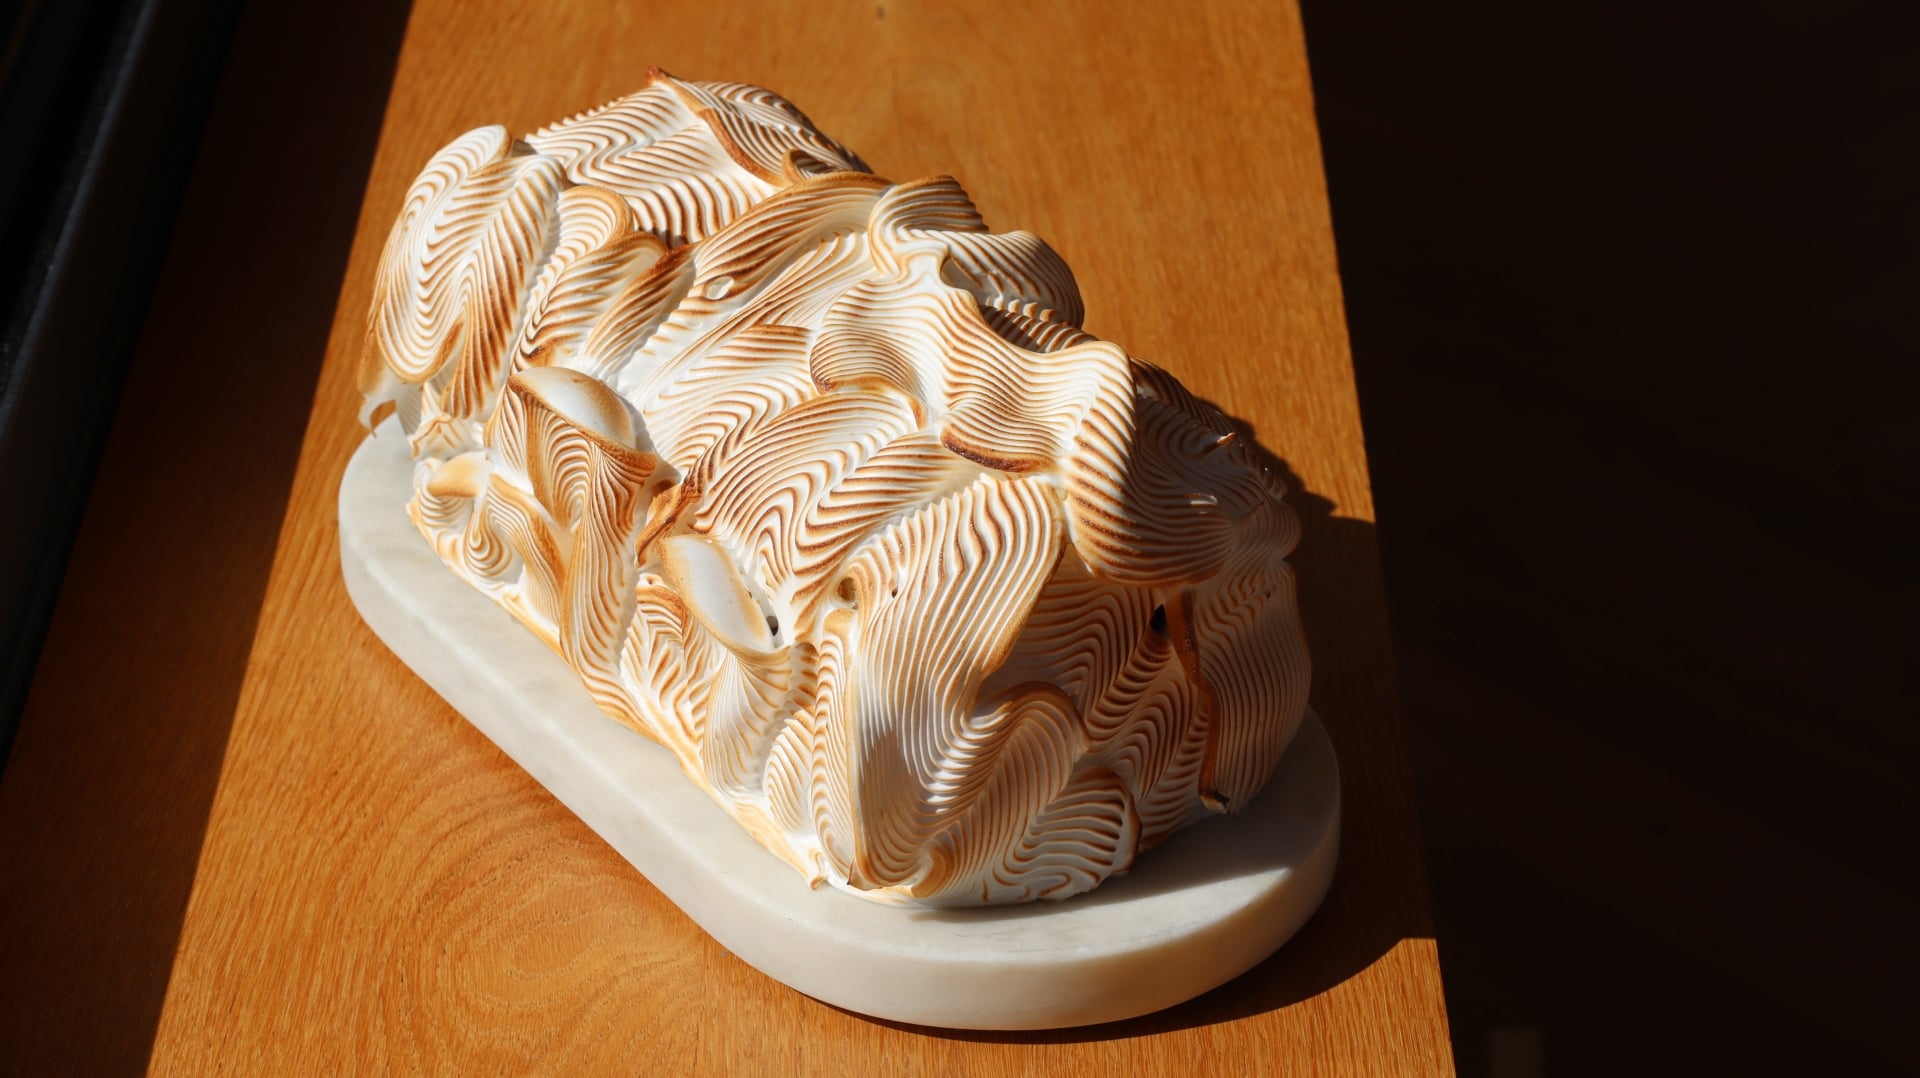
Orange Blossom Cake
TIER 2
Orange Blossom Cake
For this recipe we use a different style of brown butter sponge, layered with a 55% chocolate crémeux and the same orange compote from Tier 1. The real standout for me is the orange blossom meringue that coats the outside. Using a 789 nozzle creates the most dramatic design. It’s a real showstopper, and so satisfying to pipe!

1
CAKE
Ingredients
Makes 8-10 servings
Orange Compote
80g Orange Peel
330g Orange Segments
100g Caster/White Sugar
5g Pectin NH
5g Lemon Juice
55% Chocolate Cremeux
200g Dark Chocolate, 55% Cocoa Solids
120g Whole Eggs
150g Whole Milk
150g Double/Heavy Cream
Pinch of Flaked Sea Salt
Brown Butter Sponge
120g Unsalted Butter + Warm Water*
205g Caster/White Sugar
4g Orange Zest
2g Fine Sea Salt
205g Cake or Plain/All-Purpose Flour
13g Baking Powder
205g Whole Eggs
95g Vegetable Oil
70g Whole Milk
Orange Blossom Meringue
125g Egg Whites
80g Water
345g Caster/White Sugar
½ Tsp Orange Blossom
Beans From ½ Fresh Vanilla Pod
Special equipment
Food processor
Digital thermometer
39x27cm baking tray
Piping bags
Stand mixer
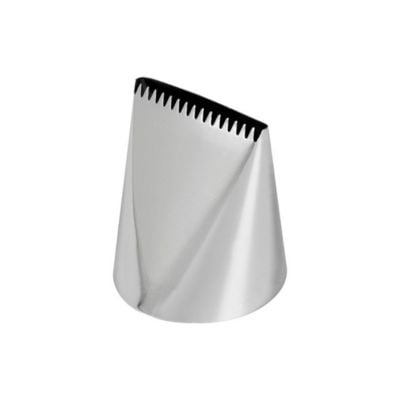
789 basket weave nozzle
Blow torch
Method
Orange Compote
1. Cut the oranges into quarters and remove the segments from the peel.
2. Cut the segments into chunks and add the required amount into a saucepan.
-
- 330g Orange Segments
3. Cut the peels into small chunks and add this into the pan.
-
- 80g Orange Peel
4. Place it onto a medium heat.
5. Meanwhile, whisk together the sugar and pectin and set it aside.
-
- 100g Caster/White Sugar
- 5g Pectin NH
6. Cook the orange mixture for about 3-5 minutes, until the segments have started to break down.
7. Whisk in the sugar mixture and cook it for a further 1-2 minutes, ensuring it reaches a boil.
8. Remove the pan from the heat and stir in the lemon juice.
-
- 5g Lemon Juice
9. Pour the entire mixture into a large food processor and blend briefly.
10. Pass the mixture through a sieve, onto a baking tray, scraping the bottom of the sieve to catch all of the compote.
11. Press a sheet of clingfilm on the surface and chill for 2-3 hours or overnight.
55% Chocolate Cremeux
1. Chop the chocolate into small pieces and add this into a tall measuring jug.
-
- 200g 55% Dark Chocolate
2. Into a medium bowl, add the cream, milk and eggs. Place this over a pan of gently simmering water.
-
- 120g Whole Eggs
- 150g Whole Milk
- 150g Double/Heavy Cream
3. Whisk the mixture constantly until it reaches around 82C/179F on a digital thermometer.
4. Immediately remove it from the heat and pass it through a sieve, over the chocolate.
5. Let it sit for 2 minutes, then blend with a hand blender until smooth. Add in a big pinch of the flaked sea salt and stir it through.
-
- Flaked Sea Salt
6. Pour the mixture onto a baking tray and cover the surface with cling film. Refrigerate for 2-3 hours until it is a more pipeable consistency. If chilled for longer, it might need to sit at room temperature to warm up slightly before being used.
Brown Butter Sponge
1. Preheat your oven to 190C/375F non-fan assisted. Lightly grease a 39x27cm baking tray and line it with parchment paper. Set this to one side.
2. Place the butter into a saucepan and melt it over a medium heat. Cook it for 3-5 minutes, whisking occasionally until it reaches a deep nutty colour and smells very fragrant.
-
- 120g Unsalted Butter
3. Immediately remove it from the heat, and pour it into a clean bowl, set on a tared scale. Take the weight of butter and add whisk in enough warm water to bring the weight back up to 120g. It will be roughly 20-30g of warm water. Don’t use cold water or it will cause chunks of the butter to solidify. Allow this to cool for 10 minutes.
4. In a large bowl, add the sugar and massage through the orange zest for a minute with your fingertips.
-
- 205g Caster/Superfine Sugar
- 4g Orange Zest
5. Sift in the remaining dry ingredients and whisk to combine.
-
- 2g Fine Sea Salt
- 205g Cake or Plain/All-Purpose Flour
- 13g Baking Powder
6. In a separate jug, whisk together the eggs, oil & milk. Then, while whisking the dry ingredients, pour in the wet mixture. Mix everything until the wet & dry ingredients are evenly combined, scraping down the bowl to ensure everything is mixed in. Be careful not to overbeat the mixture.
-
- 205g Whole Eggs
- 95g Vegetable Oil
- 70g Whole Milk
7. Finally, pour in the cooled brown butter and mix the batter slowly until everything is evenly combined.
8. Pour the cake batter into the lined tray, and bake in the centre of the oven. Bake for around 20 minutes, or until the sponge is an even golden brown colour.
9. Remove the sponge from the oven and allow it to cool for 30 minutes.
Assembly Part 1
1. Flip it out of the tray and onto a large piece of parchment or a silicon mat.
2. Cut the sponge into 3 even rectangles using a sharp serrated knife. You can probably get 4 rectangles, but I prefer to do 3 smaller rectangles and keep the rest to snack on, otherwise the cake is too tall.
3. Lift the sponges onto a baking tray lined with parchment.
4. Remove the chocolate cremeux from the fridge and add it into a piping bag. It should be a nice pipeable texture.
5. On two of the sponges, pipe a border of the cremeux, then pipe two parallel lines down the centre, leaving two gaps for the compote.
6. Remove the compote from the fridge and add this into a piping bag.
7. Fill the gaps with the compote. The cremeux will act as a border to keep the compote in place. Place the sponges into the freezer for 30 minutes so the cremeux firms up slightly so that it has more strength once you stack it.
8. Once chilled, stack the filled sponges, then top with the final unfilled sponge, golden side up. Fill in any gaps where the sponges have been stacked with the remaining cremeux, using a palette knife to smooth it. Place the entire cake back in the freezer while you make the meringue.
Orange Blossom Meringue
1. Into the bowl of a stand mixer fitted with a whisk attachment, add the egg whites and whisk on a medium low speed.
-
- 125g Egg Whites
2. Meanwhile, add the water and sugar to a small saucepan and place it over a medium heat.
-
- 80g Water
- 345g Caster/White Sugar
3. Continue to cook the sugar syrup until it reaches 118C/244F on a digital thermometer. Immediately remove it from the heat and slowly pour it over the whisking egg whites (increase to medium speed), which at this point, should be foamy.
4. Once you have added all of the sugar syrup, whisk on medium high speed for 5-7 minutes, or until the meringue is stiff and the bowl is cool to the touch.
5. Finally, add in the orange blossom and fresh vanilla beans, and whisk to incorporate. Taste it to see if you want more orange blossom.
-
- ½ Tsp Orange Blossom
- Beans From ½ Fresh Vanilla Pod
6. Add the meringue to a piping bag fitted with a 789 basket weave nozzle.
7. Remove the cake from the freezer and lift it onto a tray with two ring molds underneath (or anything to prop it up).
8. Pipe the meringue in a wavy pattern all over the cake so that it is completely covered.
9. Finally, blow torch the meringue to finish. Carefully lift it off of the ring molds with a large palette knife and onto your serving plate. Allow it to come to room temperature for 30-60 minutes before serving.
Shop the Equipment


Jaffa Cakes
TIER 1
Jaffa Cakes
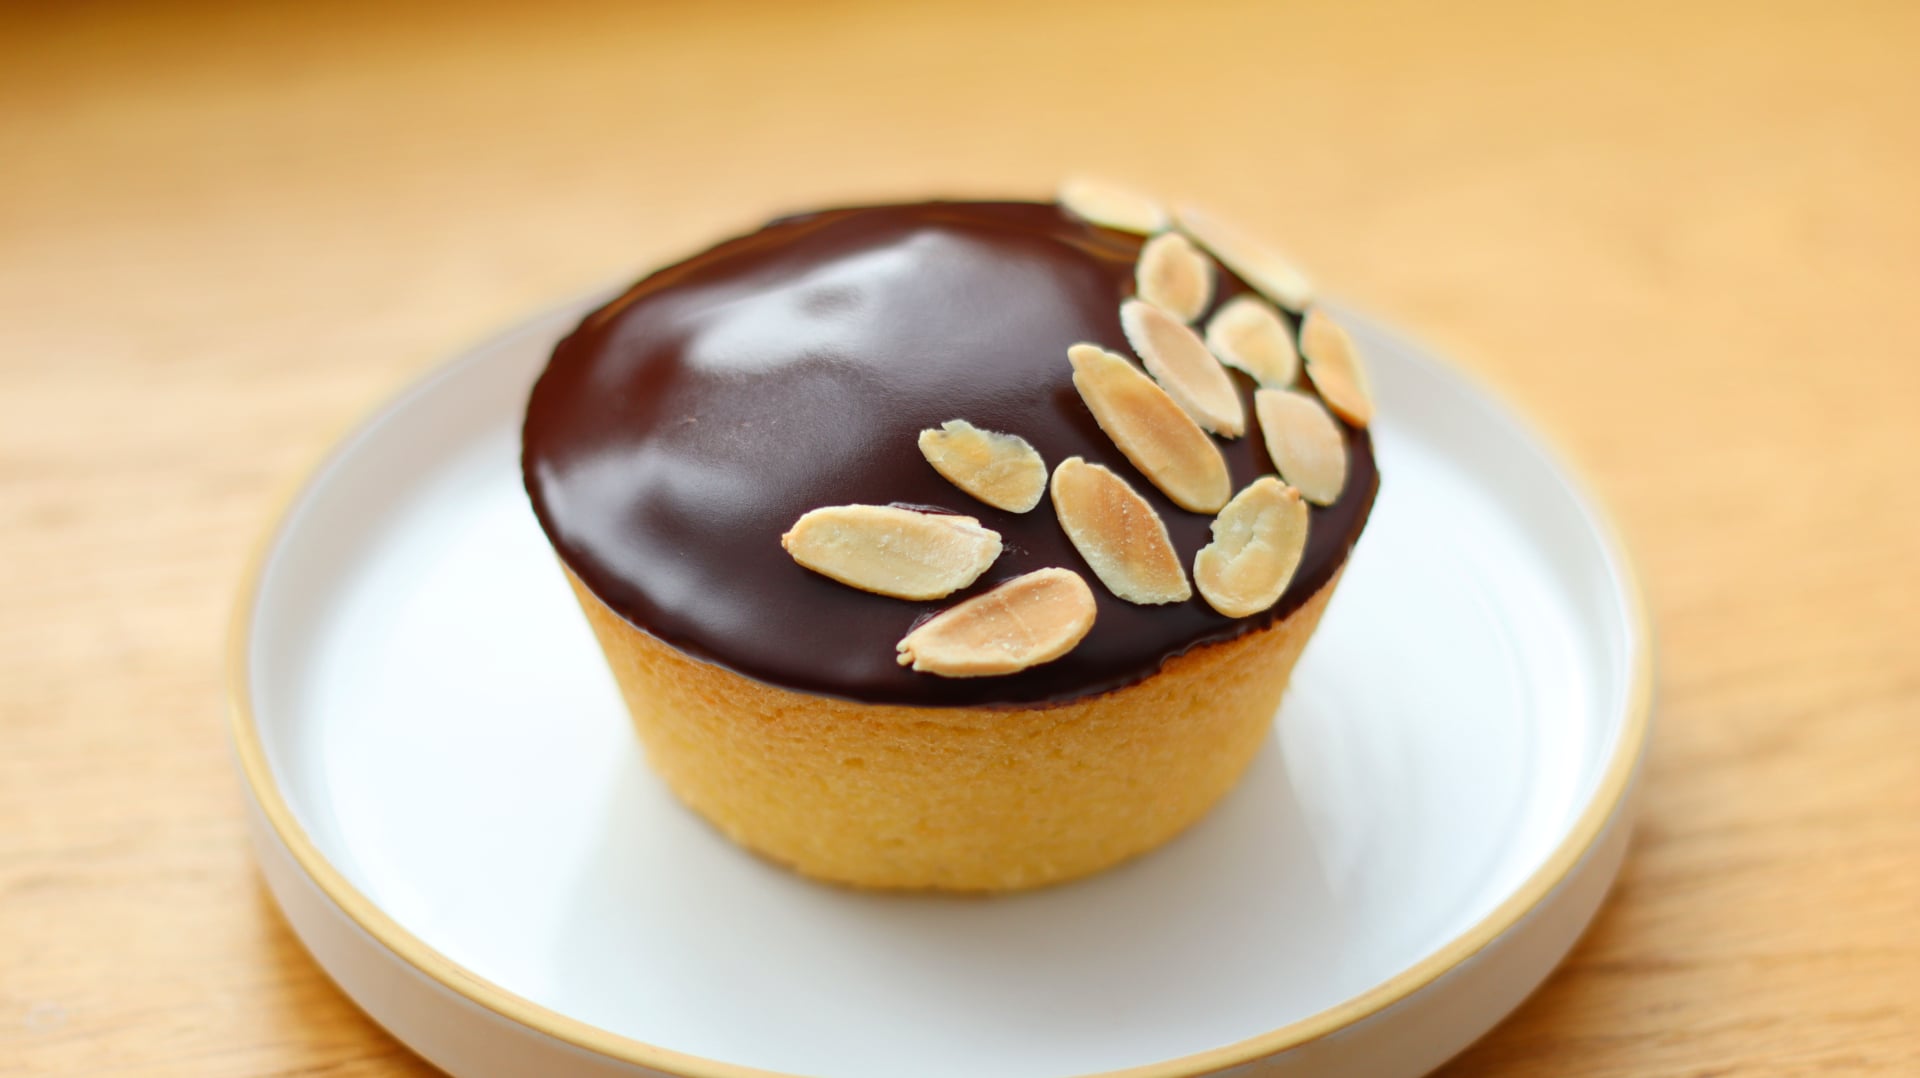
This recipe was heavily inspired by a cake I had at Ottolenghi’s bakery in London, where they sell a gluten-free orange and almond cake. I’ve never been able to find the recipe, so this is my attempt at trying to recreate it. A slightly more advanced take on a Jaffa Cake, it has a soft brown butter financier, filled with an bright orange compote and finished with a glossy chocolate glaze. It may look simple, but the combination of textures and the depth from the brown butter take it to another level.
6
INDIVIDUAL CAKES
Ingredients
Makes 6 individual cakes
Orange Compote
80g Orange Peel
330g Orange Segments
100g Caster/White Sugar
5g Pectin NH
5g Lemon Juice
Brown Butter & Orange Financier
260g Unsalted Butter
230g Egg Whites
4g Orange Zest
215g Powdered/Icing Sugar
110g Self Raising Flour (or 110g Plain/All-Purpose Flour + 1 Tsp Baking Powder)
115g Ground Almonds
1g Fine Sea Salt
Chocolate Glaze
125g Dark Chocolate, 70% Cocoa Solids
12g Honey
8g Water
37g Unsalted Butter
Toasted Flaked Almonds To Garnish
Special equipment
Food processor
Jumbo muffin tin
Piping bags
Method
Orange Compote
1. Cut the oranges into quarters and remove the segments from the peel.
2. Cut the segments into chunks and add the required amount into a saucepan.
-
- 330g Orange Segments
3. Cut the peels into small chunks and add this into the pan.
-
- 80g Orange Peel
4. Place it onto a medium heat.
5. Meanwhile, whisk together the sugar and pectin and set it aside.
-
- 100g Caster/White Sugar
- 5g Pectin NH
6. Cook the orange mixture for about 3-5 minutes, until the segments have started to break down.
7. Whisk in the sugar mixture and cook it for a further 1-2 minutes, ensuring it reaches a boil.
8. Remove the pan from the heat and stir in the lemon juice.
-
- 5g Lemon Juice
9. Pour the entire mixture into a large food processor and blend briefly – about 10 seconds.
10. Pass the mixture through a sieve, onto a baking tray, scraping the bottom of the sieve to catch all of the compote.
11. Press a sheet of clingfilm on the surface and chill for 2-3 hours or overnight.
Brown Butter Orange Financier
1. Preheat the oven to 160C/320F non-fan assisted (145C/295F fan assisted). Lightly grease a jumbo muffin tin with butter and coat the inside with flour, tipping out any excess.
2. Into a small saucepan, add the unsalted butter. Place the pan over a medium heat.
-
- 260g Unsalted Butter
3. Continue to cook the mixture, whisking occasionally until it is a deep golden brown colour, and smells very nutty. Be careful not to burn it.
4. Immediately remove it from the heat and pour it into a clean bowl on a tared scale, and weigh 220g of brown butter. Set this aside to cool for 10-15 minutes.
5. Into a medium bowl, add the egg whites and whisk for 30 seconds until frothy.
-
- 230g Egg Whites
6. Tip in the sugar and orange zest and whisk again to combine. If the icing sugar is quite lumpy, sift it in.
-
- 4g Orange Zest
- 215g Powdered/Icing Sugar
7. Whisk in the self raising flour, ground almonds and salt until there are no streaks of flour.
-
- 110g Self Raising Flour (or 110g Plain/All-Purpose Flour + 1 Tsp Baking Powder)
- 115g Ground Almonds
- 1g Fine Sea Salt
8. Finally, pour in the cooled brown butter and whisk to combine.
9. Pour the batter equally into the prepared tin, just below ⅘ of each cavity.
10. Bake in the centre of the oven for 30 minutes or until an even golden brown colour.
11. Once baked, remove them from the oven, and allow them to cool in the tin for 30 minutes, then pop them out onto a wire cooling rack. The cakes are too soft to place straight onto a wire rack from the oven, so need to stay in the tin to hold their shape. Cool for a further 15-30 minutes.
12. Once cooled, use a small serrated knife to cut a hole out of the top of the financier. Keep the lid of the cake and set this aside.
13. Remove the orange compote from the fridge and briefly stir it to loosen it, then add it into a piping bag.
14. Pipe the compote into the hole in each cake, just to the top, then add the lid of cake back on top.
15. Place the cakes back in the fridge.
Chocolate Glaze
1. Into a small bowl, add all of the ingredients for the glaze.
-
- 125g Dark Chocolate, 70% Cocoa Solids
- 12g Honey
- 8g Water
- 37g Unsalted Butter
2. Place the bowl onto a pan of gently simmering water, and stir it with a spatula until it is smooth.
3. Immediately remove it from the heat and transfer it to a bowl that is just slightly bigger than your cake. If the bowl is too big, it will be difficult to get enough depth to the glaze to effectively dip it.
4. Remove the cakes from the fridge and immediately dip them into the glaze. Flip them upside down and then set them on a wire rack.
5. The glaze can appear slightly bumpy so if you want a really smooth finish you will need to do a second dip of the glaze.
6. Place the cakes in the fridge or freezer just briefly to set the glaze on top so it is no longer wet to the touch.
7. Warm the glaze back up over a bain marie, transfer if back into the small bowl, and dip the cakes a second time.
8. Let the glaze set for 5-10 minutes, then sprinkle some toasted flaked almonds on top to finish.
Shop the Equipment

Chocolate Orange Marmalade Trifle
TIER 1
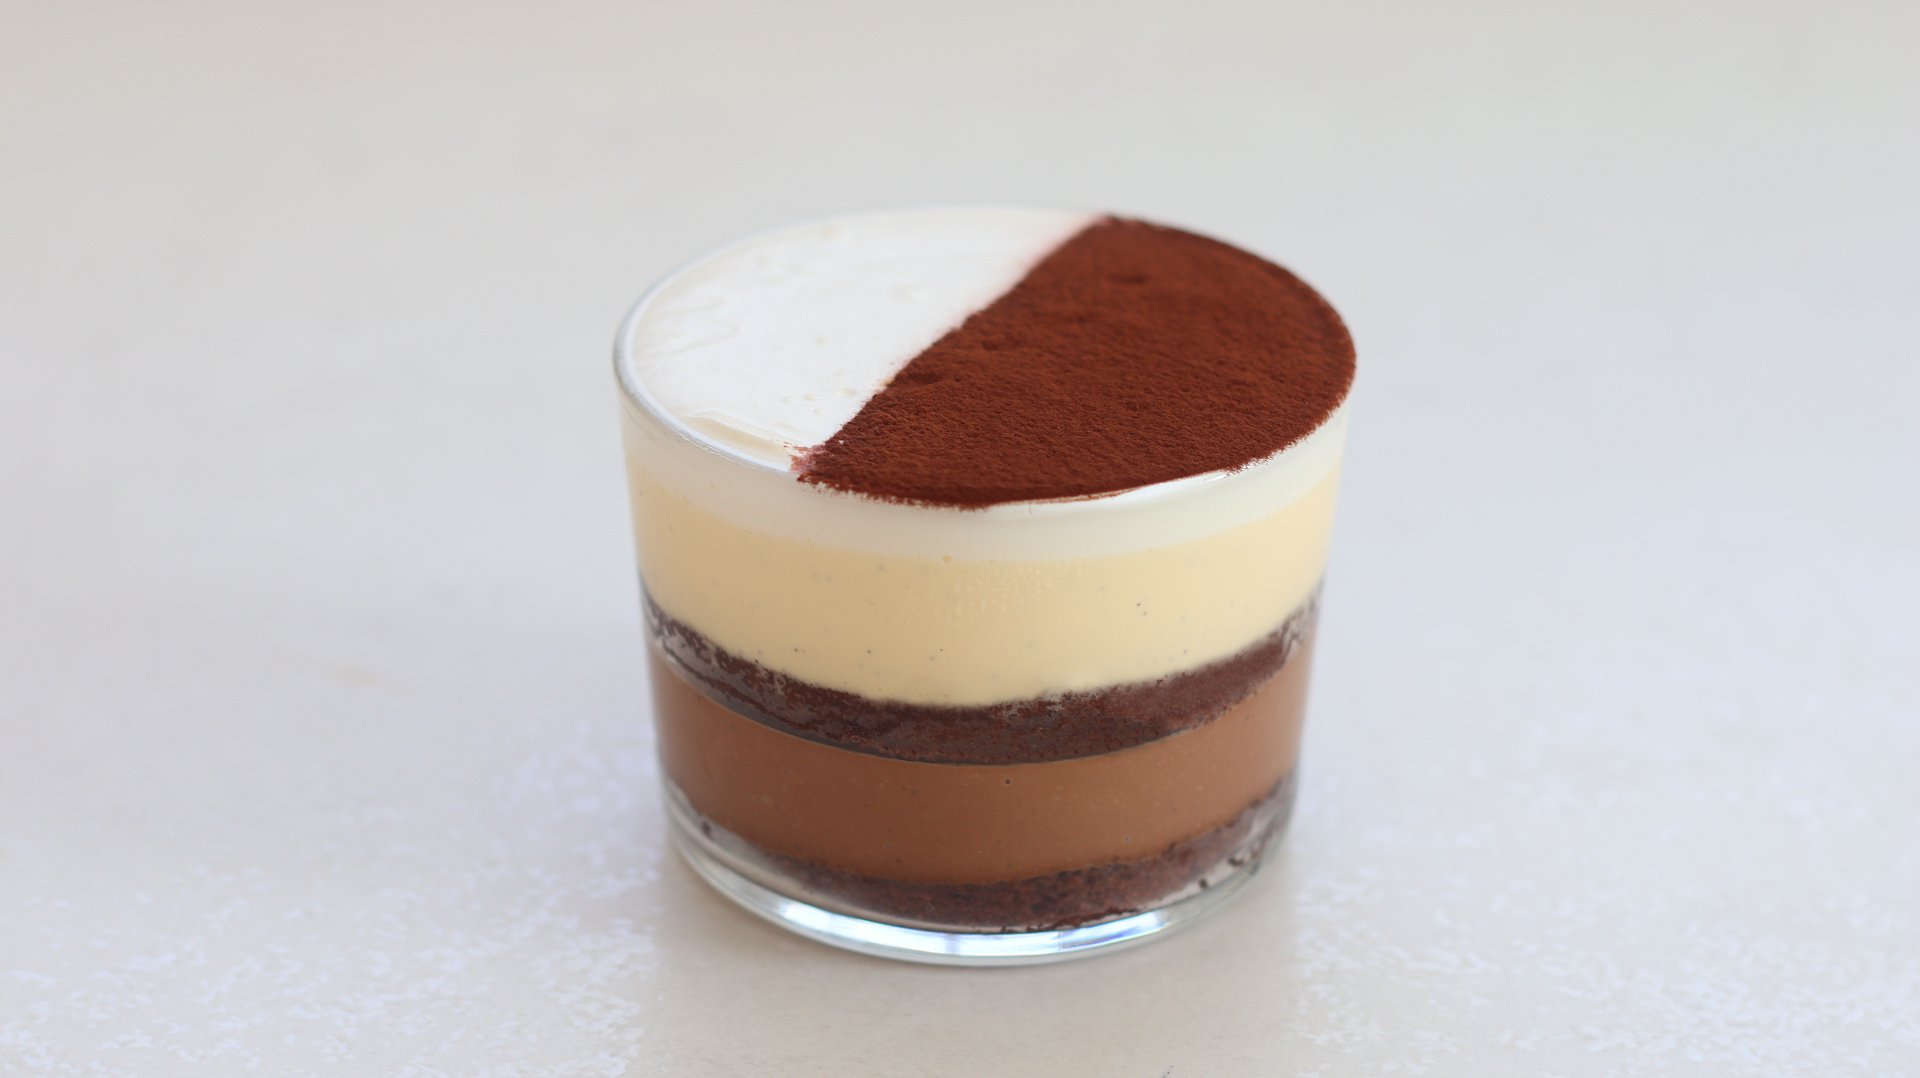
Chocolate Orange Marmalade Trifle
Now this isn’t any ordinary trifle. This has layers of soft chocolate sponge, orange marmalade, vanilla and chocolate custard, then finished with whipped cream. It’s not really traditional, but the texture when you get a spoonful of all the layers is amazing. This can be scaled up to a large trifle, you will just need to increase the quantities.
4
MINI TRIFLES
Ingredients
Makes 4 Mini Trifles
Chocolate Sponge
80g Egg Yolks
75g Caster/White Sugar, Divided
150g Egg Whites
45g Plain/All-Purpose Flour
25g Cocoa Powder
50g Vegetable Oil
35g Whole Milk
Custard Base
350g Double/Heavy Cream
175g Milk
1 Vanilla Pod
160g Egg Yolks
55g Caster/White Sugar
Pinch Flakey Sea Salt
Chocolate Custard
260-285g Custard Base
65g Chocolate, 70% Cocoa Solids
Vanilla Custard
260-285g Custard Base
40g Unsalted Butter, Cold & Cubed
Unsweetened Whipped Cream
200g Double/Heavy Cream
Orange Marmalade To Fill
Cocoa Powder To Decorate
Special equipment
39x27cm baking tray
Electric hand whisk or stand mixer
Digital thermometer
Hand blender
Cookie cutter
Piping bag (optional)
Method
Chocolate Sponge
1. Preheat the oven to 180°C/355°F Non-Fan Assisted.
2. Lightly grease a 39x27cm baking tray. Cut a rectangle of parchment paper so that it fits neatly inside the tray, and press it in.
3. Into a medium bowl, add the egg yolks, and 20g of caster sugar. Whisk the mixture with an electric hand mixer (or in a stand mixer) until it is thicker in volume and pale in colour. About 1-2 minutes. Set this to one side.
4. Into a medium bowl, add the egg whites and using an electric hand whisk (or stand mixer) whisk on a medium-low speed. Once the mixture is frothy, increase the speed to medium and slowly add the remaining 55g of caster sugar, about 1 tablespoon at a time. Whisk until you have a medium-stiff peak to the meringue.
5. Gently fold the first third of meringue into the egg yolk mixture. Once incorporated, add the second third, fold it through and then the final third.
6. Next, sift in the plain flour & cocoa powder, and fold the mixture carefully until there are no more streaks of dry ingredients.
7. Finally, pour in the vegetable oil and whole milk. Use a spatula to fold this in, making sure to scrape the bottom of the bowl.
8. Pour the batter onto the lined tray, and then using a spatula, spread the batter out evenly.
9. Bake the sponge for 12 minutes then allow it to cool for 30 minutes at room temperature.
Custard Base
1. Into a medium saucepan add the cream, milk, egg yolks, sugar and beans scraped from a fresh vanilla pod.
2. Place this over a medium-low heat and whisk constantly until it reaches a temperature of 82C/180F on a digital thermometer.
3. Immediately remove it from the heat and pour it through a sieve into a tall measuring jug.
4. Split the mixture into half in between two measuring jugs, you should get around 260-285g per jug.
5. Add the chopped chocolate into one, butter into another, and then blend each until smooth with a hand blender. Add a pinch of flakey sea salt to each and stir it through with a spoon. Alternatively, if you want the vanilla version to be thicker, try using white chocolate instead of butter.
6. Pour the vanilla custard onto a shallow baking tray and cover the surface directly with cling film. Cover the surface of the chocolate jug with cling film and refrigerate – this will thicken faster than the vanilla version.
Assembly
1. Take the cooled chocolate sponge and flip it out of the tray onto a large silicon mat or piece of parchment paper.
2. Take a few tablespoons of orange marmalade and spread this evenly across the sponge with an offset spatula.
3. Take a cookie cutter that is just slightly bigger than the width of your individual trifle dishes.
4. Place a disc of sponge into the base of each trifle dish.
5. Remove the chilled chocolate custard from the fridge (it needs 15-30 minutes to thicken and cool slightly).
6. Add it into a piping bag if you want, otherwise, pour an even layer across each dish.
7. Place it into the freezer or fridge just until a skin has formed on top and when you poke it with your finger, you feel there is enough of a ‘barrier’ to support the weight of the next layer.
8. Add a second disc of sponge, then remove the chilled vanilla custard from the fridge – this will be a looser consistency.
9. Pour this on top of the sponge, leaving enough room at the top for cream.
10. Place the trifles into the fridge or freezer just until the vanilla mixture has set to create a slight barrier and support the weight of the cream. This can take slightly longer as the mixture is softer.
11. For the whipped cream, simply add the cream to a bowl and whisk with an electric hand whisk until you have a medium stiff peak.
12. Spoon the cream on top of the set vanilla custard, and then level it completely with a slightly warm palette knife.
13. The trifles can now be refrigerated until needed or served immediately. Dust with a light coating of cocoa powder when ready to serve.
Shop the Equipment


Chocolate Orange Tiramisu
TIER 1
Chocolate Orange Tiramisu
I couldn’t make ladyfingers and not use them in a tiramisu! In Tier 1 we keep the technique of a tiramisu very classic – no cream! But I’ve mixed things up with a chocolate orange flavour. You soak your homemade ladyfingers biscuits in espresso, and layer them between orange mascarpone cream and chocolate shavings. This is a great dessert you can make ahead of time.
8-10
SERVINGS
Ingredients
Makes 8-10 Servings
Savoiardi Biscuits
115g Egg Yolks
25g Whole Eggs
40g Caster/White Sugar (A)
100g Plain/All-Purpose Flour (A)
260g Egg Whites
100g Caster/White Sugar (B)
1.5g Fine Salt
35g Plain/All-Purpose Flour (B)
Icing Sugar To Finish
Orange Mascarpone Cream
600g Mascarpone
65g Egg Yolks
50g Caster/White Sugar (A)
Zest 2 Oranges
145g Egg Whites
50g Caster/White Sugar (B)
Coffee Soaking Syrup
150g Freshly Brewed Coffee
15g Kahlua
Dark Chocolate, Grated
Special equipment
10mm round tip nozzle
Piping bag
Stand mixer
Method
Savoiardi Biscuits
1. Pre-heat the oven to 160C/320F non-fan assisted.
2. Take 2 large sheets of baking paper and draw two sets of train track lines on the baking sheets, 90mm/3.5” tall. Flip these upside down (so the ink doesn’t touch the pastry) and place them on a baking sheet.
3. Take a small round tip nozzle (10mm) and add it into a piping bag. The piping nozzle needs to be smaller than you think, as the batter will spread slightly as it is piped.
4. Into a medium bowl, add the egg yolks, whole eggs, and sugar (A). Whisk this to combine, then add the flour (B) and whisk to form a thick paste. Set this to one side.
5. Into the bowl of a stand mixer, add the egg whites (room temperature) along with the salt.
6. With the whisk attachment, whisk on a medium-low speed until it becomes frothy, with small bubbles on top (this will take a few minutes).
7. Slowly add in the sugar (B), about a tablespoon at a time. Once you have added all the sugar, whisk until you have a stiff peak.
8. Take about ⅕ of the meringue mixture and whisk it through the egg yolk mixture. This will be quite stiff, so it needs to be whisked firmly to smooth it out.
9. Add the remaining meringue in 2-3 parts, gently folding it through to ensure you don’t beat out too much air.
10. Once smooth, sift over the remaining flour (B) and fold through until there are no more lumps.
11. Add the mixture into your piping bag and let it rest for a few minutes; this will just make it slightly easier to pipe.
12. Using the guides on your baking tray, pipe individual lines, ensuring they’re not too close together, as they will spread slightly.
13. Once piped, add a good dusting of icing sugar over the top, wait 1-2 minutes, and then repeat.
14. Place them directly into the oven and bake until a deep golden brown colour – be sure not to underbake them. It should take around 30 minutes, but it can depend on how big you’ve piped them and your oven.
15. Remove them from the oven and then allow them to cool at room temperature. If you want to make these ahead of time, you can place them in an airtight container and freeze them for up to 2 months.
Orange Mascarpone Cream
1. Into a medium bowl, add the sugar (A) and zest of 1 orange, then massage this zest into the sugar.
2. Add the egg yolks and whisk by hand for a minute until thickened slightly.
3. Add the mascarpone and remaining orange zest, and whisk again until completely smooth. Set this to one side.
4. Into the bowl of a stand mixer, add the egg whites and whisk on a medium-low speed until frothy.
5. Slowly add the sugar about a tablespoon at a time. Once you’ve added all the sugar keep whisking until it reaches a stiff peak.
6. Take the meringue, and fold it through the egg yolk mixture in three parts until smooth and evenly combined.
Coffee Soaking Syrup
1. Combine the two ingredients in a shallow dish.
Assembly
1. Take the cooled lady fingers and check to see how they fit into your chosen dish. If you need to cut them down to size, use a knife or a microplane to shave them down so that they fit snugly in the dish.
2. Take the lady fingers and soak them one by one, then, lay them into the base of your tiramisu dish.
3. Once the bottom of the dish is covered, take a few large spoonfuls of the mascarpone cream mixture and spread this evenly across the lady fingers with an offset spatula.
4. Using a microplane, grate a fine layer of dark chocolate over the cream (or cocoa powder)
5. Repeat this two more times, finishing with a layer of the mascarpone cream. Use an offset spatula to completely smooth the top so that it is flush with the rim of the dish.
6. Place the tiramisu into the fridge to chill – ideally 4-6 hours, but overnight is absolutely fine too.
7. When ready to serve, remove it from the fridge and grate over one final layer of dark chocolate (or cocoa powder) and serve.
Shop the Equipment


Chocolate Orange Swirl Cookies
TIER 1
Chocolate Orange Swirl Cookies
These stunning cookies use the same base dough, one flavoured with orange and the other flavoured with cocoa powder. The doughs are laid on top of each other and carefully rolled into a tight log to create the spiral effect. You can get creative and colour one of the doughs, or even make a quick ganache and sandwich the cookies together!
18-20
COOKIES
Ingredients
Makes 18-20 Cookies
Chocolate Dough
170g Plain/All-Purpose Flour
2g Fine Sea Salt
30g Cocoa Powder
80g Icing/Powdered Sugar
30g Ground Almonds
110g Unsalted Butter, Cold & Cubed
40g Whole Eggs
Orange Dough
200g Plain/All-Purpose Flour
2g Fine Sea Salt
80g Icing/Powdered Sugar
30g Ground Almonds
110g Unsalted Butter, Cold & Cubed
Zest 1 Medium Orange
40g Whole Eggs
Egg Wash
1 whole egg, whisked
Special equipment
Stand mixer
Silicon mats (optional)
Rolling pin
Method
Chocolate Cookie Dough
1. Add all of the dry ingredients into the bowl of a stand mixer, along with the cubed butter.
2. Mix on a medium low speed for 2-4 minutes, until the butter has broken down, and the mixture has a breadcrumb/sandy-like texture.
3. Pour in the egg mixture and mix for about 20 seconds, the dough will not pull together however, so remove the bowl from the mixer and squeeze the dough with your hands, until it forms a dough.
4. Place the dough in between two silicon mats or pieces of parchment paper and roll it to about 3-5mm thick – the thinner the better really. You want to roll it as best as possible into a neat rectangle shape as that will reduce the wastage later on.
5. Place the dough into the fridge for a minimum of 3 hours.
Orange Cookie Dough
1. Add all of the dry ingredients into the bowl of a stand mixer, along with the cubed butter.
2. Mix on a medium low speed for 2-4 minutes, until the butter has broken down, and the mixture has a breadcrumb/sandy-like texture.
3. Pour in the egg mixture and mix for about 20 seconds, the dough will not pull together however, so remove the bowl from the mixer and squeeze the dough with your hands, until it forms a dough.
4. Place the dough in between two silicon mats or pieces of parchment paper and roll it to about 3-5mm thick – the thinner the better really. You want to roll it as best as possible into a neat rectangle shape as that will reduce the wastage later on.
5. Place the dough into the fridge for a minimum of 3 hours.
Assembly
1. Once the doughs have chilled remove them from the fridge, and apply a light egg wash to the chocolate dough. Then, lift the orange dough on top, gluing it in place.
2. Leave them at room temperature to soften for just a few minutes – this will make them easier to roll.
3. Once softer, with the chocolate dough on the bottom, carefully roll the dough, lengthways (with the short side of the rectangle of dough facing you), into a tight log. Wrap this in clingfilm and then refrigerate for at least 1 hour
4. Before they are done chilling, preheat the oven to 150C/300F, non-fan assisted.
5. Once chilled, use a very sharp knife to cut the log into discs of equal thickness – about 5mm, then lift the biscuits onto a tray lined with a silicon baking mat.
6. Immediately place the tray into the oven and bake until lightly golden around the edges – about 20-25 minutes. Allow to cool then serve.
Shop the Equipment


Lemon Meringue Pie
We would love to see your Bake It Better creations!
Show off your skills by sharing your desserts
#BakeItBetter

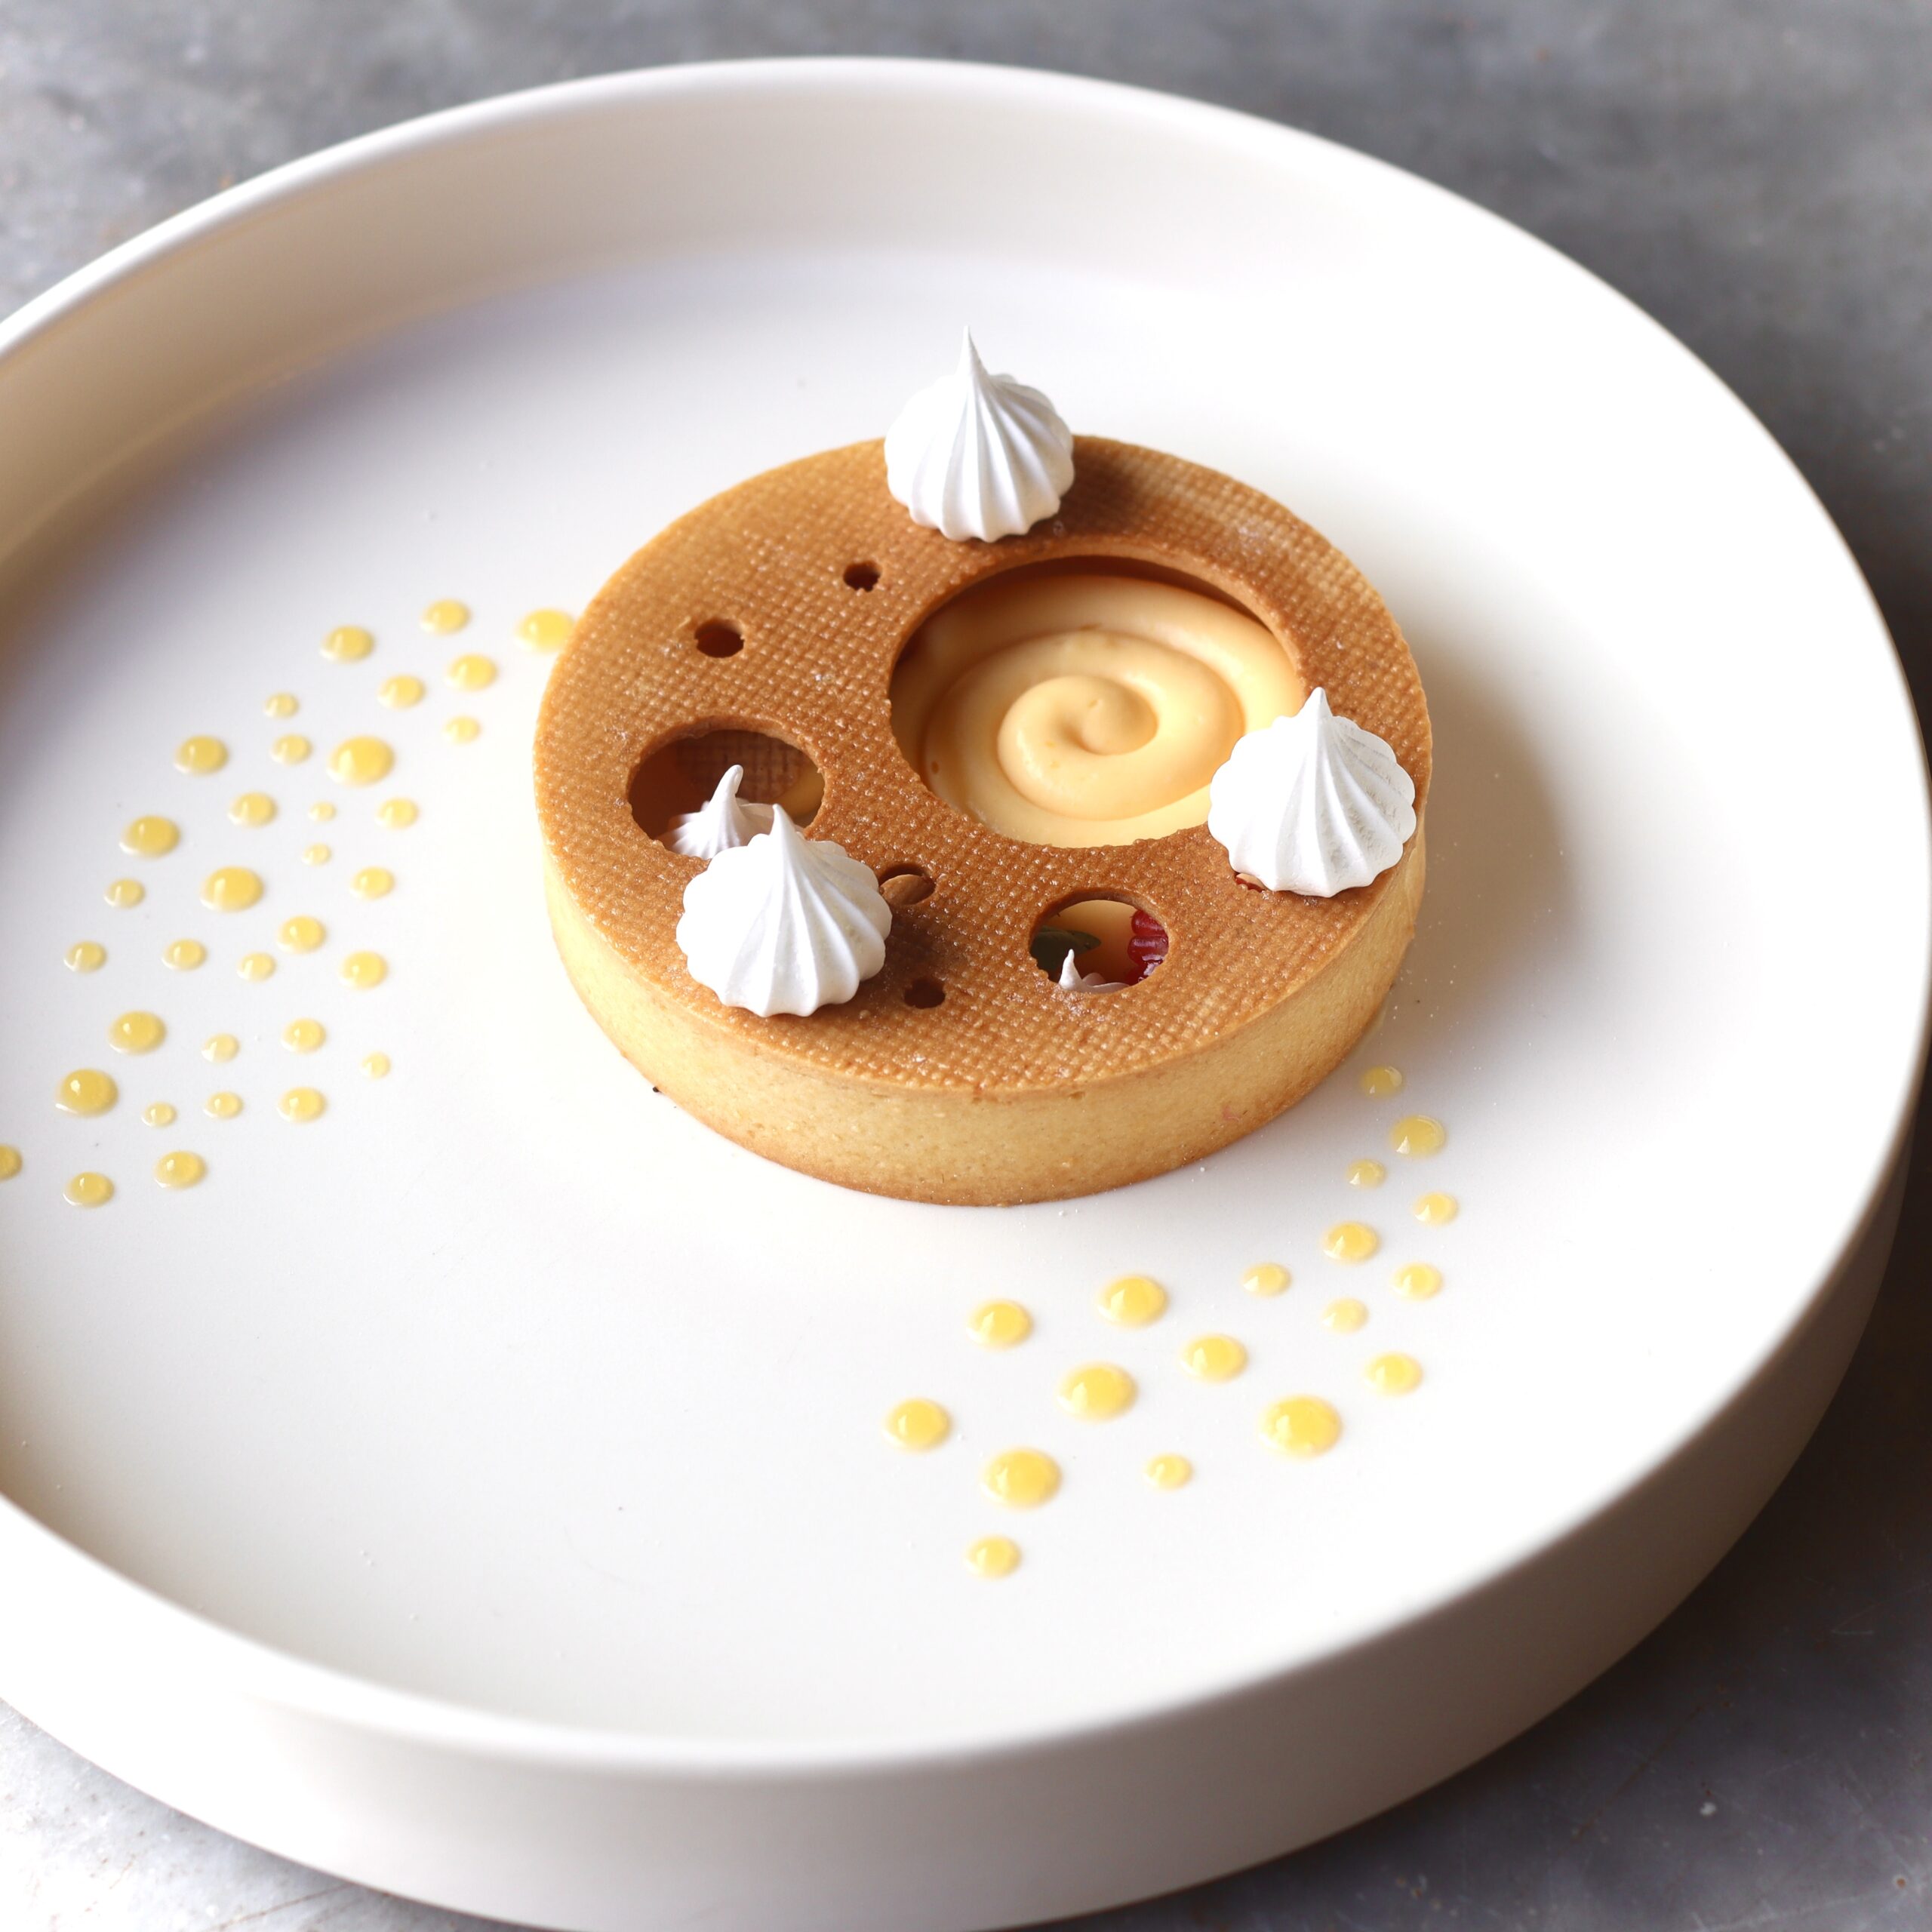
Golden Gianduja Tart
We would love to see your Bake It Better creations!
Show off your skills by sharing your desserts
#BakeItBetter

Chocolate Orange Cheesecake
We would love to see your Bake It Better creations!
Show off your skills by sharing your desserts
#BakeItBetter

Black Forest Gateaux
We would love to see your Bake It Better creations!
Show off your skills by sharing your desserts
#BakeItBetter

Almond & Orange Cake
We would love to see your Bake It Better creations!
Show off your skills by sharing your desserts
#BakeItBetter