
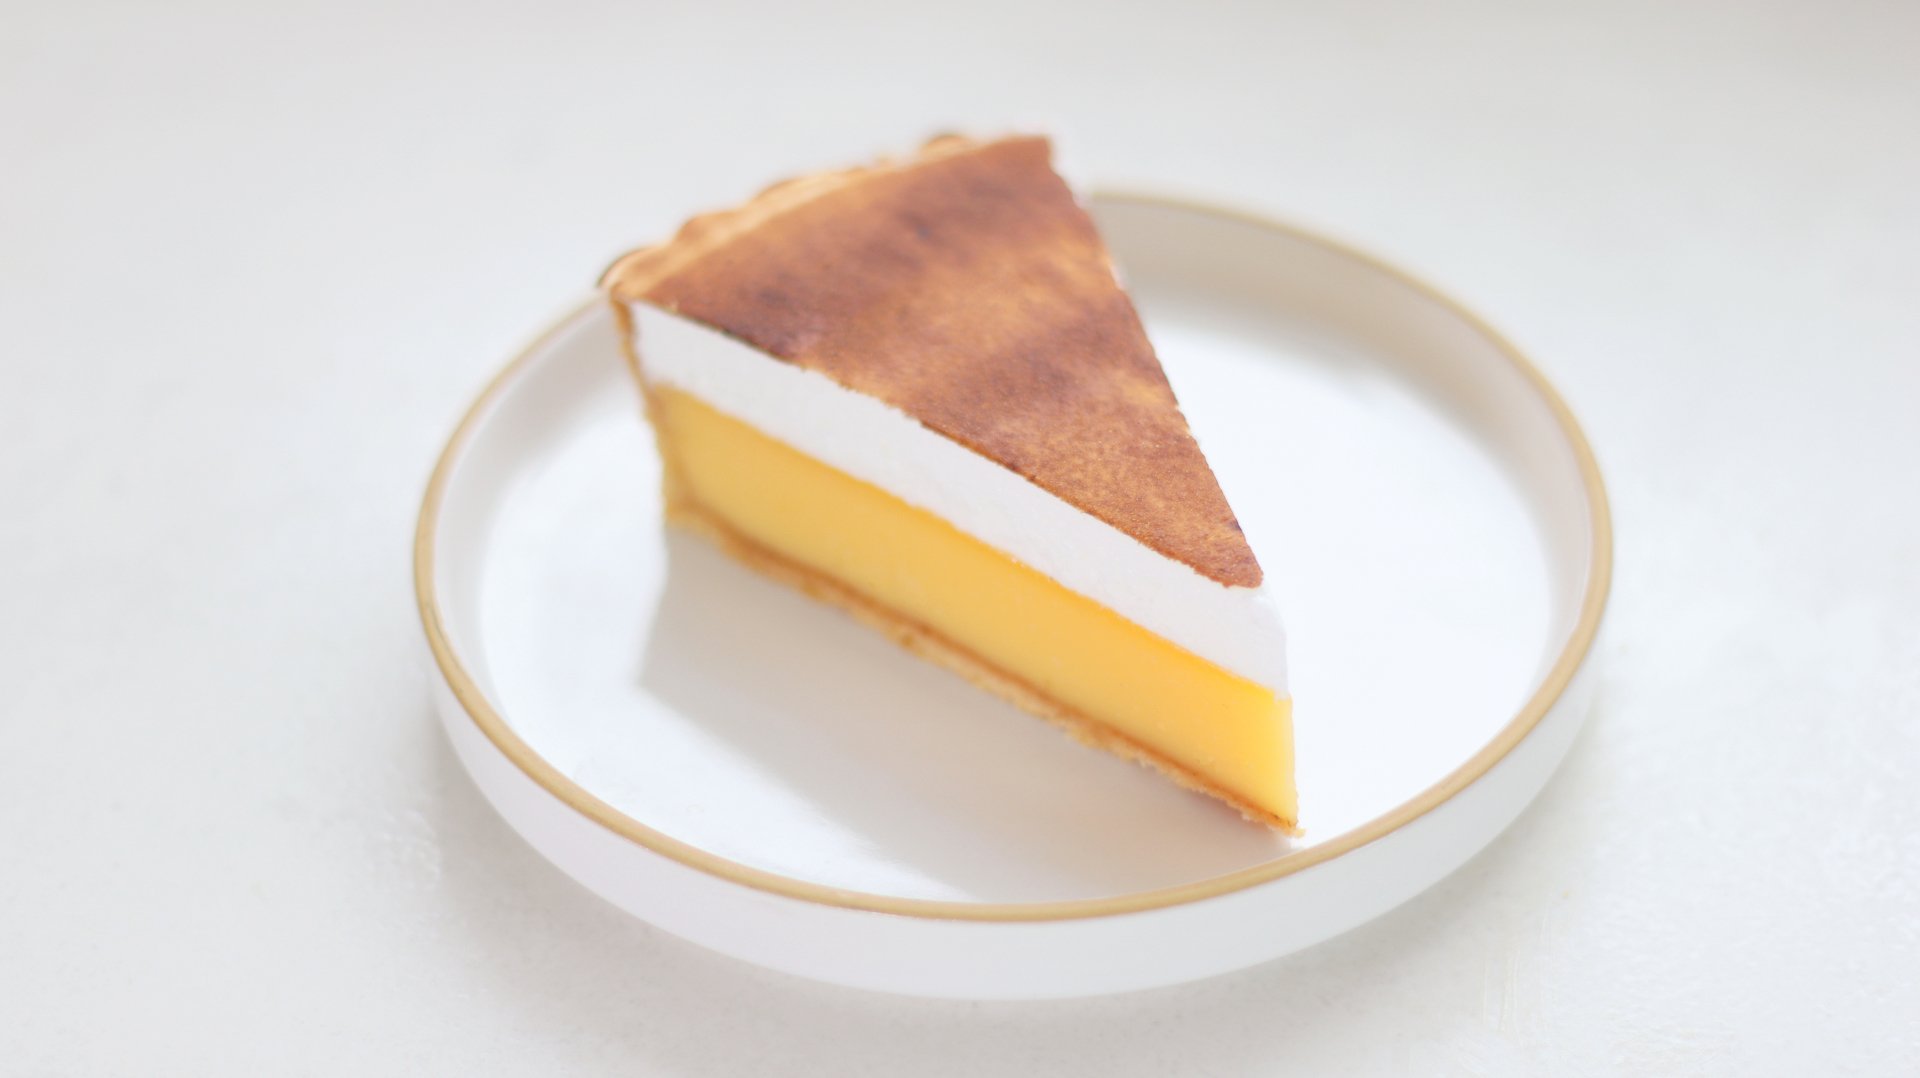
Lemon Meringue Tart
TIER 1
Lemon Meringue Tart
Lemon meringue tart is something I’ve been a bit hesitant to make before – I always thought there was way too much meringue, and it was overly sweet, so it was my mission to be proved wrong! The lemon filling is slightly richer than my Dad’s recipe, with more egg yolks which means it sets slightly firmer. We make a Swiss meringue for the topping, but with less sugar, which we press flat against the filling to create a more modern design.

1
9-INCH TART
Ingredients
Makes 1 9-inch tart
Lemon Sweet Pastry
100g Unsalted Butter, Cold & Cubed
70g Icing/Powdered Sugar, Sifted
Pinch of Fine Sea Salt
Zest ½ Lemon
50g Egg Yolk
200g Plain, All Purpose Flour
Egg Wash
40g Egg Yolk
10g Double/Heavy Cream
Lemon Filling
160g Whole Eggs
120g Egg Yolks
230g Caster/ White Sugar
200g Double/Heavy Cream
6g Lemon Zest
150g Lemon Juice
Swiss Meringue
100g Egg Whites
100g Caster/White Sugar
Special equipment
Stand mixer
9-inch fluted tart ring
Hand blender
Baking beans
Blow torch
Digital thermometer
Method
Lemon Sweet Pastry
1. Into the bowl of a stand mixer, add the butter, icing sugar, salt and lemon zest. With the paddle attachment, beat the mixture for 2-3 minutes, scraping it down a few times in between, until you have a smooth paste.
2. Add in the egg yolks, and beat again, until the mixture is evenly combined, you will need to scrape down the bowl a few times again.
3. Tip in the flour, and use a rubber spatula to scrape the bottom of the bowl to make sure the butter doesn’t get stuck. Scrape the sides, and then mix on a low speed until it pulls together to form a dough.
4. Scoop the dough out onto your work surface, and give it a quick knead just to bring it together. Shape it into a disc and warp it in clingfilm, before refrigerating for an hour or longer.
5. Once it’s chilled, remove it from the fridge and let it soften slightly at room temperature. The dough needs to be cold but flexible. If it is too cold when you roll it, it will crack.
6. Flour the dough and your rolling pin and applying even pressure, roll the dough out into a large, rough circle shape, around 3-5mm thick.
7. Working quickly, carefully lift this into a 23cm fluted tart ring on a baking tray. Use your fingers to press the dough into the side of the tin, then with the excess dough, fold it to create a thick rim around the outside of the tin. We will remove this excess later, but it will help to prevent the dough from shrinking as it bakes.
8. Dock the bottom of the pastry with a fork, and then freeze it for 30 minutes.
9. Preheat the oven to 175C Non-fan assisted (345F or 160C fan-assisted).
Lemon Filling
1. Into a large measuring jug, add the cream, sugar, eggs and egg yolks and blend until smooth.
2. Add in the lemon juice and zest, and blend again to combine, avoiding adding too many air bubbles.
3. Place a sheet of clingfilm on the surface, and refrigerate until needed.
Pastry Continued
1. Once the pastry has chilled, scrunch a large circle of parchment/baking paper up, then press it firmly into the tart. Fill it to the top with baking beans or rice.
2. Place it into the centre of the oven and bake for 25 minutes. Remove the parchment paper and beans, then bake for a further 5-10 minutes until it is a pale golden brown.
3. Whisk together the egg wash ingredients, then brush these all over the tart. Bake for a further 8-15 minutes, or until it is a deep golden colour.
4. As soon as it is out of the oven, use a serrated knife, holding it against the edge of the tin, and carefully trim off the excess pastry. Brush out any crumbs. Lower the oven temperature to 110C Non-fan assisted (230F or 95C fan-assisted).
5. Remove the lemon filling from the fridge and peel off the clingfilm. Scoop off any remaining bubbles with a spoon, then pour the mixture into a medium saucepan.
6. Place the pan onto a medium low heat and stir constantly until it reaches 40C/104F on a digital thermometer.
7. Immediately remove it from the heat and gently pour it through a sieve, back into a tall measuring jug.
8. Place the tart shell, on a tray, into the centre of the oven and pour the lemon filling in. Use a blow torch to pop any remaining bubbles.
9. Bake for around 55 minutes, or until the filling has just set when you gently wobble the tray.
10. Remove it from the oven and allow it to cool for 30 minutes at room temperature, before refrigerating for 1-2 hours.
Swiss Meringue
1. Into the bowl of a stand mixer (or a medium bowl if using an electric hand whisk), add the egg whites and sugar.
2. Place this over a pan of gently simmering water, whisking constantly until it reaches 65C/149F on a digital thermometer.
3. Immediately remove it from the heat, and place it onto a stand mixer fitted with the whisk attachment. Whisk for 5-7 minutes, until you have a medium stiff peak.
4. Remove the lemon tart from the fridge and with it still in the tin, spread the meringue over the top. Then using a large offset spatula, starting at one edge, press it firmly against the rim of the tin and drag it firmly across the tin, to smooth the top. You can do this a few times if needs be.
5. Use a blow torch to caramelise the meringue to an even golden brown colour. Alternatively place it under a hot grill, keeping a very very close eye on it.
6. Remove the tart from the tin and slice it with a hot knife to serve.
Shop the Equipment


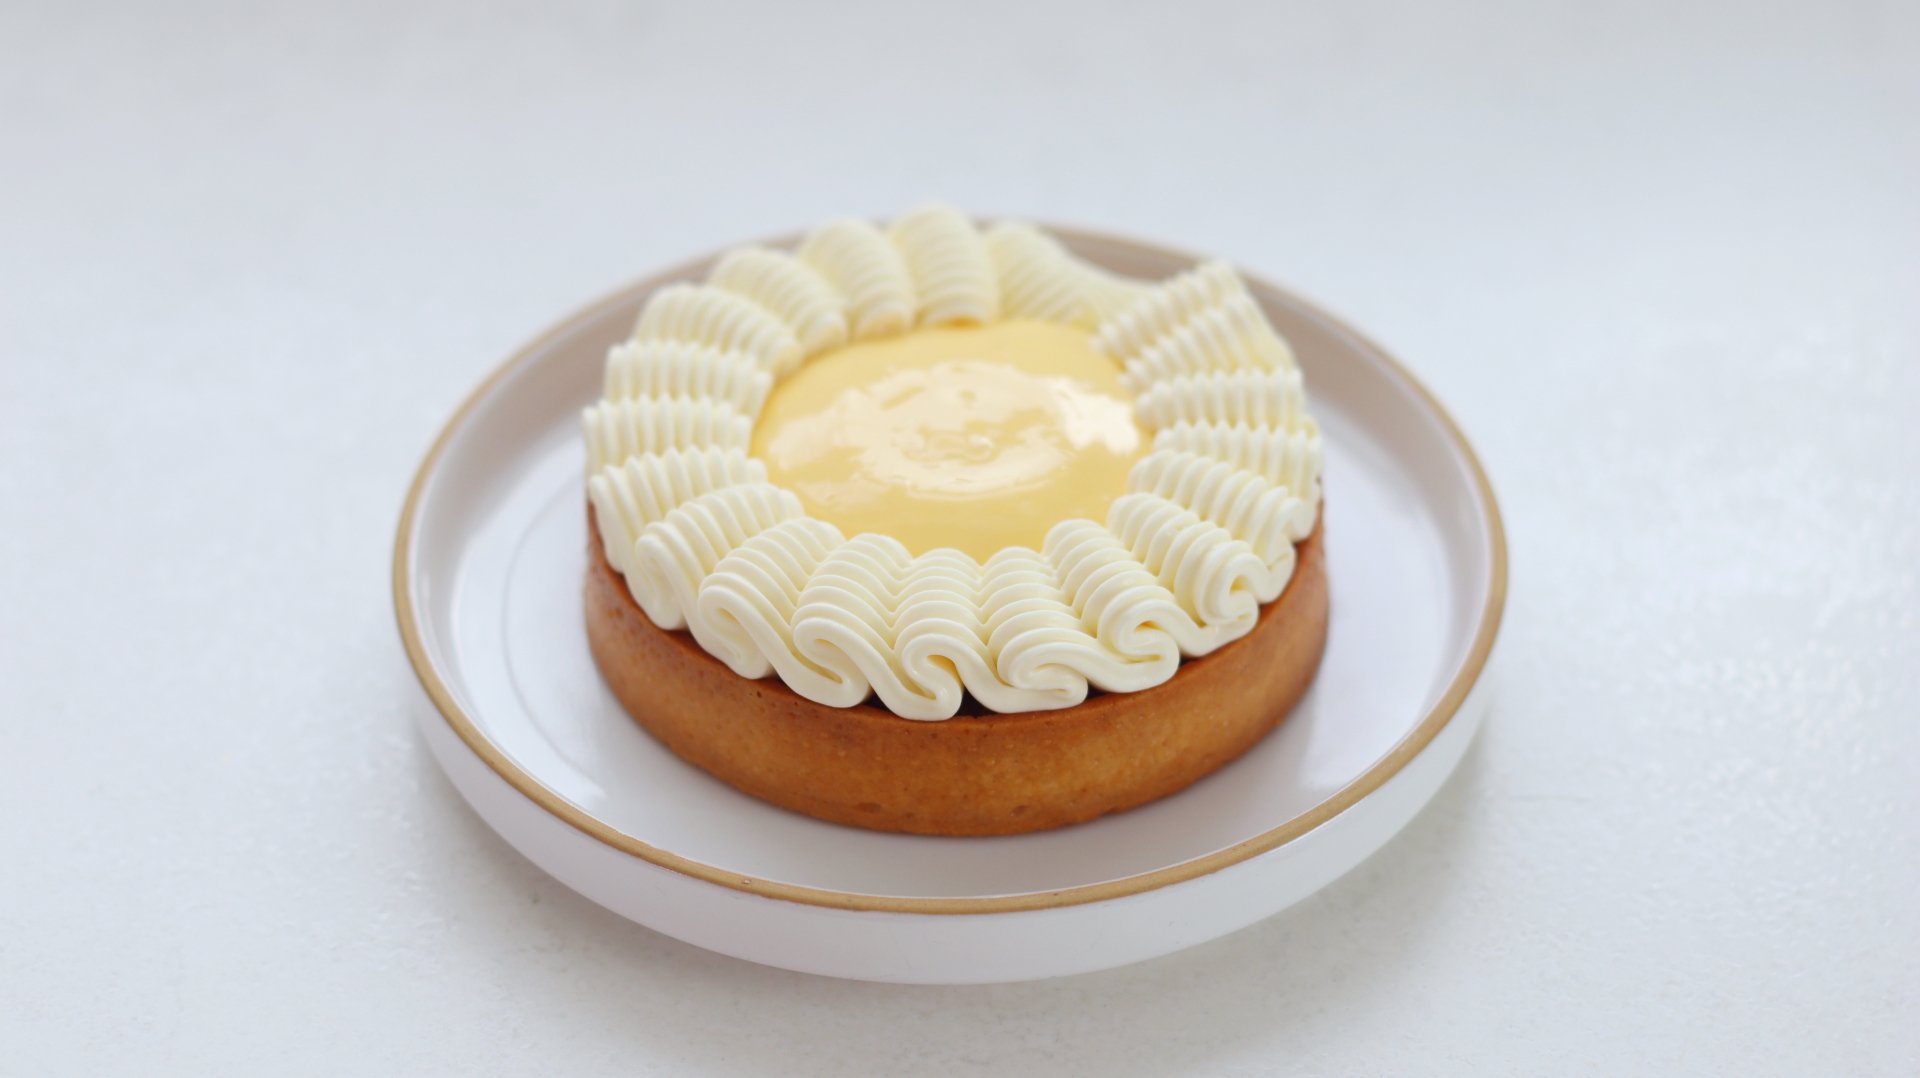
Lemon & White Chocolate Tarts
TIER 2
Lemon & White Chocolate Tart
For Tier 2, we use the same lemon filling as Tier 1, but instead of baking it we cook it like a curd. It sits on top of an almond mirliton, with a secret layer of zingy lemon confit, topped with a stunning white chocolate namelaka which is piped using a basket weave nozzle. Because we cook the lemon filling like a curd, it has a slightly softer texture, more like a cremeux which contrasts all the textures in the tart really well.
4
INDIVIDUAL TARTS
Ingredients
Makes 4 individual tarts
White Chocolate Namelaka
3g Powdered Gelatin (250 Bloom) + 18g Cold Water OR 1 Sheet of Leaf Gelatin
100g Whole Milk
10g Glucose or Honey
185g White Chocolate, Melted
200g Double/Heavy Cream, Cold
Lemon Confit
8g Lemon Zest
130g Lemon Juice
65g Caster/White Sugar
Lemon Sweet Pastry
100g Unsalted Butter, Cold & Cubed
70g Icing/Powdered Sugar, Sifted
Pinch of Fine Sea Salt
Zest ½ Lemon
50g Egg Yolk
200g Plain, All Purpose Flour
Egg Wash
40g Egg Yolk
10g Double/Heavy Cream
Lemon Filling
80g Whole Eggs
60g Egg Yolks
115g Caster/ White Sugar
100g Double/Heavy Cream
3g Lemon Zest
75g Lemon Juice
20g Unsalted Butter, Cold & Cubed (Optional)
Roasted Almond Mirliton
105g Unsalted Butter
85g Roasted Almond Powder
85g Icing/Powdered Sugar
110g Egg Whites
½ Fresh Vanilla Pod
Zest ½ Lemon
Special equipment
Hand blender
Stand mixer
2 silicon mats (optional)
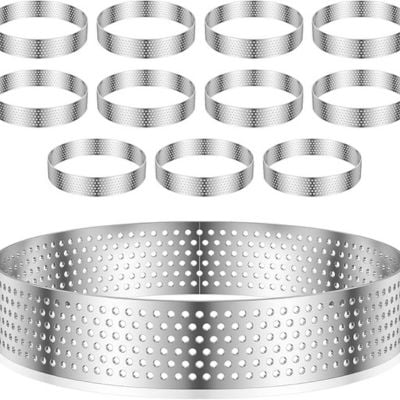
4 4-inch perforated tart rings
Multi-wheel pastry cutter (optional)
Digital thermometer
Piping bags
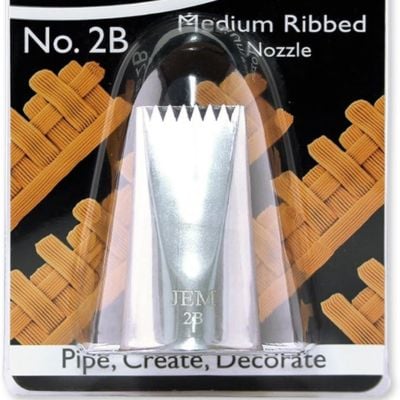
Basket weave nozzle
Rotating cake stand (optional)
Method
White Chocolate Namelaka
1. Into a small dish, add the powdered gelatin and cold water. Stir them together and allow it to bloom for 10 minutes at room temperature. If using leaf gelatin, soak this in a bowl of cold water.
2. Melt the white chocolate in a bowl over a pan of gently simmering water, and then set this to one side.
3. Meanwhile, add the milk and glucose/honey to a small saucepan. Stir it occasionally over a medium heat, until it is steaming and the glucose has dissolved.
4. Scoop in the bloom gelatin (or squeeze the excess water from the leaf gelatin and drop this in). Stir it together until the gelatin has completely dissolved.
5. Pour the hot milk mixture over the melted white chocolate in three parts, stirring in tight circles in the centre with a rubber spatula, to emulsify the mixture. Initially it will look slightly split but it will pull together.
6. Finally, pour in the cold cream and blend it with a hand blender, until smooth. Cover the surface with cling film and refrigerate overnight or a minimum of 6 hours.
Lemon Confit
1. Add the lemon zest into a small saucepan, and cover with cold water. Bring the mixture to the boil, then immediately pass it through a sieve. Repeat this two more times, to remove the bitterness from the zest.
2. Add the blanched zest, lemon juice and sugar into a saucepan, and note the total weight of the ingredients in the pan, on a digital scale.
3. Place the pan on a medium low heat, and simmer until the total weight of the pan has reduced by around 100g.
4. Pour the mixture into a small dish, covered with clingfilm and refrigerate overnight.
Lemon Sweet Pastry
1. Into the bowl of a stand mixer, add the butter, icing sugar, salt and lemon zest. With the paddle attachment, beat the mixture for 2-3 minutes, scraping it down a few times in between, until you have a smooth paste.
2. Add in the egg yolks, and beat again, until the mixture is evenly combined, you will need to scrape down the bowl a few times again.
3. Tip in the flour, and use a rubber spatula to scrape the bottom of the bowl to make sure the butter doesn’t get stuck. Scrape the sides, and then mix on a low speed until it pulls together to form a dough.
4. Scoop the dough out onto your work surface, and give it a quick knead just to bring it together.
5. Place the dough onto a large silicon mat. Place a second silicon mat on top and roll the mixture into a rough circle, getting it as thin as possible (around 3-5mm). If you don’t have silicon mats you can roll the dough between parchment paper but it will be very difficult as it will slip and slide all over the place!
6. Once you have a rough circle of dough, place it into the freezer for 30m.
7. Once chilled, remove it from the freezer and working quickly, peel the silicon mat off of the dough. Take 2 of the 4” perforated ring molds (very lightly greased with soft butter) and press these into the dough.
8. Lift them up and place them onto a perforated tray lined with a perforated baking mat.
9. Using a multi-wheel pastry cutter (or a ruler and a sharp knife) cut 2 long strips of dough, ensuring the width is slightly more than the height of your tart shells. Take the strip of dough and place it inside the tart ring, using your fingers to carefully press the walls against the base of the pastry. If at any point you feel the pastry is getting too warm, place it in the freezer for 5-10 minutes then carry on. Place the tarts into the freezer for 30 minutes.
10. Take the spare dough and form it back into a dough ball. Repeat steps 5-8 to make two more tart shells.
11. Preheat the oven to 175C/345F Non-fan assisted (160C fan-assisted).
12. Use a knife to trim the excess pastry from the tart rings so it is flush, then place the tarts into the centre of the oven for around 20 minutes, or until they are a light golden brown colour.
13. Remove them from the oven and allow them to cool for 5 minutes before carefully removing the tart rings.
14. Mix the egg wash ingredients together and use a pastry brush to paint this over the entire surface of the tart shells. Place them back into the oven and bake for a further 5-10 minutes, until the tarts are a deep golden brown colour. Set aside to cool.
Lemon Filling
1. Into a medium saucepan, add all of the ingredients for the lemon filling, excluding the butter.
2. Whisk it constantly over a medium heat, until it reaches a temperature of 82-84C (179-183F) on a digital thermometer.
3. Immediately remove it from the heat and pass it through a sieve, into a tall measuring jug.
4. Add in the cold butter and blend until smooth with a hand blender.
5. Pour the mixture onto a baking tray and cover the surface with clingfilm. Refrigerate it for 1-2 hours (or longer) until it is a thicker, more pipeable consistency.
Almond Mirliton
1. Into a small saucepan, add the butter and over a medium heat, until it has melted. Remove it from the heat and allow to cool for 5 minutes.
2. Add the remaining ingredients into a medium bowl and whisk to combine, before pouring in the melted butter and whisking to combine.
3. Cover the surface of the mixture with cling film and refrigerate for 1 hour. Meanwhile, set the oven to 160C/320F non-fan assisted (145C fan-assisted).
4. Once it has cooled, pipe the mixture into the tart shells, filling them up just above ¾ full. If you want you can also sprinkle some toasted flaked almonds on.
5. Place the tarts into the centre of the oven and bake for 20-25 minutes, or until it is a golden colour on top. Allow to cool for 30 minutes at room temperature.
Assembly
1. Remove the lemon confit from the fridge which should now be a thicker, marmalade like consistency.
2. Pipe a few dollops onto the top of the cooled tart, and spread this to the edges with the back of a spoon. It is quite sharp so you don’t need to overload the tart.
3. Remove the white chocolate namelaka from the fridge and add into the bowl of a stand mixer fitted with a whisk attachment. Whisk on a medium speed until the mixture holds a medium stiff peak.
4. Add it into a piping bag fitted with a basket weave nozzle.
5. Place the tart into the centre of a rotating cake stand and holding the piping bag at about a 60 degree angle, apply even pressure, then push the nozzle slightly forward to create an initial ruffle of buttercream, before pulling it back to fold the buttercream over itself. Continue this motion in one direction without stopping so the folds connect smoothly, creating an even, continuous ruffle/weave. Because of the type of nozzle it is a little difficult to join the lines up seamlessly, so you just have to neatly pull the piping bag away to create a tail.
6. Remove the lemon filling from the fridge and add this into a piping bag, pipe it into the centre of the tart, filling it just below the rim of the cream.
7. They are now ready to serve.
Shop the Equipment




Lemon & Olive Oil Travel Cake
TIER 2
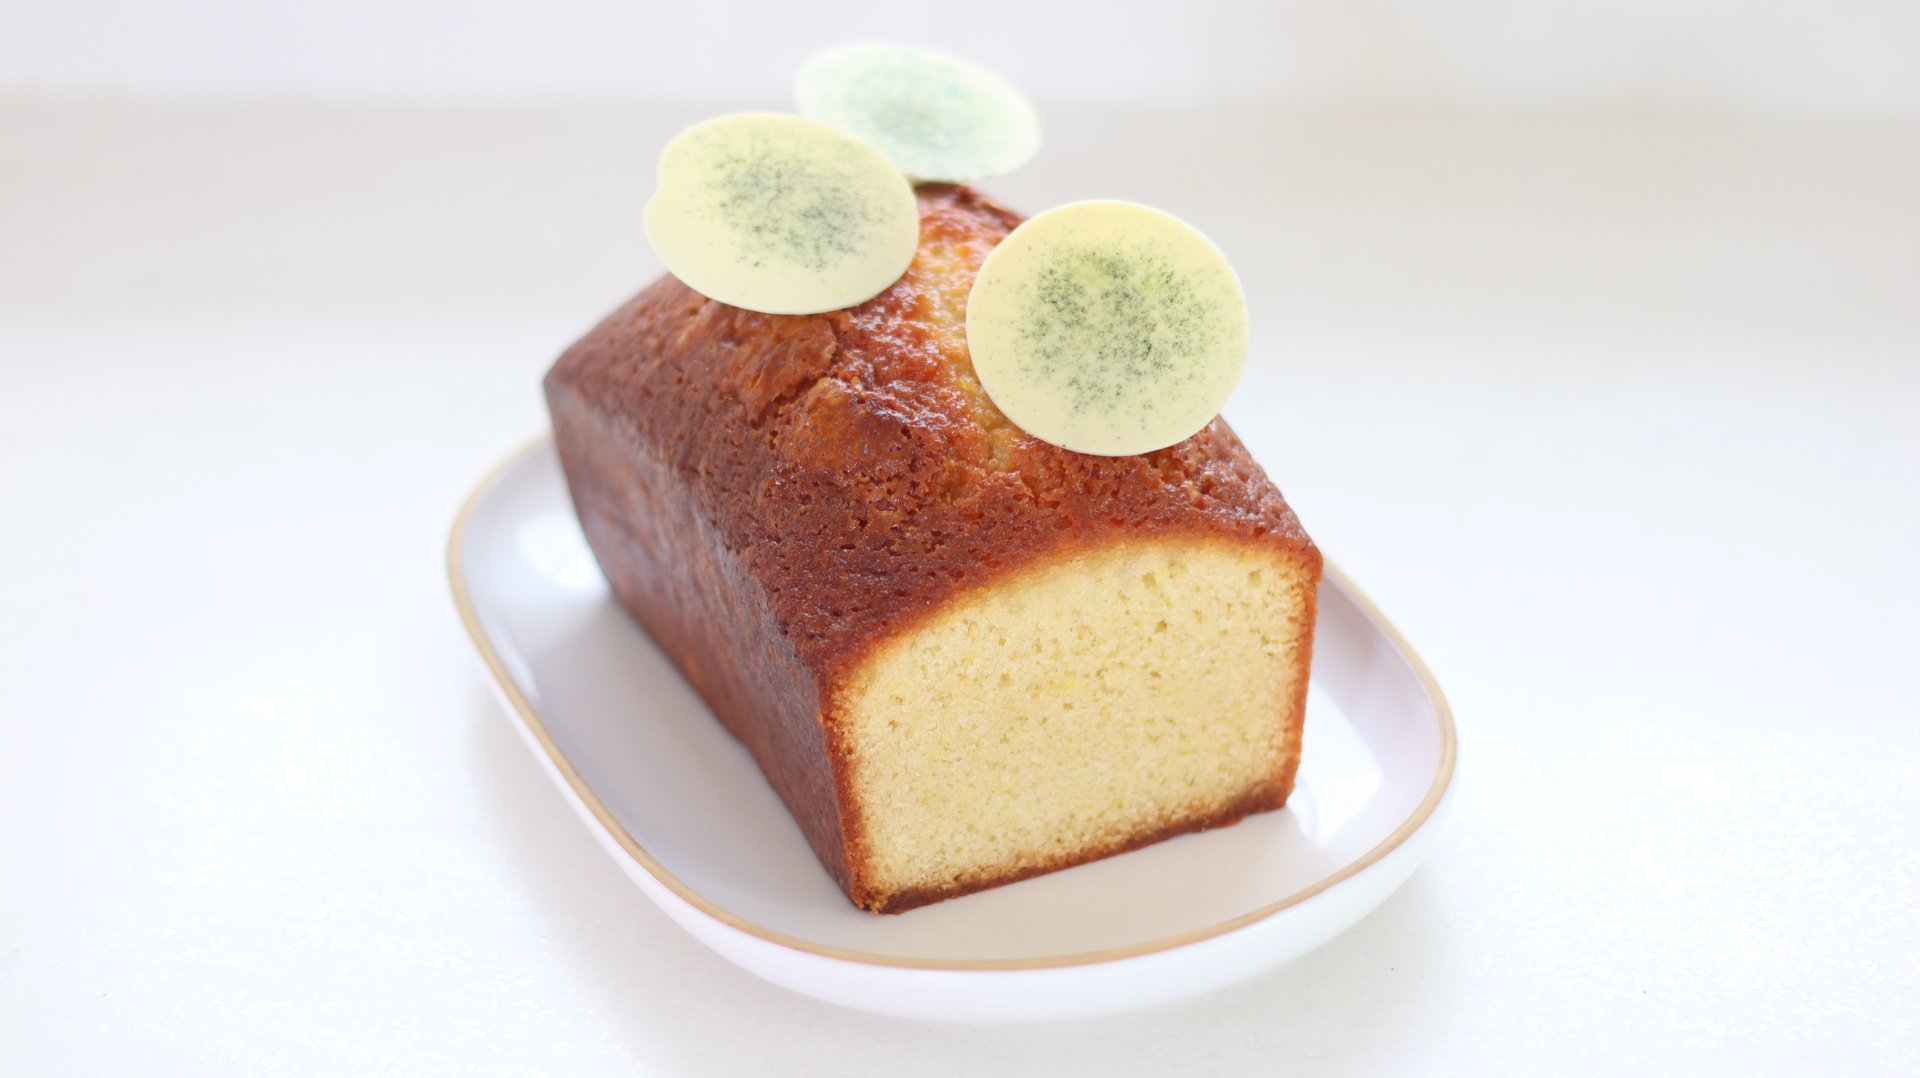
Lemon & Olive Oil Travel Cake
Now I usually just stick to olive oil in my focaccia, but it really works in this cake, adding a subtle fragrance that works so well with the citrus. The cake is so soft and, in my opinion, tastes even better after a few days! The cake batter is simple to pull together, but we’re elevating it with a professional white chocolate decoration that you’d find in most Parisian bakeries. If you’re new to tempering chocolate, check out my video from the archives.
1
2lb CAKE
Ingredients
Makes 1 2lb Cake
Lemon & Olive Oil Sponge
300g Caster Sugar
Zest 3 Lemons (4g)
200g Whole Eggs
140g Double/Heavy Cream
240g Self Raising Flour, Sifted (or 240g Plain/All Purpose Flour with 2 Tsp Baking Powder)
2g Fine Sea Salt
80g Olive Oil (or a neutral oil)
Soft Butter, To Pipe
Lemon Soaking Syrup
60g Lemon Juice
60g Water
120g Caster/White Sugar
White Chocolate Decoration
150g Tempered White Chocolate
Green Food Colour Powder
Lemon Whipped Ganache
350g Double/Heavy Cream
70g White Chocolate, Chopped
3g Powdered Gelatin (250 Bloom) + 18g Cold Water (or 1 Sheet of Leaf Gelatin, any strength)
Zest ½ Lemon
Special equipment
2lb loaf tin
Stand mixer
Piping bags
Large round tip nozzle
Hand blender
Acetate
Method
1. Preheat the oven to 165C/330F Non-fan Assisted (150C Fan). Lightly grease a 2lb/900g loaf tin with butter and coat the sides and base with parchment paper. Set to one side.
2. Into the bowl of a stand mixer, add the sugar and lemon zest. Rub these together for a minute to release the citrus oils.
3. Add the eggs on top and whisk for 2 minutes on a medium speed. Then pour in the cream and mix just to combine.
4. Scrape any lemon zest off the whisk, back into the bowl, then add in the sifted flour & salt on top and whisk on a low speed just until the dry ingredients have been incorporated.
5. Finally, pour in the olive oil and whisk again just until combined and there are no streaks of oil.
6. Pour the batter into the tin, then add some soft butter to a piping bag and pipe a very thin line, lengthways down the centre of the cake.
7. Place it into the centre of the oven and bake for 75-80 minutes, or until a skewer inserted into the centre comes out clean.
8. While the cake is baking, prepare the sugar syrup by placing all of the ingredients into a small saucepan and bring to the boil. Set to one side.
9. Remove the cake from the oven and immediately tip it out of the tin onto a wire rack with a tray underneath.
10. Pour the syrup all over the cake, then immediately wrap it tightly in clingfilm and refrigerate overnight.
11. For the lemon cream, add the powdered gelatin into a small bowl and pour the cold water over the top. If using a gelatin sheet, soak this in a bowl of cold water. Let this sit for 10 minutes.
12. Add the white chocolate into a tall measuring jug and set to one side.
13. Add 250g of the cream to a small saucepan, along with the lemon zest. Place this over a medium heat until it is steaming.
14. Remove it from the heat and pour this over the white chocolate, and scoop the bloomed gelatin on top (or squeeze the water out of the leaf gelatin and add this in). Let this sit for 2 minutes.
15. Blend with a hand blender until smooth. Then pour in the remaining 100g of cold cream and blend again. Transfer the mixture to a bowl, cover the surface with clingfilm and then place it in the refrigerator, ideally overnight.
16. The next day, remove the cake from the fridge and allow it to come to room temperature for an hour.
17. Prepare the tempered white chocolate and add this into a small piping bag. You only need a small amount of white chocolate for the decorations, but if you are tempering the chocolate by hand, it is easier to temper a larger quantity (like 300-400g). With the leftover tempered white chocolate, just pipe it into small discs and then once they are set, add them back into your bag of white chocolate to use again another time!
18. Onto a long strip of acetate, dust a series of very small patches of green food colour powder. Pipe a small dollop of tempered white chocolate on top of each patch of colour powder, about 1” wide.
19. Place a second strip of acetate on top, and then use the back of a cup or something flat and round, and press it gently until the chocolate forms a disc shape.
20. Lift the acetate onto a baking tray and place it into the fridge for 10 minutes. You may need to put another baking tray gently on top just to stop the chocolate from curling up as it sets (but this doesn’t really matter!)
21. Add the lemon whipped ganache into the bowl of a stand mixer (or a large bowl if you are using an electric hand mixer). Whisk on a medium speed until it reaches a medium stiff peak. Add the mixture into a piping bag fitted with a large round tip nozzle.
22. Pipe a few dollops of the cream over the top of the cake, then remove your chocolate discs from the fridge, peeling off the acetate to reveal the discs.
23. Gently press them onto the cream. The cake is now ready to serve. You can serve slices with more of the remaining cream.
Shop the Equipment


Lemon Meringue 'Longboys'
TIER 2
Lemon Meringue ‘Longboys’
In TIer 2 we make the same dough as Tier 1, we just add a touch of lemon zest to give them a bit of extra flavour. Then, inspired by Longboys Doughnuts in the UK, we use an oblong mould to create a different shape, coat them in lemon sugar, then top them with a lemon crème pâtissière, Italian meringue and candied lemon peel. Don’t fancy lemon? Try the chocolate crème pâtissière and crumble from my eclair recipe!
8
'LONGBOYS'
Ingredients
Makes 8-9 ‘Longboys’
Donut Dough
550g Strong White Bread Flour
125g Whole Milk
7g Instant Yeast
200g Whole Eggs
12g Fine Sea Salt
125g Unsalted Butter, Cold + Small Cubes
75g Caster/Granulated Sugar
20g Powdered Milk (Full Fat)
10g Vanilla Extract
Zest 1 Lemon
Lemon Crème Pâtissière
300g Double/Heavy Cream
200g Whole Milk
1 Fresh Vanilla Pod
85g Caster sugar
100g Egg Yolks
40g Cornstarch/Cornflour
Zest of 2 Lemons
Candied Lemon Peel
Zest of 1 Unwaxed Lemon
50g Caster Sugar
50g Water
Lemon Sugar
150g Caster/Granulated Sugar
Zest 1 Lemon
Italian Meringue
110g Egg Whites
70g Water
300g Caster Sugar
3 Litres of Vegetable Oil For Frying
Special equipment
Stand mixer
Oil spray (optional)
Oblong cookie cutter (I used a 14.5cm x 3.5cm cutter)
Deep fat fryer
Digital thermometer
Piping bags
St Honore nozzle
Method
Donut Dough
1. Into the bowl of a stand mixer, add the wet ingredients, followed by the dry. Attach the dough hook and mix it on a medium speed for 10 minutes, scraping down the bowl every 3-4 minutes.
2. After 10 minutes, turn the mixer off and let the dough rest for 5 minutes. This will relax the gluten and make the next part of the mixing easier!
3. Turn the mixer back on, and knead for a further 10-12 minutes. The dough should start to come away from the sides of the bowl but there will still be a few bits stuck to the side.
4. Remove it from the mixer and lift the dough onto your work surface. Give it a quick knead and shape it into a nice tight ball. The dough should feel smooth and pass the windowpane test when you stretch a small piece of the dough.
5. Lift it into a lightly oiled bowl, then lightly spray the top of the dough with an oil spray and cover the surface directly with cling film. Cover the bowl with a sheet of cling film too and refrigerate the dough overnight (12-18 hours). This will make it much easier to work with.
6. Before you are ready to work with the dough, prep a baking tray by cutting 8 rectangles of parchment paper and lightly oiling them before placing them on the tray. This will make it easier to transfer the donuts to the fryer.
7. The next day remove the chilled dough from the fridge. Very lightly flour your work surface and lift the dough on. Lightly flour the top of the dough and a rolling pin, and roll the dough out, the shape doesn’t matter, but you want it to be around 12-15mm thick (0.5”). Ensure there is a little flour underneath the dough once you’ve finished rolling otherwise when you go to remove the cut donuts they will stick to the table.
8. Take the oblong cookie cutter and dip it in a bowl of flour to make sure it doesn’t stick to the dough. Press the cookie cutter into the dough to cut the shapes, and lift them onto the sheets of parchment you cut earlier.
9. Very lightly oil the top of the donuts with an oil spray, and then cover the entire tray with a sheet of cling film and allow the donuts to rise for 2-3 hours at room temperature. In warmer weather, 2 hours should be fine, but when it is colder it will be closer to 3 hours. The donuts should look puffier and will have increased in volume when they are done.
Lemon Crème Pâtissière
1. It is best to make this ahead of rolling out your donuts so that it has enough time to chill.
2. Add the sugar into a bowl along with the lemon zest and briefly rub them together to release some of those citrus oils.
3. Add the egg yolks and cornflour and whisk the mixture together until it is thick, then set it to one side.
4. In the meantime, scrape the beans from the fresh vanilla pod and add these into a medium saucepan along with the milk & cream.
5. Place the pan over a medium heat and stir occasionally until the mixture is steaming.
6. Once hot, slowly pour the mixture over the egg yolks, and whisk until they are combined. It is important to do this slowly to avoid scrambling the eggs.
7. Add the entire mixture back into the pan and place it on a medium heat.
8. Whisk continuously until the mixture thickens and begins to bubble. Once it bubbles, cook for a further minute, then remove it from the heat and pass it through a sieve into another bowl. At this point it’s likely your mixture will have split a little, so just add a splash of water (2 tsp) and blend with a hand blender and it will pull it back together.
9. Place a sheet of cling film directly on the surface and refrigerate until ready to use (3-4 hours).
Candied Lemon Peel
1. Use a vegetable peeler to peel the lemon into strips.
2. With a sharp knife, cut the peel lengthways to create thin strips.
3. Into a small saucepan, add the lemon strips, sugar and water. Place it over a medium low heat and gently simmer for around 10 minutes. The strips of lemon should appear slightly translucent and the liquid should thicken.
4. Use some tongs to remove them from the pan and place them on a baking sheet lined with parchment and allow to dry completely. About half an hour.
Lemon Sugar
1. Add the sugar into a bowl along with the lemon zest and briefly rub them together to release some of those citrus oils.
2. Set the bowl to one side.
Frying
1. When the donuts are close to being proofed, add the oil to your deep fat fryer (or a large pan) and heat it to 170C/340F. A deep-fat fryer is ideal here as it is able to regulate the temperature at a much more consistent level vs frying in a pan.
2. When the donuts are ready, drop 1 into the oil, and slowly peel off the sheet of parchment paper.
3. Fry for 90 seconds, flip, fry for 60 seconds, flip, fry for 15 seconds, flip, fry for 15 seconds. Nb. Due to the shape of these donuts they’re likely to flip over by themselves in the oil, so I’d recommend holding them in place lightly with some tongs so you can ensure an even bake on each side. I’ve also increased the fry time just slightly from the video as I found slightly longer was better!
4. Remove your donut and place it on a wire rack, allowing any excess oil to drip off. After a minute, and while the donuts are still warm, toss the donut in the bowl of lemon sugar then place back on your wire rack.
5. Repeat with the remaining donuts.
Italian Meringue
1. Into a small saucepan, add the water, then pour the sugar on top. Place it over a medium heat
2. Meanwhile, add the egg whites into a stand mixer fitted with a whisk attachment. Whisk it on a medium low speed.
3. Once the water and sugar mixture has started to boil, cook it until it reaches a temperature of 118C/244F on a digital thermometer. By this point, the egg whites should be bubbly and frothy.
4. Immediately remove the sugar syrup from the heat, increase the stand mixer speed to medium high, and slowly drizzle the sugar syrup in, aiming to pour it in between the whisk and the bowl. Just make sure not to pour it on the whisk or it will splatter everywhere.
5. Continue to whisk for 6-7 minutes, or until the bowl is cool to the touch and stiff peaks form on the meringue.
6. Add the meringue to a piping bag fitted with a St. Honore nozzle.
Assembly
1. Remove your lemon crème pâtissière from the fridge and whisk it for 15-20 seconds to loosen it a little. Add it to a piping bag.
2. Take a donut and cut it lengthways down the middle. Pipe in some lemon creme patissiere until it reaches the top of the donut, then smooth it with a palette knife. Repeat with the rest of the donuts.
3. Next, take your meringue and in a zig zag motion, pipe it down the middle of your donut. Then, using a blow torch, lightly torch the top of your meringue until it’s slightly brown. Repeat with the rest of the donuts.
4. Garnish with your candied lemon peel.
Shop the Equipment


Basic Lemon Sorbet
TIER 1
Basic Lemon Sorbet
In Tier 1 we walk through the fundamentals of a sorbet, and make a basic sorbet without getting too technical! This is the perfect palate cleanser – quite a tart lemon flavour that’s so refreshing. As we don’t add any stabiliser in this recipe, this sorbet is best served within 24 hours to prevent the sugar from recrystallising. It’s a simple and delicious recipe to get you warmed up for Tier 2!
1
TUB (APPROX. 300G)
Ingredients
Makes 1 Tub (approx. 300g)
145g Caster Sugar
55g Dextrose
435g Water
345g Fresh Lemon Juice
Special equipment
Hand blender
Ice-cream machine
Method
1. Pour the cold water into a saucepan and add the sugar and dextrose. Place over a medium heat and bring it to the boil whilst whisking. Boil for a minute then take the sugar syrup off the heat and leave to cool for approximately 15 minutes (until cool to the touch).
2. Add the mixture to a bowl and pour in the lemon juice (it’s a good idea to sieve this to avoid adding any pips/pulp). Blend with a hand blender to combine. Cover the surface with cling film then put the mixture in the fridge for 4 hours. You can leave this in the fridge for longer, but 4 hours is the ideal maturation time.
3. After 4 hours, pour the mixture into your ice cream machine and churn for 20-30 minutes until it’s a thick, sorbet-like consistency (yours may take longer depending on your machine).
4. Transfer the sorbet into a container and freeze for 1-2 hours before serving.
Shop the Equipment


Lemon ‘Babka’ Bundt Cakes
TIER 1
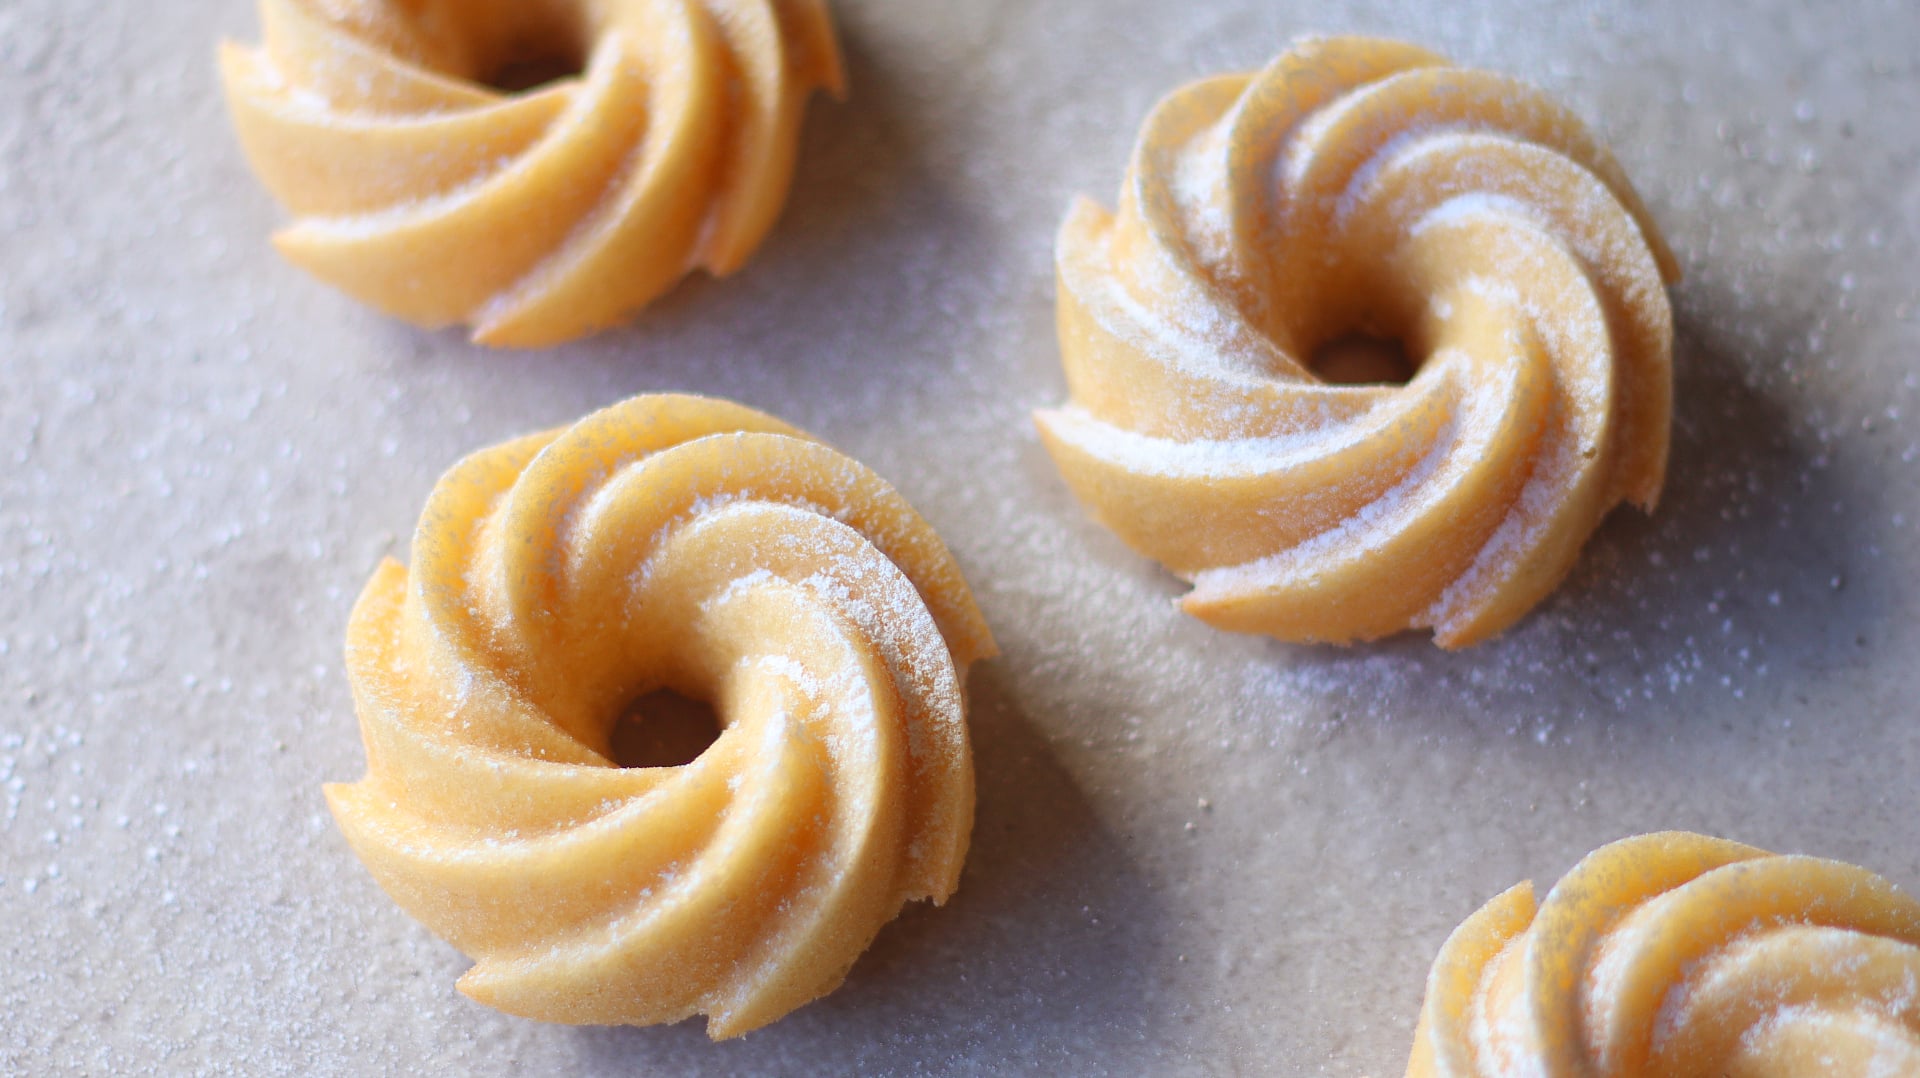
Lemon ‘Babka’ Bundt Cakes
This recipe is my take on a non-yeasted Polish Babka Bundt. It’s a simple lemon cake recipe that’s super soft, covered in a lemon syrup and finished with a lemon sugar. I’ve gone for these beautiful miniature bundts, but if you don’t have a similar tin you can use a muffin tin!
6
INDIVIDUAL BUNDT CAKES
Ingredients
Makes 6 Individual Bundt Cakes
For the lemon sugar
Peel of 4 Large Lemons (60g)
200g Caster/Granulated Sugar
*This will make more than you need but it can be stored in an airtight container – this will ensure the lemon peel doesn’t go bad.
For the lemon cake
Zest 1 Lemon (2g)
125g Caster/Granulated Sugar
100g Plain/All-Purpose Flour
5g Baking Powder
2g Salt
100g Ground Almonds
200g Whole Eggs
50g Vegetable Oil
30g Lemon Juice
Soft Unsalted Butter + Flour To Coat
For the lemon syrup
100g Sugar
50g Lemon Juice
50g Water
Special equipment
Stand Mixer
Blender
4 Cup – 6 Cavity Mini Bundt Tin
Method
Lemon Sugar
1. Preheat the oven to 80C/175F Non- Fan Assisted.
2. Peel the lemons using a vegetable peeler – you should get roughly 60g of lemon peel.
3. Place the lemon peels onto a baking tray lined with a silicon mat.
4. Place the lemon peel in the oven to dry them out, it will take 1-1.5 hours. They should look shrivelled once done.
5. Once completely dry to the touch, remove them from the oven and allow them to cool for 30 minutes.
6. Into a blender, add the sugar and dried lemon peels. Blend on high speed for 15-20 seconds, or until you have a fine, fragrant powder with no large lumps of lemon skin.
7. Add the mixture into an airtight container and set it to one side.
Lemon Cake
1. Preheat the oven to 180C/355F Non-Fan Assisted. Take soft butter (not melted), and use a pastry brush to brush the inside of the bundt tin cavities to ensure an even coating. Over the top of the tins, sieve over a few tablespoons of plain/all-purpose flour in each cavity, and shake it around the tin to coat. Tap out the excess and set the tin to one side.
2. In a medium bowl, add the sugar and the lemon zest. Massage the zest with your fingertips into the sugar to release the citrus oils.
3. Into a medium bowl, sift together the flour, baking powder and salt. Whisk it together to combine, then whisk in the ground almonds. Set this mixture aside.
4. In a large bowl, add the eggs and lemon sugar. Using an electric hand mixer (or a stand mixer), whisk on a medium speed for 3-4 minutes until the mixture is thick, pale and fluffy.
5. Pour in the oil, along with the lemon juice and whisk by hand to incorporate it, ensuring to catch any ingredients that may be at the bottom of the bowl.
6. Tip in the sifted dry ingredients and use a hand whisk again to combine until there are no more dry bits.
7. Scoop the batter into the cavities of the bundt tin, filling them up about ⅘ (75g per cavity if you’re using the same sized Bundt tin as me).
8. Bake the cakes for 18-20 minutes, until a skewer comes out clean. Whilst baking, make the Lemon Syrup.
9. In a medium saucepan over a medium heat, mix together the sugar, water and lemon juice and bring to a gentle simmer. Once simmering, take off the heat and leave to cool whilst the cakes continue to bake.
10. Once the cakes have baked and a skewer comes out clean, let them cool in the tin for 5 minutes, then place a wire rack on top before carefully flipping them over to release the cakes. Pour over the lemon syrup.
11. The cakes can be eaten warm or allowed to cool. Before serving, take the lemon sugar you made earlier and place it into a fine mesh sieve, and gently dust it over the top of the cake. The extra sweetness elevates the flavour of the cake!
Shop the Equipment


Lemon Meringue Pavlova
TIER 2
Lemon Meringue Pavlova
4
INDIVIDUAL PAVLOVAS
Ingredients
Makes 4 individual pavlovas
French Meringue
240g Sugar
120g Egg Whites
Lemon Cream
3 Large Eggs
Zest of 1 Lemon
70g Lemon Juice
110g Sugar
215g Unsalted Butter, Room Temperature
Vanilla Chantilly
200g Double/Heavy Cream
½ Tsp Vanilla Paste
1 Tsp Sugar
50g Mascarpone (Optional)
Italian Meringue
55g Egg Whites
30g Water
150g Sugar
Special equipment
Stand Mixer
Silicon Baking Mats
Piping Bags
Large Round Tip Nozzle
Digital Thermometer
Digital Thermometer
Blow Torch
Method
Lemon Cream
1. Into a large bowl, add the eggs, sugar, lemon juice and lemon zest.
-
- 3 Large Eggs
- Zest of 1 Lemon
- 70g Lemon Juice
- 110g Sugar
2. Place this over a pan of gently simmering water and whisk constantly. Keep whisking until the mixture has thickened. Be careful not to overcook the mixture and scramble the eggs.
3. Once the mixture has thickened, immediately pour it through a sieve onto another bowl or a tall jug.
4. Using a hand blender, blend the mixture, adding a few chunks of butter each time. Keep blending until the butter is fully incorporated and the mixture is smooth.
-
- 215g Soft, Unsalted Butter
5. Cover the surface with a sheet of cling film and refrigerate overnight.
French Meringue
1. Start by pouring your sugar onto a tray, and placing it into a preheated oven, at 175C/345F for 5 minutes.
-
- 240g Sugar
2. While the sugar is heating up, add the egg whites into the bowl of a stand mixer and mix on a low speed. You are looking for the egg whites to have small bubbles and be frothy once you start adding the hot sugar.
-
- 120g Egg Whites
3. Remove the sugar from the oven (and lower the temperature to 90C/195F) and by this point your egg whites should be ready – increase the speed to medium/high, and add in the sugar, 1 tbsp at a time, waiting about 10s between each addition of sugar.
4. Once you have added all the sugar, keep whisking for a further 5m, until you have a nice stiff peak to your meringue.
5. Add the mixture into a piping bag fitted with a round tip nozzle.
6. Onto a baking tray lined with a silicon mat, start by piping a small spiral, about 2.5” wide. Then starting from the outside of the spiral, pipe a dollop of meringue, then release the pressure, and swipe the dollop towards the centre.
7. Repeat that around the entire spiral.
8. You should be able to get 4 meringue nests in total.
9. Place the meringues into the oven, and bake for 1h40m. Then turn the oven off and open the door slightly. Allow them to cool in there for 30 minutes.
Vanilla Chantilly
1. Add all of the ingredients to a bowl and whisk with a hand whisk until you have a medium peak.
-
- 200g Double/Heavy Cream
- ½ Tsp Vanilla Paste
- 1 Tsp Sugar
- 50g Mascarpone (Optional)
Assembly Part 1
1. Take the cooled meringue nests, and scoop a spoonful of the chantilly into the centre.
2. Use a spatula just to spread it out into a thin layer.
3. In the meantime, add the lemon cream to a piping bag fitted with a round tip nozzle. There’s no need to whisk it beforehand as you want it to be quite firm when you pipe it.
4. In the same motion that you piped the meringue, pipe dollops of the lemon cream onto the meringue nest and swipe these into the centre. Set these to one side while you make the meringue.
Italian Meringue
1. Into the bowl of a stand mixer, add the egg whites and begin whisking on a low speed – note this is quite a small amount of egg whites so you might need to start whisking them by hand to thicken them slightly before adding them into your mixer otherwise the whisk attachment may not catch the egg whites.
-
- 55g Egg Whites
2. While that is whisking, add the water and sugar to a small saucepan. Place it on a medium heat. Cook the sugar until it reaches a temperature of 118C/244F.
-
- 150g Sugar
- 30g Water
3. By this point your egg whites should be quite frothy and thick – immediately remove the pan from the heat, and slowly pour the hot syrup over the egg whites, whisking on a high speed. Be careful not to pour the hot syrup over the whisk itself or it will splash everywhere.
4. Continue to whisk for 7 minutes or until the bowl feels cool to the touch and the meringue reaches a stiff peak.
5. Add the meringue to a piping bag fitted with a smaller round tip nozzle.
6. Pipe little kisses over the top of the lemon cream, then using a blow torch, gently heat them until they turn a light golden colour.
7. Garnish with some greenery and fresh lemon zest.
Lemon Sheet Cake
TIER 3
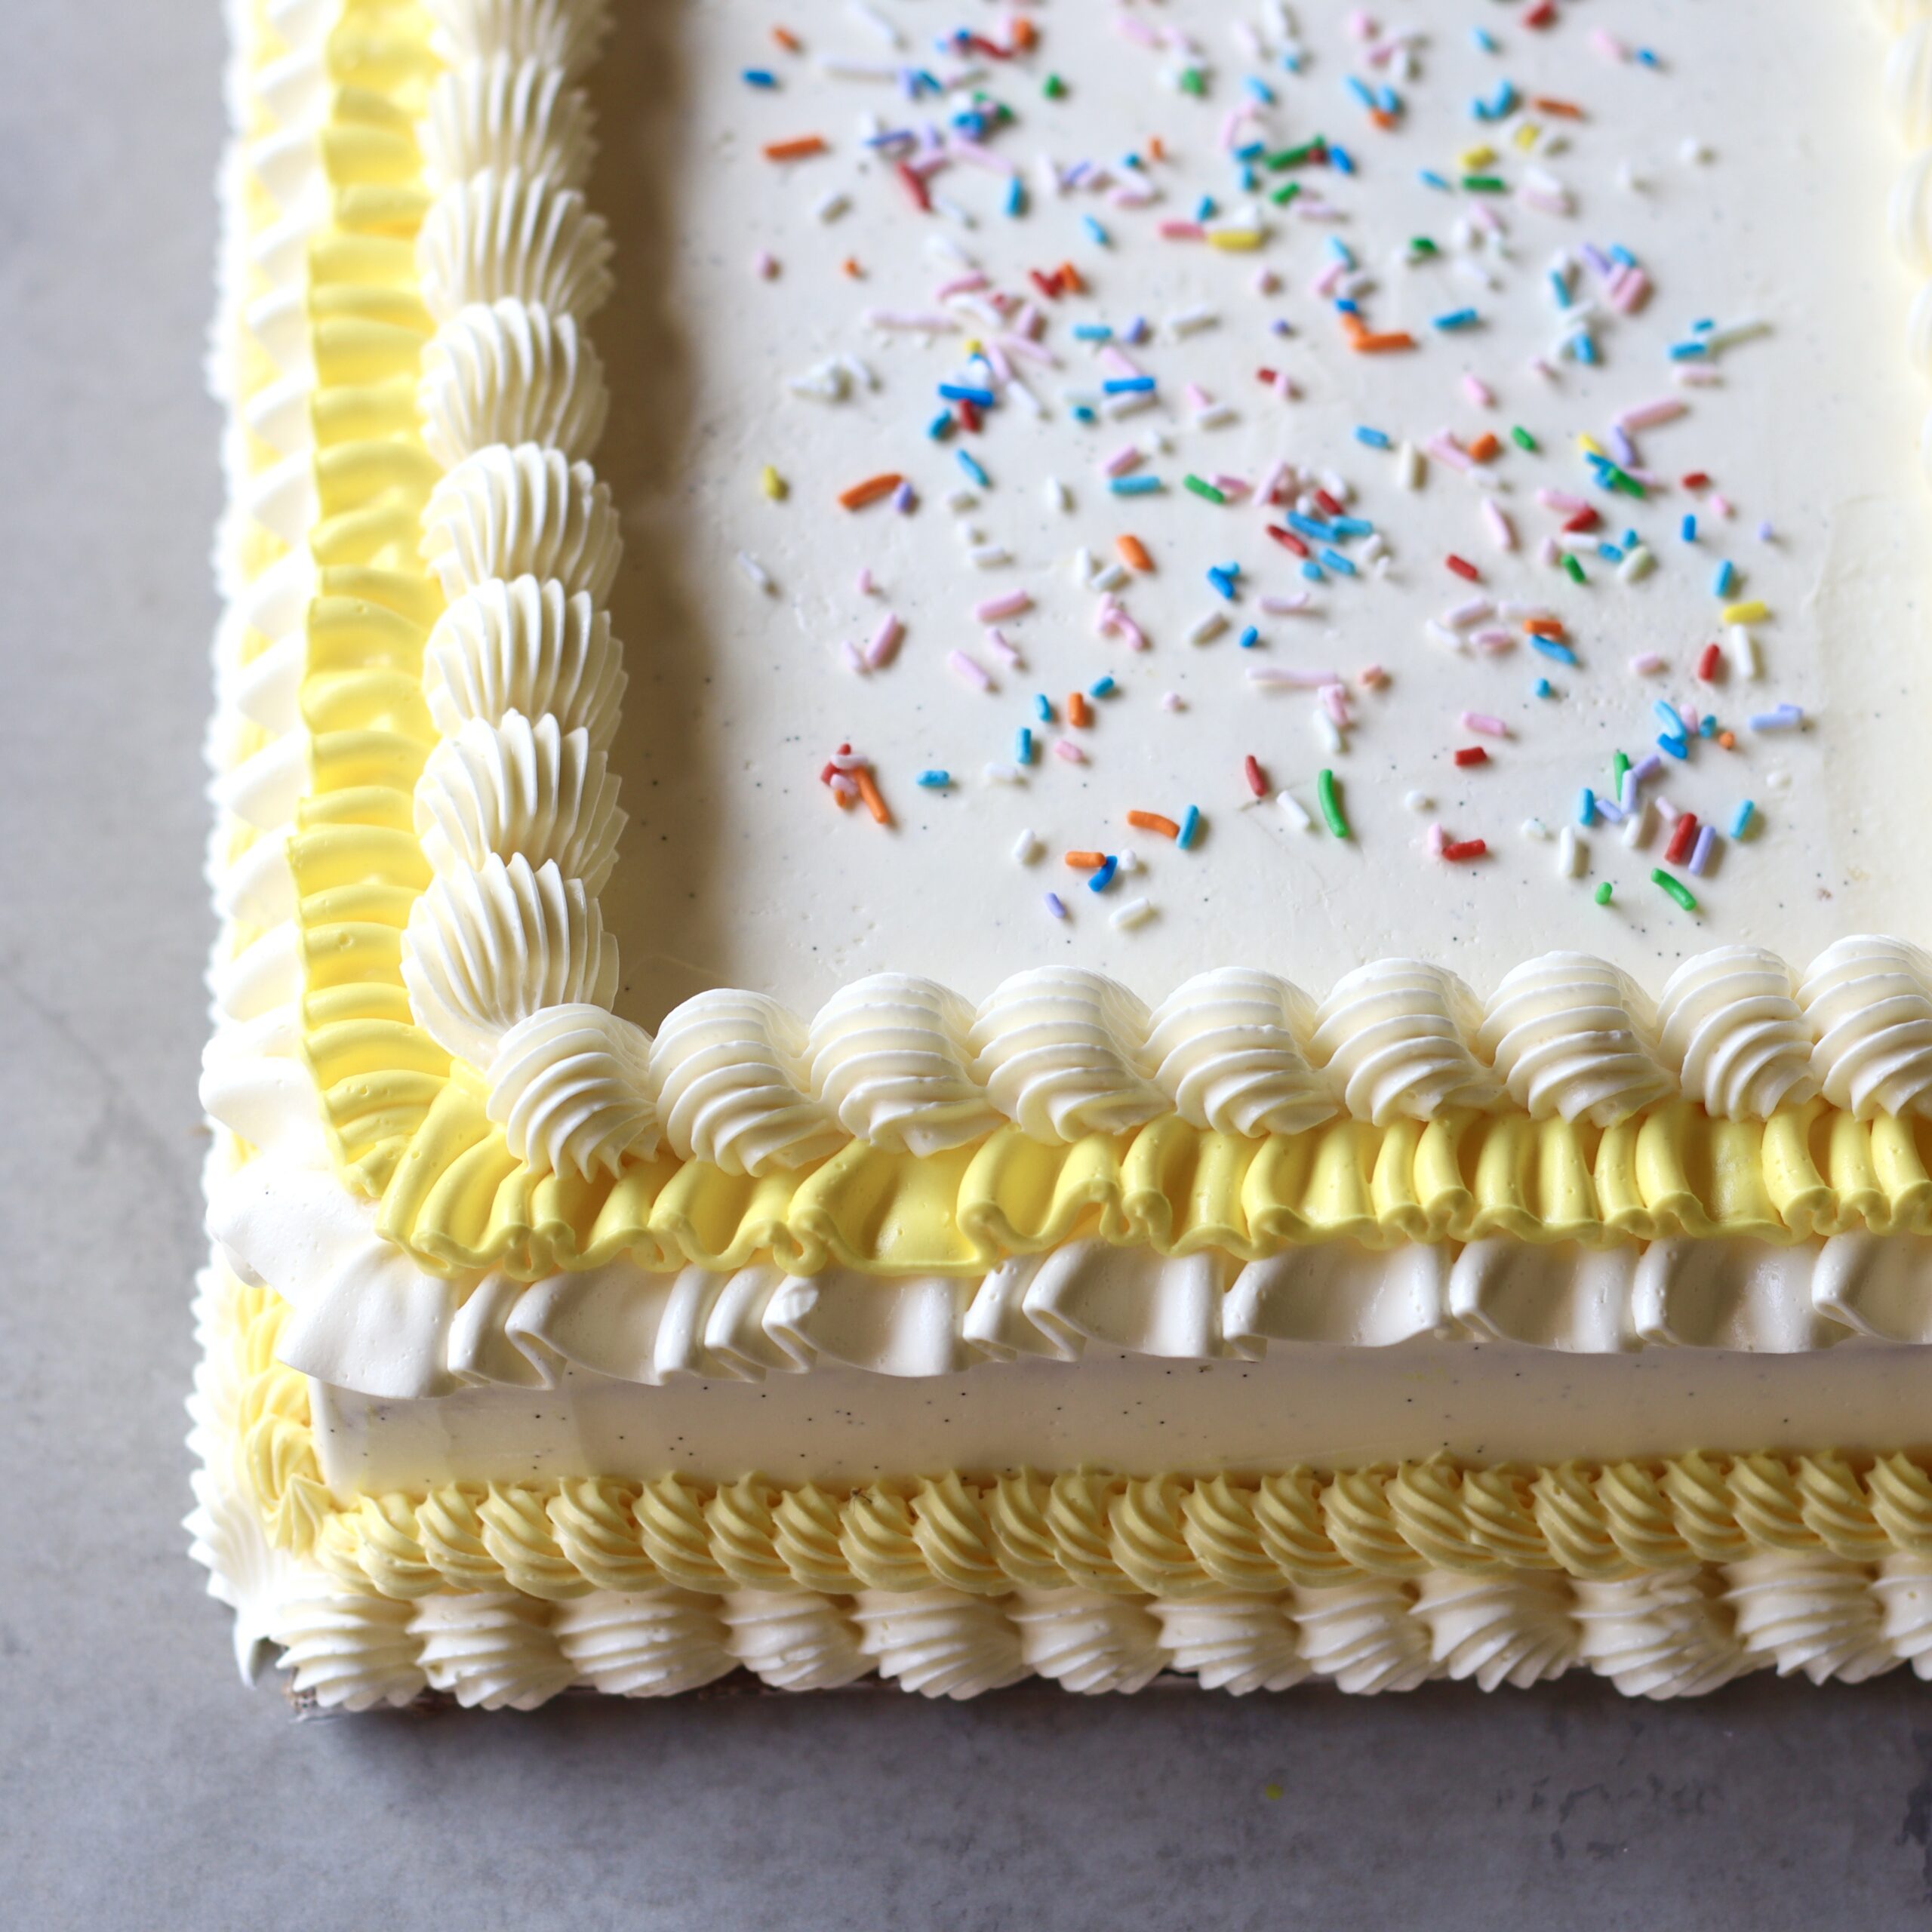
Lemon Sheet Cake
1
9"x13" SHEET CAKE
Ingredients
Makes 1 9″x13″ sheet cake
Lemon Sheet Cake
410g Caster Sugar
410g Cake Flour
26g Baking Powder
410g Whole Eggs
170g Vegetable Oil
140g Whole Milk, Room Temperature
240g Unsalted Butter
Zest 1 Lemon
1 Tsp Lemon Extract
Lemon Sugar Syrup
30g Water
30g Lemon Juice
60g Sugar
Lemon Curd
Zest of ½ Lemon
50g Lemon Juice
45g Caster Sugar
50g Whole Eggs
75g Unsalted Butter
Vanilla Swiss Meringue Buttercream
300g Egg Whites
560g Caster Sugar
9g Salt
Beans from 1 Fresh Vanilla Pod
750g Unsalted Butter, Room Temperature
Yellow Gel Food Colour
Special equipment
Stand Mixer
9×13” Cake Tin
Piping Bags
#4B Piping Nozzle
Ruffle Tip Piping Nozzle x 2
#18 Star Tip Nozzle
Digital Thermometer
Method
Lemon Sheet Cake
1. Preheat your oven to 185C/365F non-fan assisted.
2. Place the butter into a saucepan and melt it over a low heat (avoid boiling it). Once it has just melted, set it to one side to cool slightly.
-
- 240g Unsalted Butter
3. In a large bowl or the bowl of a stand mixer, add the sugar, flour & baking powder. Mix until they are evenly combined.
-
- 410g Caster/Superfine Sugar
- 410g Cake Flour
- 26g Baking Powder
4. In a separate jug, whisk together the eggs, oil, milk, lemon zest & lemon extract. Then, while mixing the dry ingredients on a slow speed, pour in the wet mixture. Mix everything until the wet & dry ingredients are evenly combined, scraping down the bowl to ensure everything is mixed in. Be careful not to overbeat the mixture.
-
- 410g Whole Eggs, Whisked
- 170g Vegetable Oil
- 140g Whole Milk, Room Temperature
- Zest 1 Lemon
- 1 Tsp Lemon Extract
5. Finally, pour in the melted butter and mix the batter slowly until everything is evenly combined.
6. Lightly grease a 9×13” rectangular cake tin. Place a sheet of parchment paper on the bottom to stop the cake from sticking.
7. Pour the batter into the cake tin and place the tin into the oven. Bake for around 40 minutes or until a skewer inserted comes out clean. Every oven is different so keep an eye on the cake. You will see it turns a very nice golden brown colour on top and that is when it is close to being done. While the cake is baking you can make the sugar syrup.
Lemon Sugar Syrup
1. Place the sugar, water and lemon juice into a medium saucepan and bring it to the boil until all of the sugar has dissolved. Make sure you don’t boil it for too long otherwise it will thicken too much as it cools. Set to one side to use when the cake is ready.
-
- 30g Water
- 30g Lemon Juice
- 60g Sugar
2. Once the cake has baked, remove it from the oven and place a wire rack on top of the tray. Very carefully flip the tray over so that the cake releases onto the wire rack.
3. Peel off the sheet of parchment paper and then immediately soak the cake with the lemon sugar syrup.
4. Wrap the cake in cling film and then place the entire cake in the fridge to chill for 3-4 hours. This will help to make sure the cake is nice and moist.
Lemon Curd
1. Into a stainless steel bowl, add the eggs, sugar, lemon juice and lemon zest.
-
- Zest of ½ Lemon
- 50g Lemon Juice
- 45g Caster Sugar
- 50g Whole Eggs
2. Place the bowl over a pan of simmering water.
3. Whisking constantly until the mixture has thickened, almost like a custard consistency.
4. Immediately remove it from the heat and pass it through a sieve onto a tall jug.
5. Allow the mixture to cool to around 40C/105F (it will only take a few minutes), and then add in the soft butter.
-
- 75g Unsalted Butter, Soft
6. Use a hand blender to blend until the mixture is completely smooth.
7. Place a sheet of cling film on top and refrigerate the curd until you are ready to use it.
8. If you chill it overnight you may need to warm it up just slightly before you use it so that it is softer to spread.
Vanilla Swiss Meringue Buttercream
1. Into a large metal bowl, or the bowl of a stand mixer, add the egg whites, sugar, vanilla and salt.
-
- 300g Egg Whites
- 560g Caster Sugar
- 9g Salt
- Beans from 1 Fresh Vanilla Pod
2. Place the bowl of a pan of gently simmering water. Whisk the mixture constantly until the sugar has dissolved and it reached a temperature of around 65C/149F on a digital thermometer.
3. Once at temperature, remove it from the heat and place it onto a stand mixer. Attach the whisk and whisk for 5-7 minutes, or until the bowl feels completely cool to the touch.
4. With the mixer still on a medium speed, slowly add in the soft butter, one piece at a time. As long as the butter is soft, you should be able to add it in relatively quickly. Wait about 10 seconds in between each addition.
-
- 750g Unsalted Butter, Soft & Room Temperature
5. Initially it will look quite soupy, then it may begin to look curdled, but don’t panic – this is normal.
6. Once you have added all the butter, keep whisking for a further 3-4 minutes until the buttercream is completely smooth.
Assembly
1. Remove the cake from the fridge and use a serrated knife to trim all the edges of the cake (not the top though!), getting rid of the golden brown edges to reveal a nice soft cake on the inside.
2. Then, cut the cake in half horizontally so you have two nice even slabs of cake.
3. Place one half of the cake onto a cake board so the sliced sponge is facing out.
4. Take a few scoops of the vanilla buttercream and scoop this into the centre. Use an offset spatula to spread this out as evenly as possible to the edges.
5. Then, on top of that pipe or spread on a nice layer of that lemon curd. It should be a nice soft consistency that you can spread easily.
6. Place the second slab of cake on top.
7. To create the crumb coat, add a big dollop of buttercream on the cake and use an offset spatula to spread it over. Try and neaten it up as best as possible, using the spatula to scrape off any excess buttercream.
8. Once you are happy with the crumb coat, place the cake in the fridge for 20-30 minutes.
9. Remove the cake from the fridge and apply a second layer of buttercream, again using your spatula to spread it out as evenly as possible and a cake scraper to make it smooth. As you are scraping the sides you may see you get a build up of frosting on the top – what you can do is freeze the cake for 15 minutes, then use a sharp knife to trim off that excess buttercream around the outside.
10. When you have a rectangular cake that is relatively smooth and even coverage of buttercream, chill the cake for 20 minutes in the fridge and then we can start to decorate.
11. Split the remaining buttercream into 2 batches, leaving one batch white, and colour the remaining batch with a vibrant yellow gel food colour. We are then going to add the white + yellow buttercream into 4 different piping bags:
-
- 1 x Ruffle tip – White Buttercream
- 1 x Ruffle Tip – Yellow Buttercream
- 1 x 4B Tip – White Buttercream
- 1 x 18 Star Tip – Yellow Buttercream
12. Remove the chilled cake from the fridge and start with the White Buttercream – 4B Piping Bag. Start at the bottom of the cake and pipe and shell border by applying even pressure to create a dollop of buttercream, stop piping and then drag the piping bag down to create a flick at the bottom of the shell. Repeat this technique, joining the dollops as you go along the outside edge of the cake.
13. Next, take the Yellow Buttercream – 18 Star Tip, and just above the shell border you just piped, apply even pressure, and pipe in an anti-clockwise circular motion to create a constant loop of tight spirals.
14. Move to the top of the cake and take the White Buttercream – Ruffle Tip Piping Bag. Apply even pressure and holding the piping nozzle so that the opening of the nozzle is perpendicular to the cake i.e it is facing outwards and to the left, (not facing up or down) pipe and even draping of the ruffled buttercream right along the edge of the cake. Try to ensure there are no air bubbles in your piping bag so that you can apply consistent pressure on the bag without stopping as you pipe.
15. Once you have piped the white ruffle around the entire top side of the cake, pick up the Yellow Buttercream – Ruffle Tip Piping Bag and pipe a second line of yellow ruffles, just above the white ones.
16. Finally, take the White Buttercream- 4B Piping Nozzle, and cover up the edge of the yellow ruffle buttercream with a shell design, just as we did in step 12.
17. Fill the centre of the cake with sprinkles or candles (whatever you fancy) and then let the cake come to room temperature for at least an hour before serving.
Lemon Meringue Pie
TIER 3
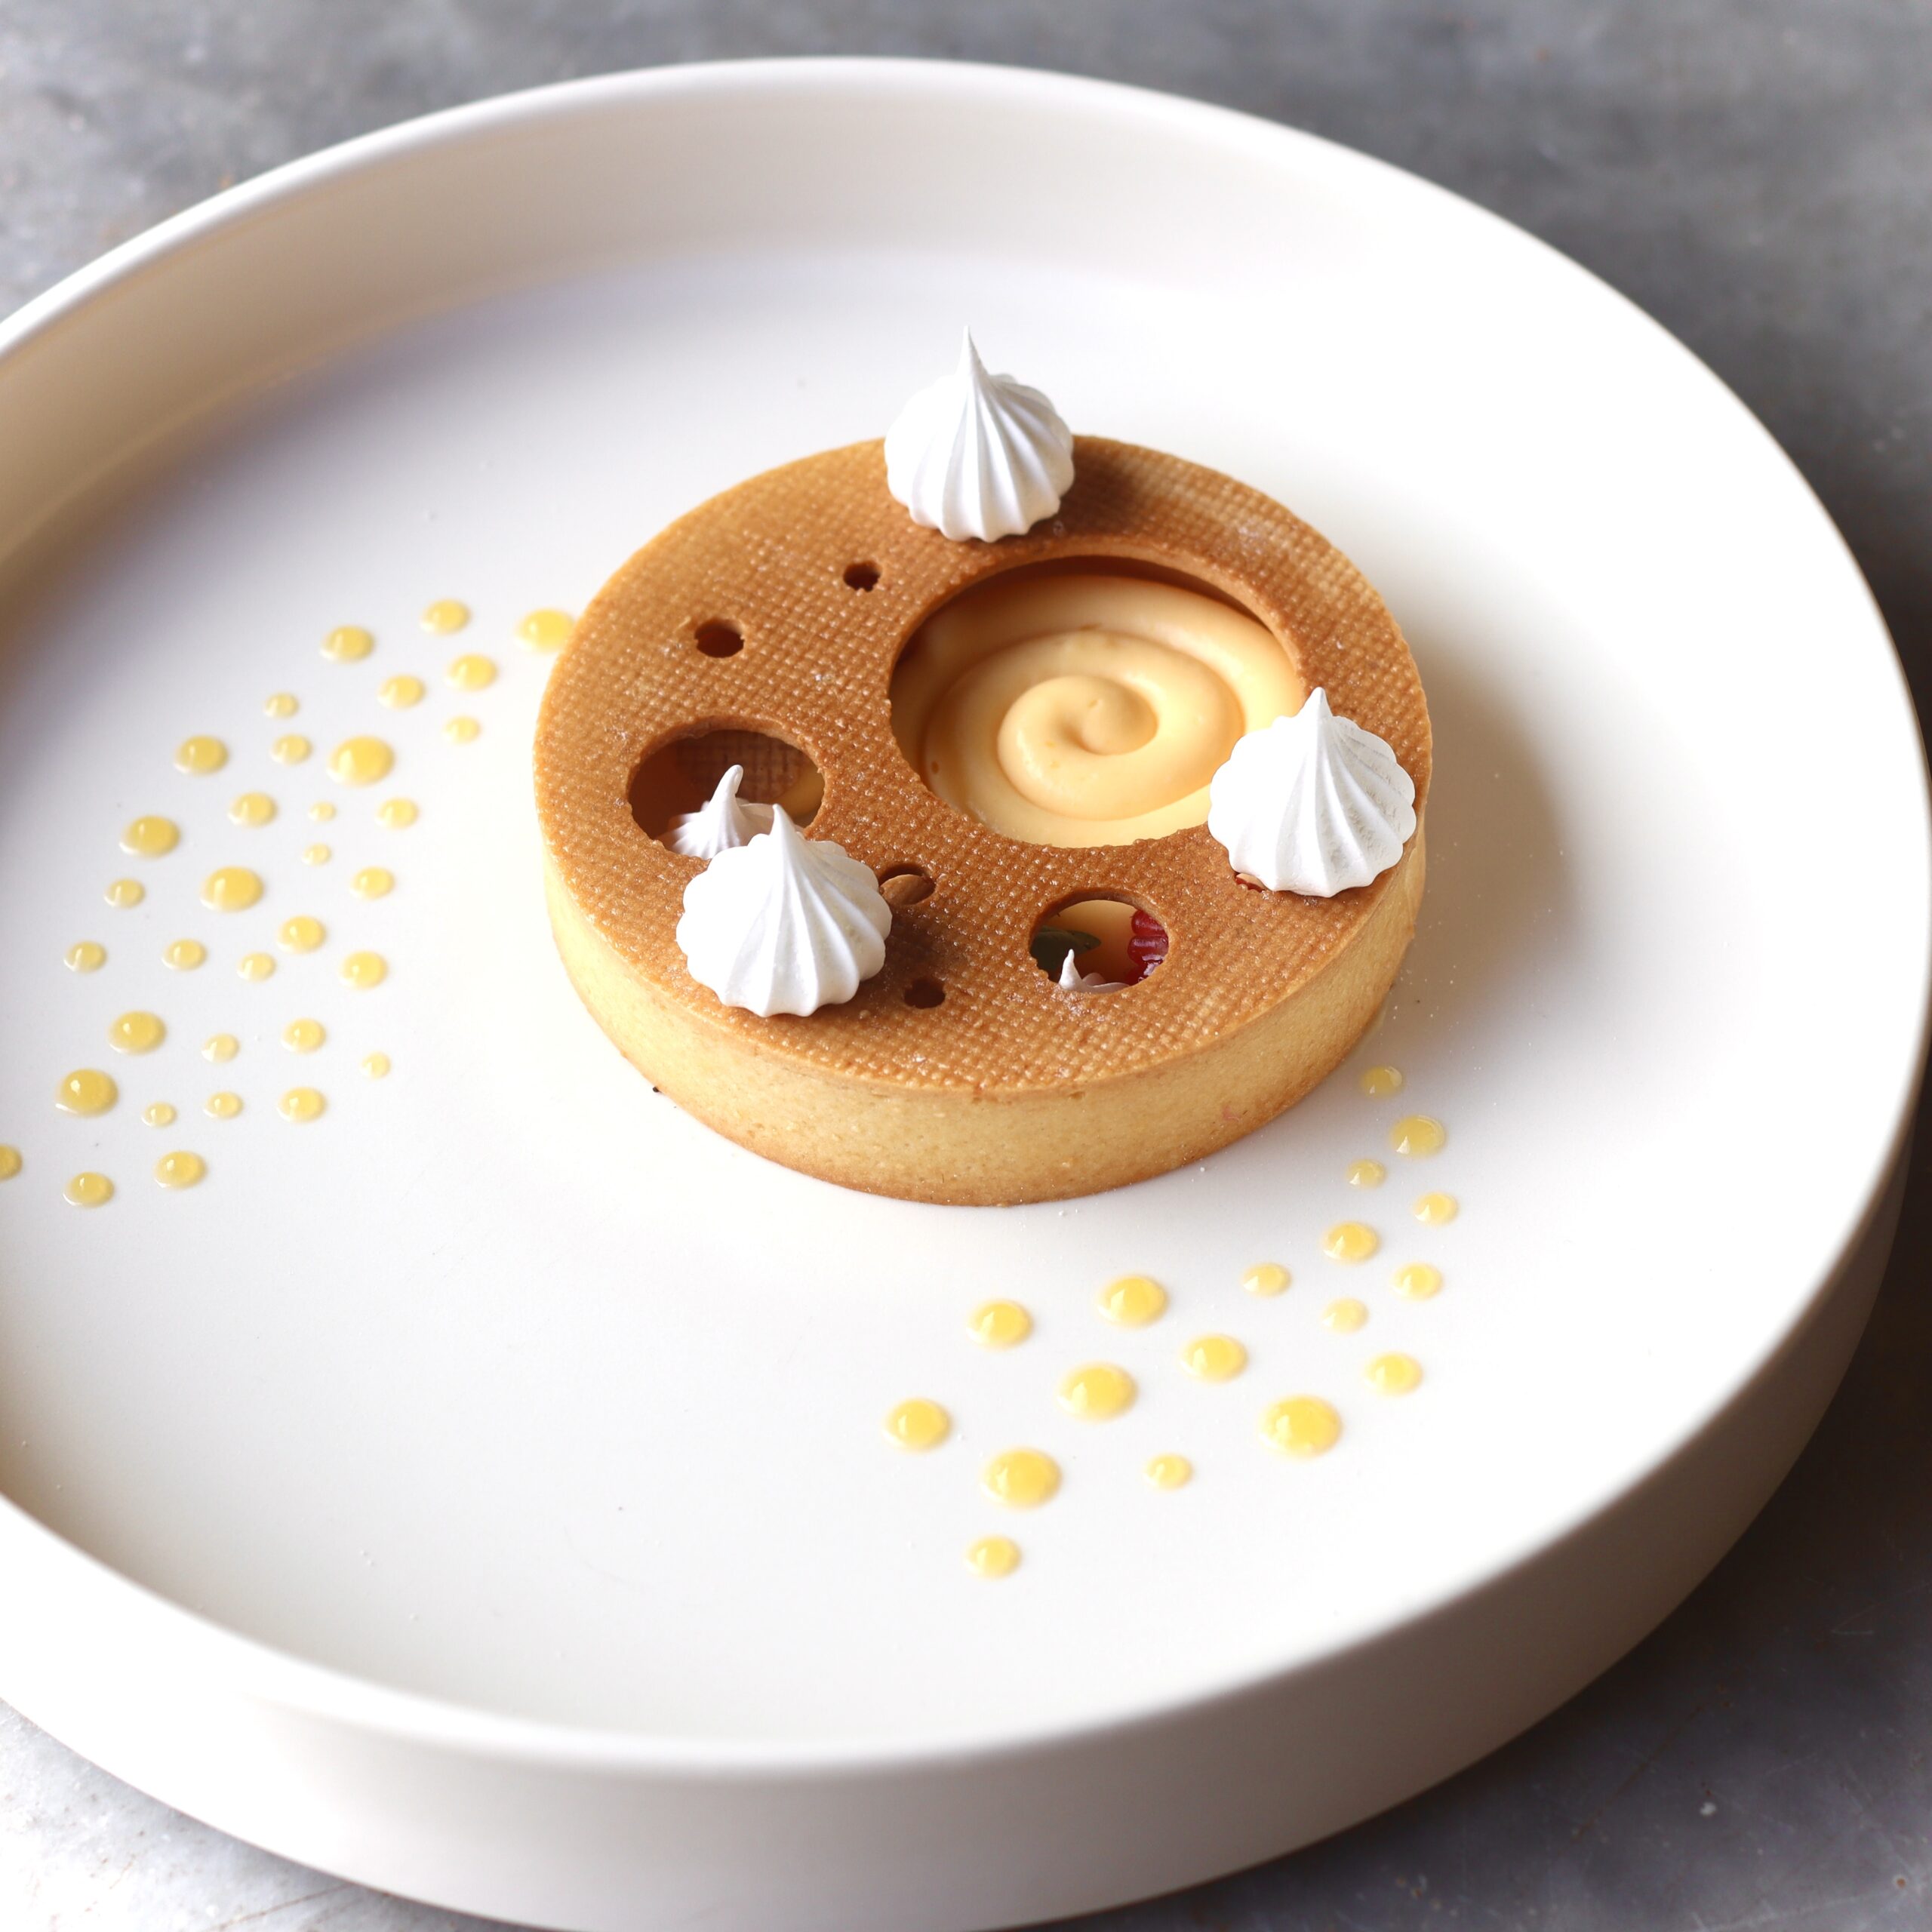
Lemon Meringue Pie
4
INDIVIDUAL DESSERTS
Ingredients
Makes 4 individual desserts
Lemon Cream
150g Caster Sugar
Zest of 1 Large Lemon
110g Lemon Juice
4 Large Eggs
290g Unsalted Butter, Soft
Lemon Sweet Pastry
100g Unsalted Butter
70g Icing/Powdered Sugar
50g Egg Yolk
Zest ½ Lemon
200g Plain Flour
French Meringue Kisses
100g Egg Whites
200g Caster Sugar
Orange Gel
300g Freshly Squeezed Orange Juice
2.5g Agar Agar
5g Sugar
10g Lemon Juice
Fresh raspberries to decorate
Special equipment
Stand Mixer or Electric Hand Whisk
4 x 4.5” Perforated Tart Rings
Piping Bag
Hand Blender or Food Processor
Method
Lemon Cream
You may have some lemon cream leftover depending on how big and how thick you pipe you spirals for the final plating.
1. Into a large bowl, add the eggs, sugar, lemon juice and lemon zest.
-
- 150g Caster Sugar
- Zest of 1 Large Lemon
- 110g Lemon Juice
- 4 Large Eggs
2. Place this over a pan of gently simmering water and whisk constantly. Keep whisking until the mixture has thickened. Be careful not to overcook the mixture and scramble the eggs.
3. Immediately pour the mixture through a sieve onto another bowl.
4. Using a hand blender, blend the mixture, adding a few chunks of butter each time. Keep blending until the butter is fully incorporated and the mixture is smooth.
-
- 290g Soft, Unsalted Butter
5. Cover the surface with a sheet of cling film and refrigerate for a minimum of 4 hours.
French Meringue Kisses
This will make more meringue than you need, but it can be hard to whisk a very small amount of egg whites!
1. Preheat your oven to 90C/195F non-fan assisted.
2. Into the bowl of a stand mixer, add the egg whites.
-
- 100g Egg Whites
3. Whisk the mixture on a medium low speed until it starts to become frothy.
4. Once it is frothy, increase the speed to medium high and start adding the sugar.
-
- 200g Caster Sugar
5. Add the sugar 1 tbsp at a time, trying to avoid throwing it on the whisk as otherwise it will throw the sugar all over the edge of the bowl and it won’t incorporate fully. Make sure to let the mixer whisk for 10-15 seconds before you add the next addition of sugar.
6. Once you have added all the sugar, keep whisking on a medium high speed until you have a stiff peak to your meringue. You should be able to rub the mixture between your fingers and not feel any sugar granules.
7. Add the meringue into a piping bag fitted with a 4B or any star tip nozzle.
8. Line a baking tray with a silicon mat or parchment paper and pipe small kisses of meringue.
9. Place the tray in the oven and bake the kisses for 45 minutes. Turn the oven off, then open the oven door slightly and leave them in the oven to cool for a further 30 minutes.
Lemon Sweet Pastry
Note – I used quite a large silicon mat in the video – so the instructions below will guide you on splitting the dough into two balls if you are using regular sized silicon mats- one ball to create the bases for your tart shell, and one ball to create the walls.
1. Into a large bowl (or the bowl of a stand mixer), add the cubed, cold butter, lemon zest and sift over the icing/powdered sugar.
-
- 100g Unsalted Butter, Cold & Cubed
- Zest ½ Lemon
- 70g Icing/Powdered Sugar
2. With a paddle attachment or with the beaters on a hand mixer, beat the butter and sugar for 2-3 minutes until it is evenly combined. Scrape down the mixture with a spatula twice during this time.
3. While still beating the mixture, pour in the egg yolks and beat to combine. After about 30 seconds, scrape down the bowl ensuring all the butter is scraped off the bottom of the bowl and then mix for another 30 seconds.
-
- 50g Egg Yolks
4. Add in the flour, and mix on a very low speed, until the dry ingredients are just combined. Be careful not to overbeat the mixture, simply mix until no more flour is visible and the mixture is clumping together. It should take about 15 seconds.
-
- 200g Plain Flour/All-Purpose
5. Squeeze the mixture in your hand to form two rough balls. Place one ball of dough onto a silicon mat. Place a second silicon mat on top and roll the mixture into a rough rectangle, getting it as thin as possible.
6. Once you have a rough circle of dough, place it into the freezer for 30 minutes. This dough will be for the base of the tart shells.
7. With the remaining dough, repeat the process, rolling it in between two silicon mats, into a rough rectangle shape.
8. Place the sheet of dough in the freezer for 30 minutes.
9. While the dough is chilling, take the perforated tart ring and very lightly grease the inside with some soft butter.
10. Remove the chilled dough from the freezer that you are going to use for the base of the tart shell.
11. Working quickly, peel the dough off of the silicon matt and place it onto your baking tray lined with a baking mat (ideally a perforated baking mat). Press the tart shells into the dough and peel away any excess dough. Arrange the 4 tart shells on the baking tray and place them back in the freezer.
12. Remove the second strip of dough from the freezer that we are going to use for the walls of our tart shell. Working quickly, peel the top of the silicon mat off. Use a knife to cut long strips of dough.
13. Cut 4 strips of dough in total and then quickly place these back into the freezer for 10 minutes. You need to work quickly so the dough doesn’t melt.
*Note – you may not have enough dough here for 4 tart walls depending on how you rolled it. In which case, start by cutting two walls and then re-roll the scraps to make another 2 walls.
14. Once chilled, remove the baking tray from the freezer that has the tart bases on and remove one strip of dough for the walls.
15. Work quickly and take the strip of dough and place it inside the tart ring. Use a knife to cut it to size so that there isn’t too much excess dough overlapping. Alternatively, you can measure a piece of paper on the inside of the tart ring so that it measures perfectly, then cut your strips of dough to this exact length so they fit perfectly when you place them inside the tart ring.
16. Use your fingers to press together the base and the walls. The idea is to slightly push down the base of the wall, so that it meets the dough on the base of the tart shell. Do this all the way around the tart shell so that there are no gaps in between the wall and the base.
17. You have to do this while the dough is cold, otherwise, if it is too warm, as you press the dough it will tear. If it does feel too warm, place it back in the freezer for 10 minutes then try again.
18. Remove the remaining strips of dough for the walls from the freezer and repeat this with the remaining tarts.
19. Once you have attached the walls and the dough, do not try and move the tart shells or lift them up as the dough will have softened and it will tear. Always keep them on the tray. Place the entire tray of tart shells in the freezer for 15 minutes. Meanwhile, preheat your oven to 175C/350F non-fan assisted.
20. After 15 minutes in the freezer, remove the tray of tart shells. Use a knife to trim off the excess pastry around the top of the tart shell.
21. Then, use a variety of cookie cutters and piping nozzles to cut different sized holes out of the base of the dough.
22. Make sure to keep the disc cut outs and place these on the baking tray too (these may cook quicker than your tart shells so keep an eye on them as they bake as you may need to take them out early).
23. Place the tarts into the oven and bake for around 14-16 minutes until they are nice and golden. Be careful as the underside of the tart that is facing directly onto the tray, will end up being the top of the cage. This will cook quicker as it is in direct contact with the tray, so have a little look underneath the tart shell after about 14 minutes in the oven to see how the colour is. Remove them from the oven and allow them to cool completely.
Orange Gel
1. Into a saucepan add the orange juice and the agar agar.
-
- 150g Orange Juice
- 2.5g Agar Agar
2. Whisk the mixture together and bring it to a boil. Once it comes to a boil, cook for 1 minute to fully activate the agar agar.
3. Remove it from the heat and pour in the remaining orange juice, sugar and lemon juice.
-
- 150g Orange Juice
- 5g Sugar
- 10g Lemon Juice
4. Pour the mixture onto a tray and let it set in the fridge for 30 minutes – 1 hour, or until it forms a jelly-like consistency.
5. Break the mixture up and place it into a blender (or blend in a tall jug with a hand blender)
6. Once smooth, store it in a container in the fridge until you are ready to plate with it.
Final Assembly
1. Remove the lemon cream from the fridge, and scoop it directly from the bowl, into a piping bag fitted with a round tip nozzle. Make sure to squeeze any air bubbles out of the piping bag.
2. Take your plate, and applying even pressure, pipe a spiral of the lemon cream onto it.
3. Next, place the meringue kisses around the outside, and pipe a few more dollops of the lemon cream.
4. Garnish with some freshly sliced raspberries, and the discs of lemon sweet pastry you made from the cut outs. (I also added some fresh vanilla powder, which is simply dried up vanilla pods that I blended into a powder).
5. Carefully place the lemon pastry cage over the top, trying to slot the meringue kisses into the holes.
6. Remove the orange gel from the fridge and place it into a piping bag.
7. Pipe small dots of the gel over the plate and then serve.

Lemon Cake
We would love to see your Bake It Better creations!
Show off your skills by sharing your desserts
#BakeItBetter

Vanilla Panna Cotta
We would love to see your Bake It Better creations!
Show off your skills by sharing your desserts
#BakeItBetter

Lemon Citrus Crunch
We would love to see your Bake It Better creations!
Show off your skills by sharing your desserts
#BakeItBetter

Lemon Tart
We would love to see your Bake It Better creations!
Show off your skills by sharing your desserts
#BakeItBetter