
No-Bake Strawberry Cheesecake
TIER 1
No-Bake Strawberry Cheesecake
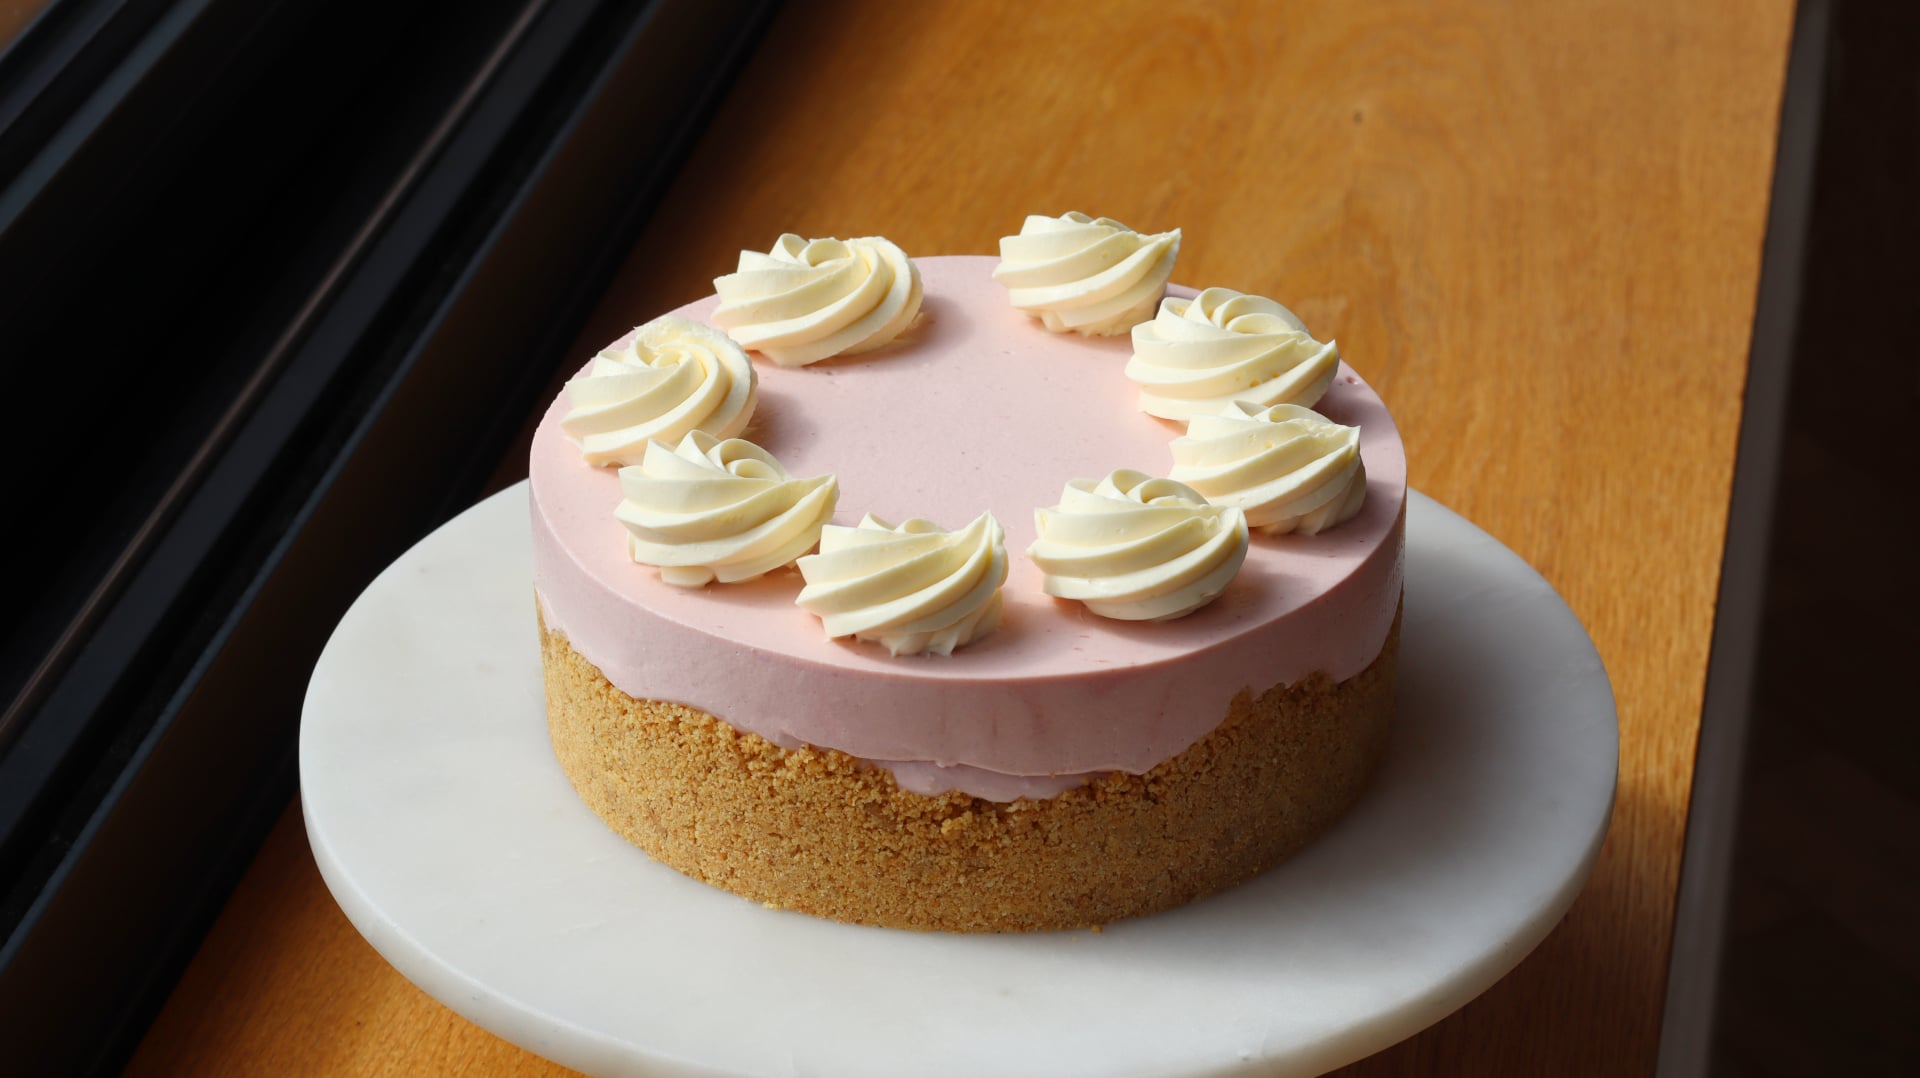
Everyone needs a foolproof, no-bake strawberry cheesecake recipe, and this one is quick to make with a smooth and creamy texture. It’s a simple biscuit base teamed with a brightly coloured strawberry cheesecake filling, which holds its texture really well. We make it in a ring mold for a more professional finish, and pipe mascarpone cream on top for a final touch of elegance.

1
7-INCH CAKE
Ingredients
Makes 1 7-inch cake
Gelatin Mass
10g Powdered Gelatin (Platinum/Knox Bloom)
60g Cold Water
Biscuit Base
180g Digestives/Graham Crackers
70g Unsalted Butter, Melted
Pinch of Flakey Sea Salt
Zest ¼ Lemon
Strawberry Cheesecake
50g Gelatin Mass (or 2.5 gelatin leaves, any grade)
230g Strawberry Puree
125g Caster/White Sugar
500g Full Fat Cream Cheese
325g Double/Heavy Cream
Mascarpone Cream
300g Double/Heavy Cream, Divided
20g Gelatin Mass (or 1 gelatin leaf, any grade)
50g Mascarpone
30g White Chocolate
Special equipment
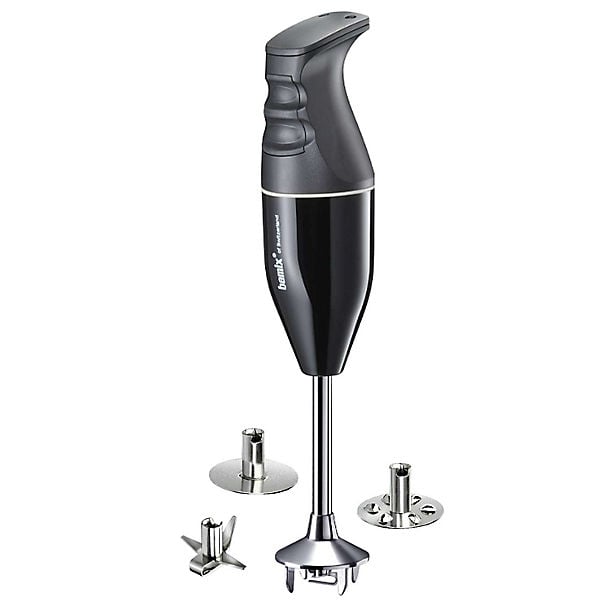
Hand blender
Food processor (optional)
18x6cm ring mold
Silicon mat
Digital thermometer
Stand mixer or Electric hand whisk
Blow torch or Heat gun
Piping bag
Star tip nozzle
Method
Gelatin Mass
1. Add the powdered gelatin and water to a small bowl and stir together to combine. Set this aside in the fridge to bloom for 15 minutes.
- 10g Powdered Gelatin (Platinum/Knox Bloom)
- 60g Cold Water
Mascarpone Cream
1. Into a tall measuring jug, add gelatin mass, white chocolate and mascarpone. Set this aside.
- 20g Gelatin Mass
- 30g White Chocolate
- 50g Mascarpone
2. Add 200g of the cream into a small saucepan and place it over a medium heat. Stir until the mixture is steaming then remove it from the heat and pour it into the measuring jug.
- 200g Double/Heavy Cream
3. Allow it to sit for 2 minutes before blending until smooth. Add in the remaining 100g of cream and blend again.
- 100g Double/Heavy Cream
4. Pour the mixture onto a baking tray and cover the surface with clingfilm. Refrigerate it for a minimum of 3 hours.
Biscuit Base
1. Into a blender, add the biscuits, and blend to a fine crumb. Pour these into a medium bowl.
- 180g Digestives/Graham Crackers
2. Add the butter into a small saucepan and stir until melted.
- 70g Unsalted Butter
3. Add the salt and lemon to the bowl, then stir in the melted butter, starting with about half and stirring just until the mixture is sticking together. You don’t want it to be too soggy.
- Pinch of Flakey Sea Salt
- Zest ¼ Lemon
4. Line a baking sheet with a silicon mat and place a 18x6cm ring mold in the centre.
5. Line the tart ring with the biscuits, starting with the sides so they go up about halfway up the side of the ring, then fill in the base. Ensure it is quite thin and smooth. We don’t want an overly thick base/sides so if there is any left over you can eat it!
6. Set this in the freezer while you make the cheesecake filling.
Strawberry Cheesecake
1. Into a small saucepan, add the strawberry puree and gelatin mass. Stir this over a low heat until the gelatin mass has melted. It should be around 50/60C (122-140F). If it doesn’t get warm enough the gelatin won’t melt and you will get chunks! If you are using gelatin leaves, just soak them in cold water until soft, then add them to the pan along with the puree and heat until melted as above. Set the pan aside to cool, it needs to be around 40C/104F when we use it, or just above body temp.
- 50g Gelatin Mass (or 2.5 gelatin leaves, any grade)
- 230g Strawberry Puree
2. Into the bowl of a stand mixer or a large bowl if using an electric hand mixer, add the cream cheese and sugar and beat for a minute until smooth.
- 125g Caster/White Sugar
- 500g Full Fat Cream Cheese
3. Add in the cooled strawberry mixture and beat again until combined, scraping down the bowl as needed.
4. Add the cream into the bowl of a stand mixer or a large bowl if using an electric hand whisk, and whisk to medium/soft peaks.
- 325g Double/Heavy Cream
5. Working quickly as the cheesecake mixture will be beginning to thicken as the gelatin activates, fold the cream in, in two parts.
6. Remove the chilled base from the freezer and pour the cheesecake mixture in, right to the top. Use a palette knife to smooth it, so it is flush with the top of the ring mold. Refrigerate the cheesecake for 3 hours.
Assembly
1. Once chilled remove it from the fridge and lift it onto your serving plate. Use a blow torch or heat gun to gently warm the sides of the ring mold and carefully lift it off.
2. Remove the chilled mascarpone cream from the fridge and add it to the bowl of a stand mixer fitted with a whisk attachment (or a large bowl if using an electric hand whisk). Whisk it until it reaches a medium peak, then add it into a piping bag fitted with an open star tip nozzle.
3. Pipe 6 swirls around the outside of the cheesecake and then serve.
Shop the Equipment


Elevated Strawberry Cheesecake
TIER 2
Elevated Strawberry Cheesecake
Taking inspiration from a modern Fraisier cake, this cheesecake has a fun, but slightly tricky design, made by “wrapping” a smooth cream around the outside using acetate. The cheesecake is frozen for a short time, so we also look at how to adjust the ingredients in the cheesecake mixture to help ensure a smooth, and ice-free texture! Excuse my slightly unique way to create the shape – I’m open to any alternative suggestions!
1
7-INCH CAKE
Ingredients
Makes 1 7-inch cheesecake
Gelatin Mass
10g Powdered Gelatin (Platinum/Knox Bloom)
60g Cold Water
Mascarpone Cream
300g Double/Heavy Cream, Divided
20g Gelatin Mass (or 1 gelatin leaf, any grade)
50g Mascarpone
30g White Chocolate
Genoise Sponge
220g Whole Eggs
130g Caster/White Sugar
30g Unsalted Butter, Melted
Zest ¼ Lemon
125g Plain/All-Purpose Flour
Pinch of Salt
Strawberry Cheesecake
50g Gelatin Mass (or 2.5 gelatin leaves, any grade)
230g Strawberry Puree
125g Caster/White Sugar
35g Invert Sugar/Trimoline
550g Full Fat Cream Cheese
325g Double/Heavy Cream
Pinch of Salt
2 Tbsp Strawberry Jam To Fill
Fresh Strawberries To Decorate
Special equipment
Hand blender
39x27cm baking tray
Silicon mat
Electric hand whisk
Stand mixer (optional)
Digital thermometer
18x6cm ring mold
Acetate
Blow torch or Heat gun
Pastry rods (optional)
Method
Gelatin Mass
1. Add the powdered gelatin and water to a small bowl and stir together to combine. Set this aside in the fridge to bloom for 15 minutes.
- 10g Powdered Gelatin (Platinum/Knox Bloom)
- 60g Cold Water
Mascarpone Cream
1. Into a tall measuring jug, add gelatin mass, white chocolate and mascarpone. Set this aside.
- 20g Gelatin Mass
- 30g White Chocolate
- 50g Mascarpone
2. Add 200g of the cream into a small saucepan and place it over a medium heat. Stir until the mixture is steaming then remove it from the heat and pour it into the measuring jug.
- 200g Double/Heavy Cream
3. Allow it to sit for 2 minutes before blending until smooth. Add in the remaining 100g of cream and blend again.
- 100g Double/Heavy Cream
4. Pour the mixture onto a baking tray and cover the surface with clingfilm. Refrigerate it for a minimum of 3 hours.
Genoise Sponge
1. Preheat the oven to 175C non-fan assisted (160C/320F fan assisted). Take a 39x27cm baking tray, lightly grease it with butter and line it neatly with parchment paper.
2. For the sponge, add the eggs, sugar & lemon zest into a medium bowl and place it over a pan of gently simmering water.
- 220g Whole Eggs
- 130g Caster/White Sugar
- Zest ¼ Lemon
3. Using a hand whisk, whisk them together until they reach 40C/104F on a digital thermometer.
4. Remove it from the heat and add the mixture to the bowl of a stand mixer, fitted with a whisk attachment (or a medium bowl if using an electric hand whisk)
5. Whisk on a medium-high speed for 3-5 minutes, or until the mixture is thick and holds a ribbon when you drizzle it from the whisk.
6. Remove the bowl from the stand mixer and sift over the flour and salt.. Fold this together, being as gentle as possible until there are no more lumps of flour.
- 125g Plain/All-Purpose Flour
- Pinch of Salt
7. Take a small portion of the batter and add it into a bowl. Pour in the melted butter and fold this mixture together so there are no streaks of butter.
- 30g Unsalted Butter, Melted
8. Add this back into the main bowl and fold it through to incorporate.
9. Pour the mixture onto the lined baking tray and spread it out evenly with an offset spatula.
10. Bake it in the oven for 15 minutes, then remove it and allow it to cool completely.
Strawberry Cheesecake
1. Into a small saucepan, add the strawberry puree. Place the entire pan onto a tared scale and note the weight.
- 230g Strawberry Puree
2. Place it over a medium low heat and stir it occasionally, until the puree has reduced by 85g (from 230g to 145g). You can do this by placing the pan back on the tared scale as you are cooking it to see how much the weight has reduced by.
3. Remove it from the heat and stir in the gelatin mass until it has completely melted. Set the pan aside to cool, it needs to be around 40C/104F when we use it, or just above body temp.
- 50g Gelatin Mass (or 2.5 gelatin leaves, any grade)
4. Into the bowl of a stand mixer or a large bowl if using an electric hand mixer, add the cream cheese, invert sugar and caster/white sugar and beat for a minute until smooth.
- 125g Caster/White Sugar
- 550g Full Fat Cream Cheese
- 35g Invert Sugar/Trimoline
5. Add in the cooled strawberry mixture and beat again until combined, scraping down the bowl as needed.
6. Add the cream into the bowl of a stand mixer or a large bowl if using an electric hand whisk, and whisk to medium/soft peaks.
- 325g Double/Heavy Cream
7. Working quickly as the cheesecake mixture will be beginning to thicken as the gelatin activates, whisk in the first half of cream, then fold the remaining cream in with a spatula until smooth. Right at the end fold through a pinch of salt.
- Pinch of Salt
Assembly
1. Take a 18x6cm ring mold and cut a disc of the genoise sponge and lift it onto a baking tray lined with a silicon mat.
2. Spread the strawberry jam across the sponge and place the rind mold around the outside.
- 1-2 Tbsp Strawberry Jam
3. Scoop the cheesecake mixture into the ring mold, pressing it in firmly with a spatula to remove any air pockets. Fill the ring mold right to the top then flatten it with a warm spatula so that it is flush with the ring mold.
4. Place it into the freezer for 2 hours.
5. Just before it is chilled, cut a piece of acetate so that it is long enough to wrap around the outside of the cheesecake and about ½” taller.
6. Remove the chilled mascarpone cream from the fridge and add into the bowl of a stand mixer fitted with a whisk attachment (or a medium bowl if using an electric hand whisk). Whisk to a medium soft peak.
7. Lay the acetate flat on your work surface (it can help to oil the surface slightly so it sticks in place) and use a palette knife to spread the cream evenly across the acetate.
8. Remove the cheesecake from the freezer and gently heat the ring mold with a blow torch to remove it.
9. Carefully lift the acetate from the work surface and wrap the cream around the outside of the cheesecake. Once it is stuck on there you can’t really move it (!) so try and do this as carefully as possible the first time around.
10. This is where you have to get a little creative to create the ‘dents’ in the cream. I used a few skewers, rested against small cups to weigh down the outside edge of the acetate in different places, to create the indent. But feel free to use whatever you think might work! Your acetate might even be flexible enough that you can just press it into shape with your fingers.
11. Place it carefully back into the freezer for 30-60 minutes, just until the mascarpone cream has frozen and you can peel away the acetate cleanly without it ripping the cream.
12. Once it is ready, peel off the acetate and lift the cheesecake onto your serving plate.
13. Slice some strawberries and place them in the centre of the cheesecake. For evenly sized strawberries, first trim off the tops. Then place each strawberry between two pastry rods set to around 10–12mm high and carefully slice off the base. This creates strawberries with a flat top and bottom, all at a consistent height, so they sit neatly and evenly inside the cheesecake.
14. To make the strawberries glossy, you can brush them with a little bit of nappage or melted marmalade jam (with a splash of water).
15. Allow the cheesecake to defrost for around 30 minutes at room temperature before serving (you can check it has thawed by inserting a skewer into the centre and checking there is no resistance).
Shop the Equipment

Triple Chocolate Cheesecake
TIER 1
Triple Chocolate Cheesecake
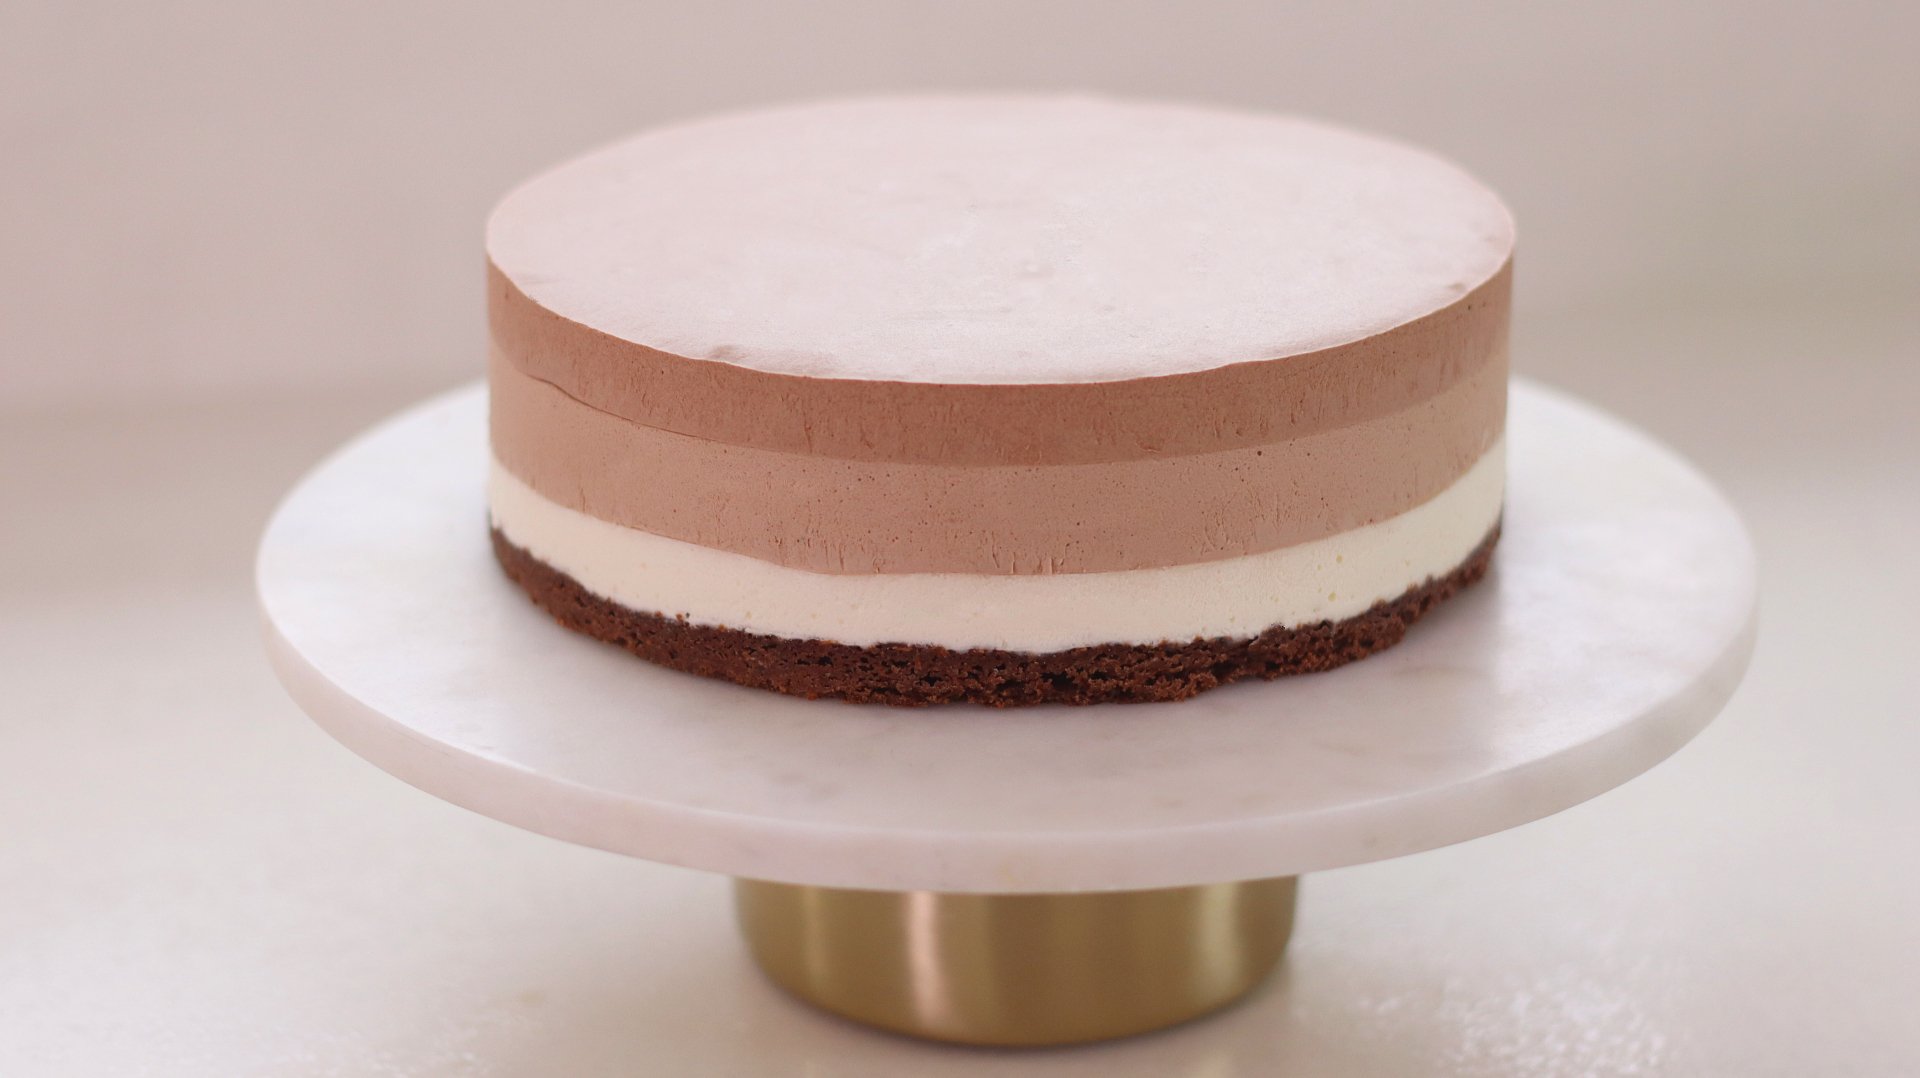
Unlike a traditional dense cheesecake, this one has a light, mousse-like texture (Triple Chocolate… Choussecake?!). The process is simple as we start by making a ganache with cream cheese, then fold in whipped cream to create that incredible texture. Each layer is easy to replicate since the measurements are nearly identical, with just a few small tweaks. The only tricky part is waiting for each layer to set! But once it’s ready to serve, you’re left with a beautiful ombré effect.
1
8" CHEESECAKE
Ingredients
Makes 1 8-inch Cheesecake
Chocolate Cookie Base
120g Oreos
20g-40g Unsalted Butter
Milk Mixture
275g Whole Milk
30g Honey
White Chocolate Layer
75g Milk Mixture (Above)
60g White Chocolate, Chopped
75g Double/Heavy cream
90g Cream Cheese, Full Fat
60g Double/Heavy cream
Milk Chocolate Layer
75g Milk Mixture (Above)
60g Milk Chocolate, Chopped
6g Cocoa Powder
75g Double/Heavy cream
90g Cream Cheese, Full Fat
60g Double/Heavy cream
Dark Chocolate Layer
75g Milk Mixture (Above)
65g Dark Chocolate (70% Cocoa Solids), Chopped
75g Double/Heavy cream
90g Cream Cheese, Full Fat
60g Double/Heavy cream
Special equipment
Food processor
8×2.75” ring mold
Acetate (optional)
Hand blender
Stand mixer
Method
Chocolate Cookie Base
1. Add the Oreos into a food processor and blend to a fine crumb. If you want, you can remove the white filling and just use 120g of Oreo biscuits.
2. Pour these into a medium bowl and set it to one side.
3. Add the butter into a small saucepan and place it on a low heat until melted.
4. Slowly pour about half of the butter mixture into the Oreos and stir to combine. Keep adding butter until the mixture resembles slightly wet sand. Oreos don’t require as much butter to pull together unlike a traditional biscuit base so add it slowly to avoid a very wet biscuit mixture.
5. Take an 8×2.75” ring mold and place a piece of acetate along the inside. Acetate isn’t completely necessary as we are freezing the mousse. If you don’t have acetate you can simply heat the outside of the ring mold with a hair dryer/heat gun when you need to demold it. Acetate just makes this process much easier and you end up with a slightly cleaner finish. Place the ring onto a baking tray.
6. Pour the Oreo mixture into the base of the ring and use the back of a measuring cup or something flat, to smooth the base out so that it is even. Place the tray into the freezer.
Milk Mixture
1. Add the milk and honey into a small saucepan, and place it over a medium-low heat until it is steaming – stirring occasionally. We are going to split this mixture between all three cheesecake bases.
The process for making the layers is identical, so it is easiest to set up three measuring jugs at once, each with the chopped chocolate in, then pour in the weighed milk mixture.
White Chocolate Layer
1. Into a tall jug, add the chopped chocolate, and pour over 75g of the hot milk mixture. The mixture needs to be hot so that the chocolate melts. Let it sit for 2 minutes before blending until smooth.
2. Add in the cream cheese, and the 75g of double/heavy cream. Blend again until smooth and there are no lumps of cream cheese. Cover the surface with clingfilm and refrigerate for 3 hours (or longer if needed).
Milk Chocolate Layer
1. Into a tall jug, add the chopped chocolate, and cocoa powder, and pour over 75g of the hot milk mixture. The mixture needs to be hot so that the chocolate melts. Let it sit for 2 minutes before blending until smooth.
2. Add in the cream cheese, and the 75g of double/heavy cream. Blend again until smooth and there are no lumps of cream cheese. Cover the surface with clingfilm and refrigerate for 3 hours (or longer if needed).
Dark Chocolate Layer
1. Into a tall jug, add the chopped chocolate, and pour over 75g of the hot milk mixture. The mixture needs to be hot so that the chocolate melts. Let it sit for 2 minutes before blending until smooth.
2. Add in the cream cheese, and the 75g of double/heavy cream. Blend again until smooth and there are no lumps of cream cheese. Cover the surface with clingfilm and refrigerate for 3 hours (or longer if needed).
Assembly
The assembly process is slightly tedious, as you have to wait for each layer to set before you can add the next one!
1. Remove the white chocolate layer from the fridge and place it into a medium bowl or the bowl of a stand mixer fitted with a whisk attachment. Whisk on a medium speed, until the mixture thickens and holds a medium peak. Set this to one side.
2. Into a bowl, add the remaining 60g of double/heavy cream and whisk until it holds a medium peak. Note – 60g can actually be quite tough to whisk if you are using an electric stand mixer so it is worth mixing 100g so that the whisk attachment can actually catch it, then just weigh the required 60g of cream.
3. Take the 60g of whipped cream, and fold this through the white chocolate layer, until smooth and combined. The final texture of the mixture should be thick, but still soft and slightly runny. We want a texture where we can pour the mousse into the tin and it will almost settle itself without too much assistance!
4. Remove the chilled chocolate base from the freezer and pour the white chocolate layer in. It should spread to the edges and settle, but if not just use a palette knife or a spoon to gently spread it, so that it is even. You can even give the tray a bit of a tap on the work surface to help it settle. Place the tray into the freezer for 30-60 minutes, or until the white chocolate layer feels firm enough to the touch to support another layer of mousse.
5. Repeat this exact same process with the milk chocolate and dark chocolate layers, freezing the mousse in between the milk and dark chocolate each layer. Note that because these layers have more cocoa solids, they will become thicker more quickly as you whisk them, so be careful not to over-whisk them and let them become too thick.
6. Once you have added the dark chocolate layer, place the entire cheesecake into the freezer. If you need to serve this quickly, 2-3 hours in the freezer will be absolutely fine, but you can also freeze it overnight too.
7. When you are ready to serve, remove the cheesecake from the freezer, and lift it onto your serving dish. Carefully pull off the ring mold and then peel away the acetate, to reveal a smooth cheesecake. The cheesecake now needs 2 hours to defrost before you can eat it (maybe slightly less if you only freeze it for 2-3 hours). Or, you can defrost it for 2 hours then get it straight into the fridge.
8. Just a note that the longer you leave it at room temperature, you will begin to see the base ‘weep’. This is just because the sugar draws moisture from the cheesecake mixture. Nothing has gone wrong, it’s just a natural scientific occurrence of the ingredients of the hygroscopic properties of sugar!
Shop the Equipment


Espresso Burnt Basque Cheesecake
TIER 2
Espresso Burnt Basque Cheesecake
We don’t use coffee often in Bake It Better, but it’s a flavour I absolutely love! A classic burnt Basque cheesecake is usually made without a biscuit base, but here, we’re taking it up a notch with our own homemade chocolate biscuit base. I’ve also included some great techniques to give the cheesecake a more refined finish—less rustic than most recipes! If coffee isn’t your thing, feel free to skip the espresso and coffee beans and swap in fresh vanilla instead!
1
9" CHEESECAKE
Ingredients
Makes 1 9-inch Cheesecake
Chocolate Cookie Base
70g Unsalted Butter, Cubed & Cold
55g Plain/All-Purpose Flour
12g Cocoa Powder
45g Ground Almonds
35g Caster/White Sugar
1g Baking Powder
Pinch of Sea Salt Flakes
Coffee Cheesecake
450g Double/Heavy Cream + extra
45g Coffee Beans, Whole
880g Cream Cheese
265g Caster Sugar
38g Plain Flour
290g Whole Eggs, Whisked Together
25g Freshly Brewed Espresso
Special equipment
9” springform/loose bottom cake tin
Stand mixer
Hand blender
Food processor
Method
Chocolate Cookie Base
1. Take a 9” springform/loose bottom cake tin, and lightly grease the base and sides. Place a circle of parchment along the bottom and a strip around the side.
2. Into the bowl of a stand mixer (or you can do this with your hands), add all of the ingredients.
3. With the paddle attachment, mix on a low speed until it resembles a crumble-like texture and the butter has broken down. If doing this by hand, just rub the mixture between your fingers.
4. Remove the mixture from the bowl and tip it into the base of the cake tin. Use your hands to press it flat into the tin – it will be quite dry/dusty initially, but pressing it down will help form it into a dough. Then use the back of a flat glass to press it firmly down.
5. Place the tin into the freezer, while you pre-heat the oven to 175C/345F Non-fan assisted.
6. Put the tin into the oven and bake the base for 20 minutes. Remove it from the oven and allow it to cool at room temperature for 15 minutes.
7. Once it has cooled, lay a few large sheets of foil underneath the pan – we will need these later!
Coffee Cheesecake
1. Into a medium saucepan, add the cream and whole coffee beans. Place the lid on the pan and place it on a medium heat. Once it comes to a simmer, turn the heat off and allow it to steep for 30 minutes.
2. Pre-heat the oven to 210C/410F fan-assisted.
3. Remove the lid and pour the mixture into a tall jug, then use a hand blender to blend for about 30 seconds.
4. Pour the mixture through a sieve and into a bowl on a scale. You will have lost some weight due to evaporation, so you need to top up the mixture with more fresh double/heavy cream, until it weighs 365g.
5. Into a food processor or blender, add the cream cheese, flour, and sugar. Blend on a low speed for about 2 minutes until the mixture is smooth. We’re trying to avoid adding in too much air so it is important to do this on a low speed. Scrape down the mixture a few times to ensure it incorporates properly.
6. Pour in the eggs and blend until combined on a low speed. Scrape down the food processor when/if needed.
7. Finally, pour in the coffee cream and freshly brewed coffee and blend on low until combined. Scrape down the food processor and blend again.
8. Give the bowl a very firm tap on the work surface to get rid of any excess bubbles, then pour the mixture, through a sieve, straight over the biscuit base.
9. Take two tea towels, and soak them in water. Fold them into a neat rectangle shape and then wrap them around the outside of the tin. Then, take the foil that you laid down, and wrap this up and around the tea towels (to stop them from burning!)
10. Place the tray into the centre of the oven and bake for around 35-40 minutes. The cheesecake should be dark on top, with a very significant wobble when you gently shake the tray. About ¾ of the cheesecake should wobble. If you think the cheesecake is done, but maybe you want it a little darker on top, you can put it under a hot grill just for a minute or two to add some colour. For me, I found 36 minutes was perfect.
11. Remove it from the oven and allow it to cool at room temperature for 1 hour, before refrigerating overnight. It’s important to let it chill overnight to really set the cheesecake.
12. The next day, remove it from the tin, and then use a hot knife to cut slices.
Shop the Equipment


Summer Fruits Cheesecake
We would love to see your Bake It Better creations!
Show off your skills by sharing your desserts
#BakeItBetter

Chocolate Orange Cheesecake
We would love to see your Bake It Better creations!
Show off your skills by sharing your desserts
#BakeItBetter

Oreo & Vanilla Cheesecake
We would love to see your Bake It Better creations!
Show off your skills by sharing your desserts
#BakeItBetter

Crème Brûlée Cheesecake
We would love to see your Bake It Better creations!
Show off your skills by sharing your desserts
#BakeItBetter