
Pullman Loaf
TIER 1
Pullman Loaf
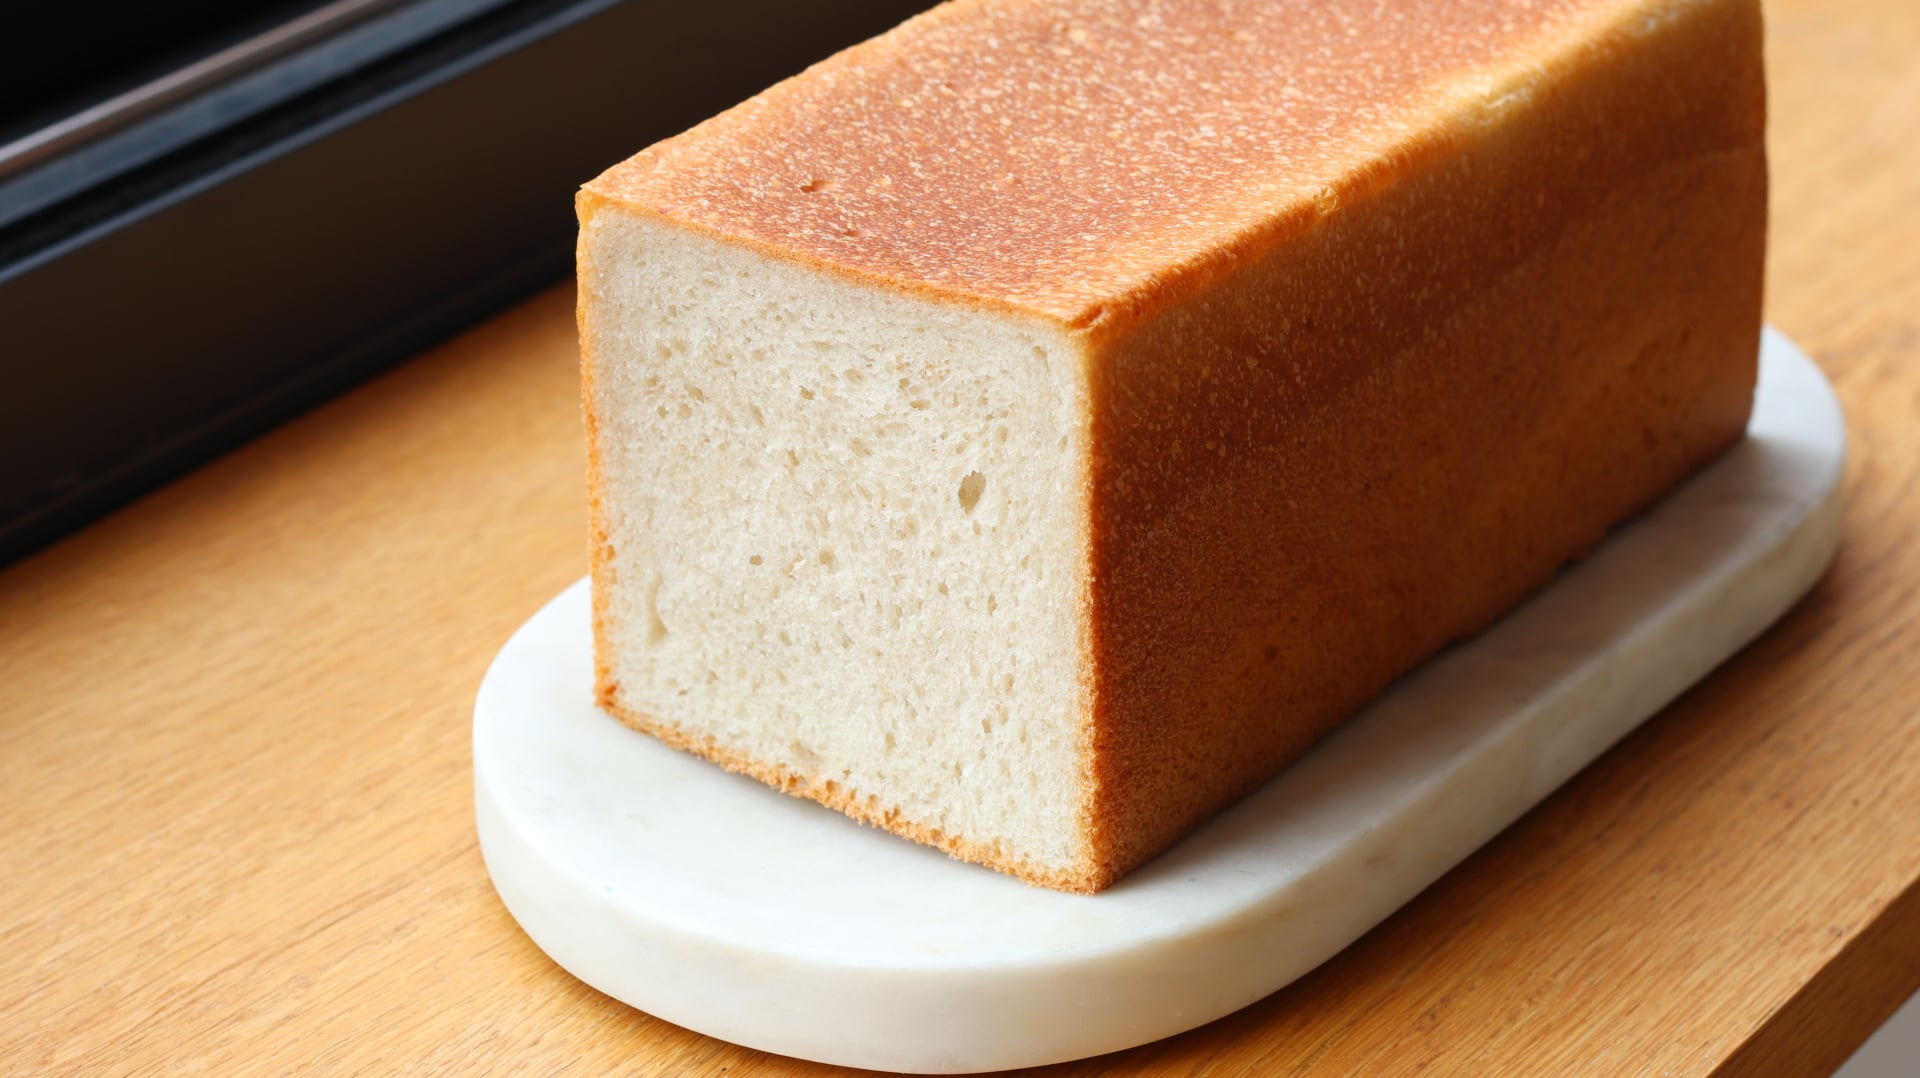
A pullman style loaf is pretty typical with Japanese Milk bread, but works really well for this hybrid sourdough sandwich loaf. This is my go to weekly bread, as it’s easy to prepare and baking with a lid on top means you don’t need to worry quite as much about achieving a perfectly shaped dough. The dough is soft and the rye flour in the sourdough starter adds a subtle flavour, with little flecks of bran throughout the crumb.

1
LOAF
Ingredients
Makes 1 Loaf
Levain
12g Sourdough Starter*
100g Strong White Bread Flour
19g Dark Rye Flour
119g Water (24℃)
*See the guide at the bottom of the recipe for preparing a sourdough starter
Dough
280g Cold Water
0.5g Instant Dry Yeast
155g Mature Sourdough Starter
50g Olive Oil
20g White Sugar
10g Fine Sea Salt
500g Strong White Bread Flour
Special equipment
Stand mixer
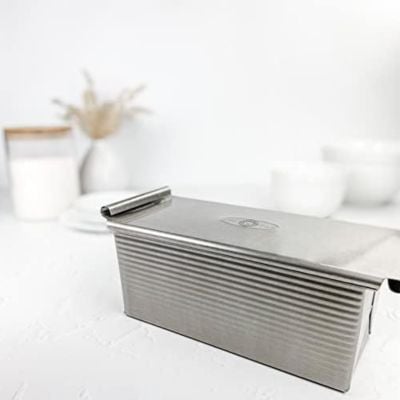
9×4 inch Pullman loaf tin
Digital thermometer
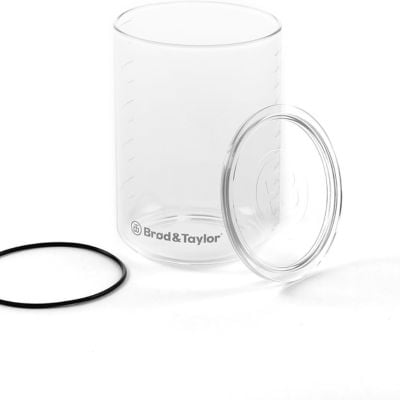
Sourdough starter jar
Method
Levain
A levain is essentially an offshoot of your sourdough starter, made specifically for a particular recipe. You take a small amount of your mature starter and feed it separately, usually in a different ratio, then use the levain once it has fermented and is ready.
However, you don’t always need to make a separate levain. For these recipes, I’ve called it a ‘Levain’ but you can simply feed your existing sourdough starter using the quantities given above. Once it has fermented, use the required amount in the dough and keep whatever is left over as your starter to feed again for your next bake. This keeps things simpler while still giving you the same result.
The ratio for the levain is 1:10:10 which for my starter, peaks in around 8 hours. This means I can feed it in the evening, then it is ready to use the next morning. Depending on your conditions and starter, this might be too slow. If you find that ratio is too slow, a ratio of 1:2:2 will peak much faster (50g Sourdough Starter, 90g Strong White Bread Flour, 10g Dark Rye Flour, 100g Water (24C)
1. In the evening, prepare your levain by mixing all the ingredients in a bowl with a rubber spatula. Scoop them into a clean jar and place the lid on top.
-
- 12g Sourdough Starter
- 100g Strong White Bread Flour
- 19g Dark Rye Flour
- 119g Water (24℃)
2. Leave it at room temperature until the starter has tripled in volume – about 8-10 hours. Depending on your starter, it may only double in volume, that is absolutely fine!
Dough
1. Into the bowl of a stand mixer, add the cold water, sourdough starter, olive oil and instant dry yeast.
-
- 280g Cold Water
- 0.5g Instant Dry Yeast
- 155g Mature Sourdough Starter
- 50g Olive Oil
2. Add the flour on top followed by the salt.
-
- 500g Strong White Bread Flour
- 10g Fine Sea Salt
3. Attach the dough hook and knead the dough on a medium speed for 6-8 minutes, until the dough is smooth and elastic.
4. Lift it out of the bowl, onto a very lightly floured work surface and using a bench scraper, shape it into a smooth boule shape.
5. Lift it into a lightly oiled bowl and cover the bowl tightly with cling film. Allow the dough to proof at room temperature until double in volume – about 2.5-3 hours.
6. Lightly flour the top of the dough and your work surface. Carefully scoop the dough out of the bowl, smooth side down, onto the work surface.
7. Use your hands to flatten the dough into a rough ‘A’ shape, so the base is slightly smaller than the width of your bread tin.
8. Fold the top edge down and press firmly to seal. Continue rolling the dough tightly towards you, creating a compact log and sealing the dough with each roll.
9. Once fully rolled, gently roll the log back and forth to even out the shape, keeping it roughly the same length as the tin.
10. Place the dough seam-side down into a non-stick 9 × 4 × 4-inch Pullman tin (if it’s not non-stick, make sure it is lightly greased with oil). Slide the lid of the pullman tin on and allow it to proof at room temperature. It should take a further 2-3 hours. It may take longer in a cooler room temperature.
11. The dough is ready when it has risen to about 2 cm below the rim of the tin. Don’t proof so far that the dough reaches the rim, as you need to be able to slide the lid into place without it touching the dough. If the dough has risen too much, it will be overproofed and may push out of the tin during baking.
12. About 30 minutes before it is ready, preheat the oven to 205C/400F (non-fan assisted. 190C/375F fan assisted)
13. With the lid on the tin, place it into the centre of the oven and bake for 45-50 minutes. As you are baking ‘blind’ you really want to avoid taking it out too early and disrupting the bake so I always try not to check before 45 minutes.
14. The dough is ready when you slide back the lid, it is a deep golden colour, and the centre of the dough registers 90C/195F on an instant read thermometer.
15. Immediately remove it from the tin and lift it onto a wire rack to cool completely before slicing. I like to wrap the loaf in a clean tea towel as it cools, which softens the crumb slightly.
Sourdough Starter
There are many ways to create a sourdough starter by using different flours, hydration levels, and feeding ratios. The method below follows a 1:2:2 ratio (starter:water:flour), which is a reliable and simple approach, but it can easily be adjusted to suit your schedule, environment, or preferences.
Notes:
Daily feeding is essential in the beginning.
During the first 5-6 days, consistency matters. Try not to skip a day, as this early period is crucial for developing an active and reliable culture.
Don’t worry about perfect timing.
While it helps to feed your starter at around the same time each day in the beginning, sourdough is more resilient than people think. If you’re a few hours late – or even miss a day – it won’t kill the starter. With a couple of consistent feeds, it will usually bounce back.
Temperature plays a major role.
Keeping your starter at a stable temperature will help it ferment on a regular, predictable cycle. Use the same water temperature for each feed when possible, and if you’re serious about consistency, a home dough proofer can be a great investment. It allows you to maintain a steady environment, which leads to more predictable fermentation.
Choose the right container.
A straight-sided glass jar (like a canning jar) with a loose-fitting lid is ideal. It should be large enough to allow the starter to double or even triple in size during peak activity. It’s helpful to place a thin rubber band around the jar to mark the level of your sourdough starter so you can easily tell when it has doubled in size.
Day 1
45g Strong White Bread Flour
5g Dark Rye Flour
50g Water (24C)
1. Into a small bowl, add the ingredients and stir them together with a rubber spatula to form a paste.
2. Scrape the mixture into a clean glass jar, scraping down the sides of the jar if needed so that the starter is level in the jar.
3. Place the lid loosely on top of the and leave it for 24 hours at an ambient room temperature.
Day 2
25g Sourdough Starter
45g Strong White Bread Flour
5g Dark Rye Flour
50g Water (24C)
1. After 24 hours, you may see a tiny bit of activity, small bubbles, but don’t worry if nothing has happened.
2. Scoop out 25g of Day 1’s mixture (the sourdough starter) into a small bowl, discarding the remaining.
3. Add the fresh flour and water on top, and stir them together to combine.
4. Pour the mixture into a clean glass jar and scrape down the sides to ensure it is level. Place the lid loosely on top and leave it for 24 hours at an ambient room temperature.
Days 3-6
25g Sourdough Starter
45g Strong White Bread Flour
5g Dark Rye Flour
50g Water (24C)
1. We now follow the exact same process as day 2, for the rest of the week. As the days progress you will see the starter becoming more active and bubbly.
Day 6
By the 6th day, you should see significantly more activity in your starter, with bubbles visible on the surface and throughout the starter, as well as a more consistent rise and fall pattern. While the exact timing of the peak will depend on your conditions and the flour you’re using, it’s important to establish this consistency before using the starter to bake with.
While by day 7 the starter can typically be used to bake with, feeding it for an extended period of time, such as 14 days or longer, before using it, can help to lead to a stronger starter. In the early stages of development, the pH is higher, but over time, as acids accumulate, the starter promotes the growth of more acid-tolerant bacteria. This shift helps to create a more stable fermentation ecosystem, with a more reliable balance between lactic acid bacteria and wild yeasts.
Depending on your starter, it may either double or triple in volume every time you feed it. This will be your ‘peak’ so take note of every time you feed it, where it rises before falling. If your starter just doubles in volume that is fine too!
Maintaining Your Sourdough Starter
Option 1 – Daily Feeding
If you plan on baking with the starter regularly, then it is best to keep it at room temperature and feed it on a consistent 24-hour cycle. This will ensure it is active and ready to use when you need to bake. However, feeding it daily can be time-consuming and use a significant amount of flour over time.
Option 2 – Refrigeration
If you bake less frequently, you can store your starter in the fridge to slow down fermentation. To do this, feed your starter and then place it in the fridge. It can typically be left for up to a week without additional feedings. After a week, remove it from the fridge and feed the starter following the same ratios as above. Depending on your starter, it may need one or more feedings at room temperature to fully reactivate
Option 3 – Dehydration
For long-term storage, you can dehydrate your starter. Take your starter at its peak and spread it thinly onto a sheet of parchment paper placed on a baking tray. Let it air dry in the oven with the heat off—this can take anywhere from 1 to 3 days, depending on your environment. Once the starter is completely dry and brittle, break it into flakes and store it in an airtight bag or container and freeze. To reactivate the dry starter, add about 15g of the dried starter flakes into a jar along with your normal feed quantities and feed it as you normally would for 2-3 days, or until it shows signs of activity and strength.
Shop the Equipment


Demi-Baguette
TIER 2
Demi-Baguette
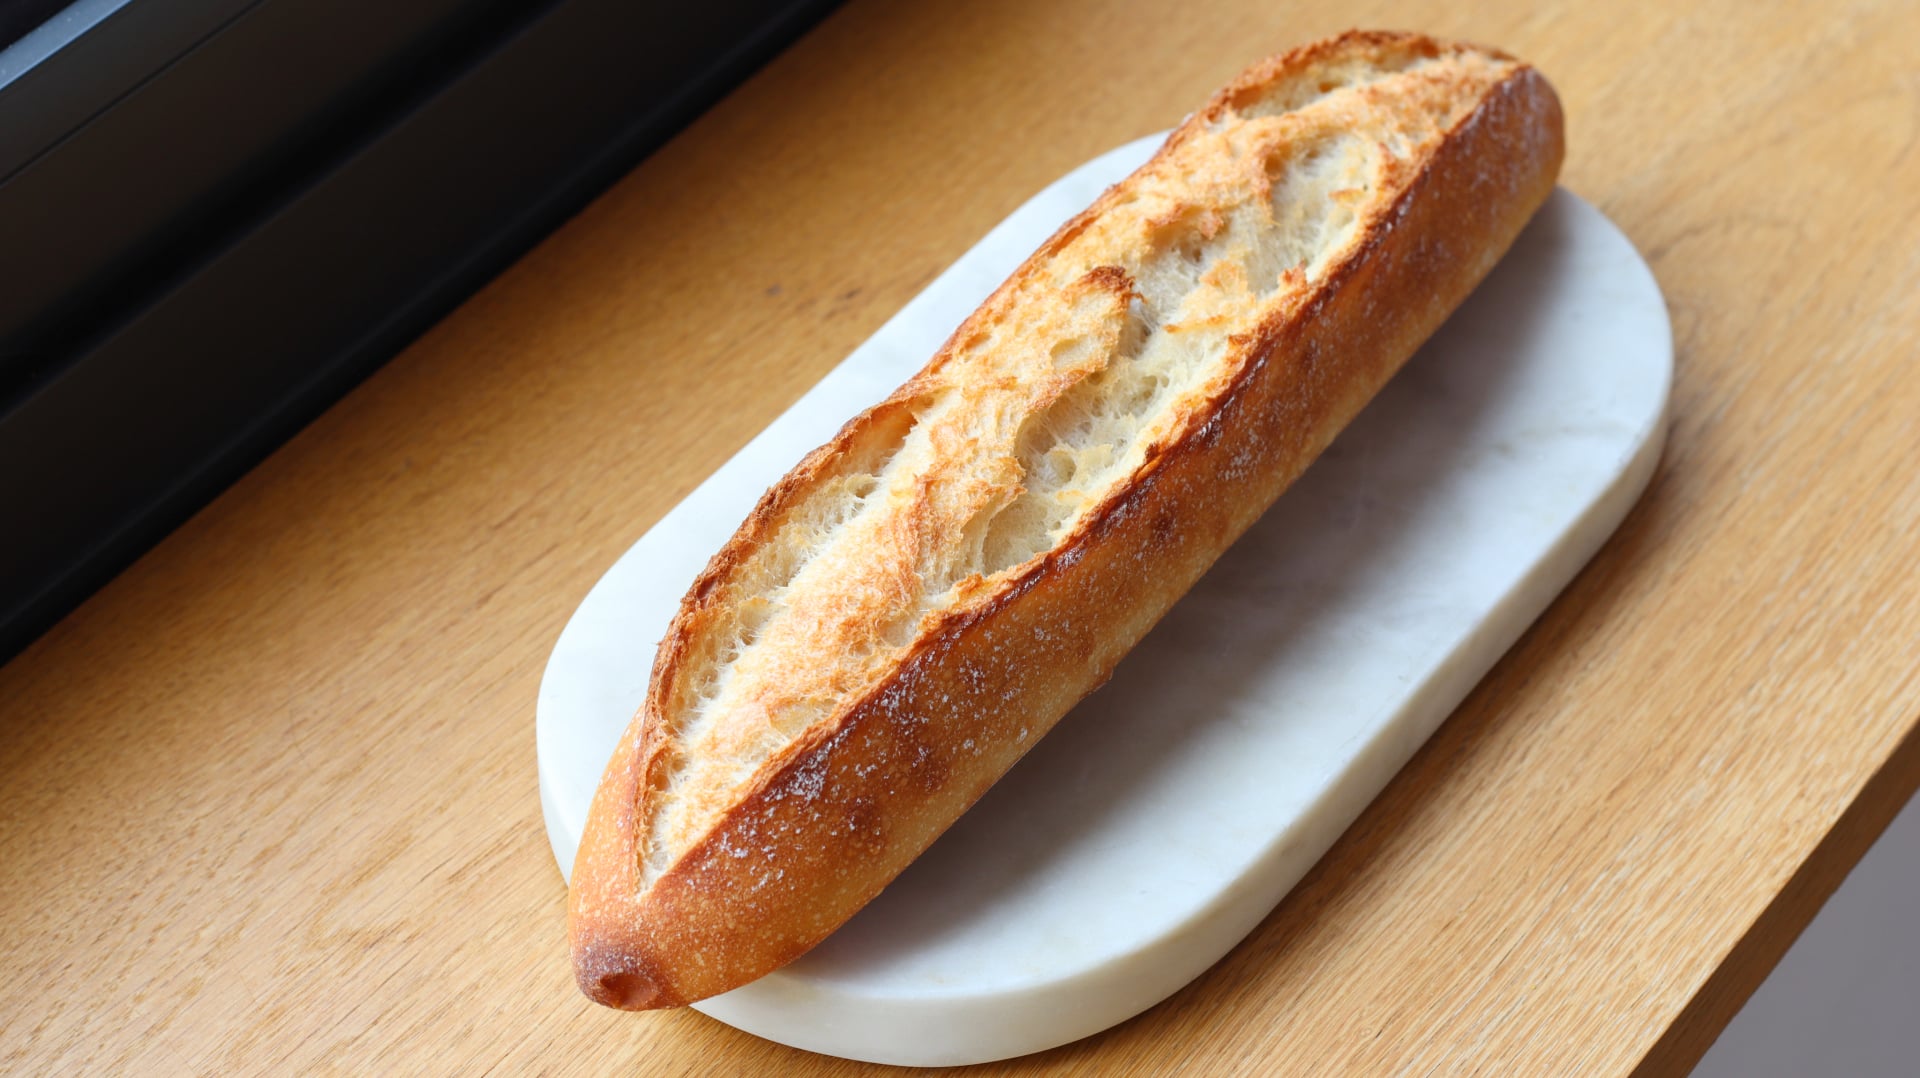
I’m a little nervous to call this a ‘baguette’, as I’m sure the purists might have something to say! But this is possibly the easiest baguette-style bread I’ve ever made. The dough is incredibly simple to prepare, with no stand mixer required. The main thing to focus on is the shaping, which takes a little practice, but using a perforated baguette mould acts as a bit of a cheat, helping you achieve a nice, neat shape. You’ll be amazed by the results for such little effort.
2
DEMI-BAGUETTES
Ingredients
Makes 2 Demi-baguettes
Levain
12g Sourdough Starter*
100g Strong White Bread Flour
19g Dark Rye Flour
119g Water (24℃)
*See the guide at the bottom of the recipe for preparing a sourdough starter
Dough
350g Water, Cold
15g Mature Sourdough Starter
0.5g Instant Dry Yeast
500g Strong White Bread Flour
12g Fine Sea Salt
Special equipment
Perforated baguette tray
Sourdough starter jar
Method
Timings
This dough is designed to be proofed overnight, either at room temperature or in the refrigerator. To ensure your dough is ready to bake the following morning, prepare your sourdough starter so that it reaches its peak in the early evening, ready to use when making the dough.
Levain
A levain is essentially an offshoot of your sourdough starter, made specifically for a particular recipe. You take a small amount of your mature starter and feed it separately, usually in a different ratio, then use the levain once it has fermented and is ready.
However, you don’t always need to make a separate levain. For these recipes, I’ve called it a ‘Levain’ but you can simply feed your existing sourdough starter using the quantities given above. Once it has fermented, use the required amount in the dough and keep whatever is left over as your starter to feed again for your next bake. This keeps things simpler while still giving you the same result.
The ratio for the levain is 1:10:10 which for my starter, peaks in around 8 hours. This means I can feed it in the morning, then it is ready to use in the early evening. Depending on your conditions and starter, this might be too slow. If you find that ratio is too slow, a ratio of 1:2:2 will peak much faster (50g Sourdough Starter, 90g Strong White Bread Flour, 10g Dark Rye Flour, 100g Water (24C)
1. In the morning, prepare your levain by mixing all the ingredients in a bowl with a rubber spatula. Scoop them into a clean jar and place the lid on top.
-
- 12g Sourdough Starter
- 100g Strong White Bread Flour
- 19g Dark Rye Flour
- 119g Water (24C)
2. Leave it at room temperature until the starter has tripled in volume – about 8 hours. Depending on your starter, it may only double in volume, that is absolutely fine!
Dough
1. Into a large bowl, add the cold water, sourdough starter and instant dry yeast. Swirl it together with your hand to dissolve the starter.
-
- 350g Water, Cold
- 15g Mature Sourdough Starter
- 0.5g Instant Dry Yeast
2. Add the flour on top followed by the salt.
-
- 500g Strong White Bread Flour
- 12g Fine Sea Salt
3. Mix it together with a spatula just until the flour has absorbed all the liquid and there are no more dry ingredients left in the bowl. Lightly wet your hand and briefly fold the dough in on itself, starting from the edges and folding into the centre. Flip it over so the smooth side is facing up and cover the bowl with a tea towel.
4. Allow the dough to rest for 30 minutes.
5. After 30 minutes. begin the first stretch and fold by lightly wetting one hand. Slide it under the dough in the bowl, then lift and gently stretch the dough upward. Fold it back down toward the center. Rotate the bowl 90° and repeat the motion. Do this four times in total. At first, the dough may feel a bit tough and shaggy, but it will become noticeably more elastic as you go. Once you’ve completed all the folds, lift the dough gently from the bowl, allowing the dough to hang. Tuck the hanging tail underneath the dough, then repeat 2–3 times until the surface is smooth and taut. Cover the bowl with a tea towel and leave it at room temperature for 30 minutes.
6. Repeat this three more times, performing a total of 4 sets of stretch and folds, for a total of 2 hours.
7. After the final stretch and fold, flip the dough over so the smooth side is facing up and then gently spritz the top of the dough with water (or gently rub a light layer on top with your hand). Cover the bowl with cling film and leave at room temperature for 8-10 hours. Alternatively you can refrigerate the dough overnight, but it will just need longer to proof the following day. Personally, I prefer to chill the dough overnight, as it makes the shaping slightly easier but by proofing at room temperature, the dough will be quicker to make the next day.
8. Remove the chilled dough from the fridge and lightly flour the top. Use a plastic bench scraper to lift it onto a very lightly floured work surface, keeping the smooth side facing up. Divide the dough in half; each piece should be roughly 425g if you want to weigh them.
9. Brush away any excess flour and turn one piece of dough over so the smooth side is facing down. Fold the edges of the dough into the centre, working your way around, to create a rough dumpling-like shape.
10. Turn the dough over so the smooth side is facing up. Using your hands or a bench scraper, gently pull the dough towards you to create tension and form a tight, smooth ball. Repeat with the second piece.
11. Place both dough balls on a lightly floured surface, cover with a tea towel and leave to rest at room temperature for 30 minutes.
12. To shape the baguettes, turn one dough ball onto a very lightly floured surface, smooth side down. Gently flatten it with your hands, pressing out some of the gas, until you have a rough oval.
13. Take the top third of the dough and fold it down towards the centre. As you fold, gently tuck the two corners in towards the centre, creating a slightly tapered edge. Seal the fold firmly with your fingertips or the heel of your hand. This helps create the tapered end of the baguette.
14. Rotate the dough 180°, checking that it isn’t sticking to the work surface. Fold the top third down towards the centre again, once more gently tucking the corners in as you fold. Seal firmly.
15. Fold the dough one final time, bringing the top edge all the way down to the bottom edge. Seal the seam firmly with the heel of your hand to create a neat, compact log.
16. Turn the dough over so the seam is underneath. Starting in the centre, gently roll the dough back and forth, gradually moving your hands towards the ends. As you reach the ends, apply slightly more pressure to taper them into a pointed tail. Repeat a few times until the baguette is evenly shaped.
17. Carefully lift the baguette, keeping the seam underneath, and place it into a perforated baguette tray. Repeat with the second piece of dough.
18. If the dough has been chilled, it will need 2.5-3 hours to proof at room temperature. The dough is proofed when it looks fuller in volume, and when you poke it, it should slowly spring back. If it springs back too quickly, it hasn’t proofed enough yet. If you proofed the dough at room temperature overnight, then the dough should only need around an hour.
19. About 30 minutes before it is done proofing, preheat the oven to 240C/465F non-fan assisted (225C/435F fan-assisted) with a small tray at the bottom of the oven.
20. Place the proofed baguettes into the centre of the oven and splash about ½ cup warm water on the tray that is on the bottom of the oven.
21. Bake the baguettes for around 20-22 minutes until they are an even golden brown colour, then drop the oven temperature to 160C/330F non-fan assisted (150C/300F fan-assisted) and bake for a further 3-5 minutes, until you are happy with the colour.
22. Remove them from the oven and lift them straight onto a wire rack to cool completely.
Sourdough Starter
There are many ways to create a sourdough starter by using different flours, hydration levels, and feeding ratios. The method below follows a 1:2:2 ratio (starter:water:flour), which is a reliable and simple approach, but it can easily be adjusted to suit your schedule, environment, or preferences.
Notes:
Daily feeding is essential in the beginning.
During the first 5-6 days, consistency matters. Try not to skip a day, as this early period is crucial for developing an active and reliable culture.
Don’t worry about perfect timing.
While it helps to feed your starter at around the same time each day in the beginning, sourdough is more resilient than people think. If you’re a few hours late – or even miss a day – it won’t kill the starter. With a couple of consistent feeds, it will usually bounce back.
Temperature plays a major role.
Keeping your starter at a stable temperature will help it ferment on a regular, predictable cycle. Use the same water temperature for each feed when possible, and if you’re serious about consistency, a home dough proofer can be a great investment. It allows you to maintain a steady environment, which leads to more predictable fermentation.
Choose the right container.
A straight-sided glass jar (like a canning jar) with a loose-fitting lid is ideal. It should be large enough to allow the starter to double or even triple in size during peak activity. It’s helpful to place a thin rubber band around the jar to mark the level of your sourdough starter so you can easily tell when it has doubled in size.
Day 1
45g Strong White Bread Flour
5g Dark Rye Flour
50g Water (24C)
1. Into a small bowl, add the ingredients and stir them together with a rubber spatula to form a paste.
2. Scrape the mixture into a clean glass jar, scraping down the sides of the jar if needed so that the starter is level in the jar.
3. Place the lid loosely on top of the and leave it for 24 hours at an ambient room temperature.
Day 2
25g Sourdough Starter
45g Strong White Bread Flour
5g Dark Rye Flour
50g Water (24C)
1. After 24 hours, you may see a tiny bit of activity, small bubbles, but don’t worry if nothing has happened.
2. Scoop out 25g of Day 1’s mixture (the sourdough starter) into a small bowl, discarding the remaining.
3. Add the fresh flour and water on top, and stir them together to combine.
4. Pour the mixture into a clean glass jar and scrape down the sides to ensure it is level. Place the lid loosely on top and leave it for 24 hours at an ambient room temperature.
Days 3-6
25g Sourdough Starter
45g Strong White Bread Flour
5g Dark Rye Flour
50g Water (24C)
1. We now follow the exact same process as day 2, for the rest of the week. As the days progress you will see the starter becoming more active and bubbly.
Day 6
By the 6th day, you should see significantly more activity in your starter, with bubbles visible on the surface and throughout the starter, as well as a more consistent rise and fall pattern. While the exact timing of the peak will depend on your conditions and the flour you’re using, it’s important to establish this consistency before using the starter to bake with.
While by day 7 the starter can typically be used to bake with, feeding it for an extended period of time, such as 14 days or longer, before using it, can help to lead to a stronger starter. In the early stages of development, the pH is higher, but over time, as acids accumulate, the starter promotes the growth of more acid-tolerant bacteria. This shift helps to create a more stable fermentation ecosystem, with a more reliable balance between lactic acid bacteria and wild yeasts.
Depending on your starter, it may either double or triple in volume every time you feed it. This will be your ‘peak’ so take note of every time you feed it, where it rises before falling. If your starter just doubles in volume that is fine too!
Maintaining Your Sourdough Starter
Option 1 – Daily Feeding
If you plan on baking with the starter regularly, then it is best to keep it at room temperature and feed it on a consistent 24-hour cycle. This will ensure it is active and ready to use when you need to bake. However, feeding it daily can be time-consuming and use a significant amount of flour over time.
Option 2 – Refrigeration
If you bake less frequently, you can store your starter in the fridge to slow down fermentation. To do this, feed your starter and then place it in the fridge. It can typically be left for up to a week without additional feedings. After a week, remove it from the fridge and feed the starter following the same ratios as above. Depending on your starter, it may need one or more feedings at room temperature to fully reactivate
Option 3 – Dehydration
For long-term storage, you can dehydrate your starter. Take your starter at its peak and spread it thinly onto a sheet of parchment paper placed on a baking tray. Let it air dry in the oven with the heat off – this can take anywhere from 1 to 3 days, depending on your environment. Once the starter is completely dry and brittle, break it into flakes and store it in an airtight bag or container and freeze. To reactivate the dry starter, add about 15g of the dried starter flakes into a jar along with your normal feed quantities and feed it as you normally would for 2-3 days, or until it shows signs of activity and strength.
Shop the Equipment
