
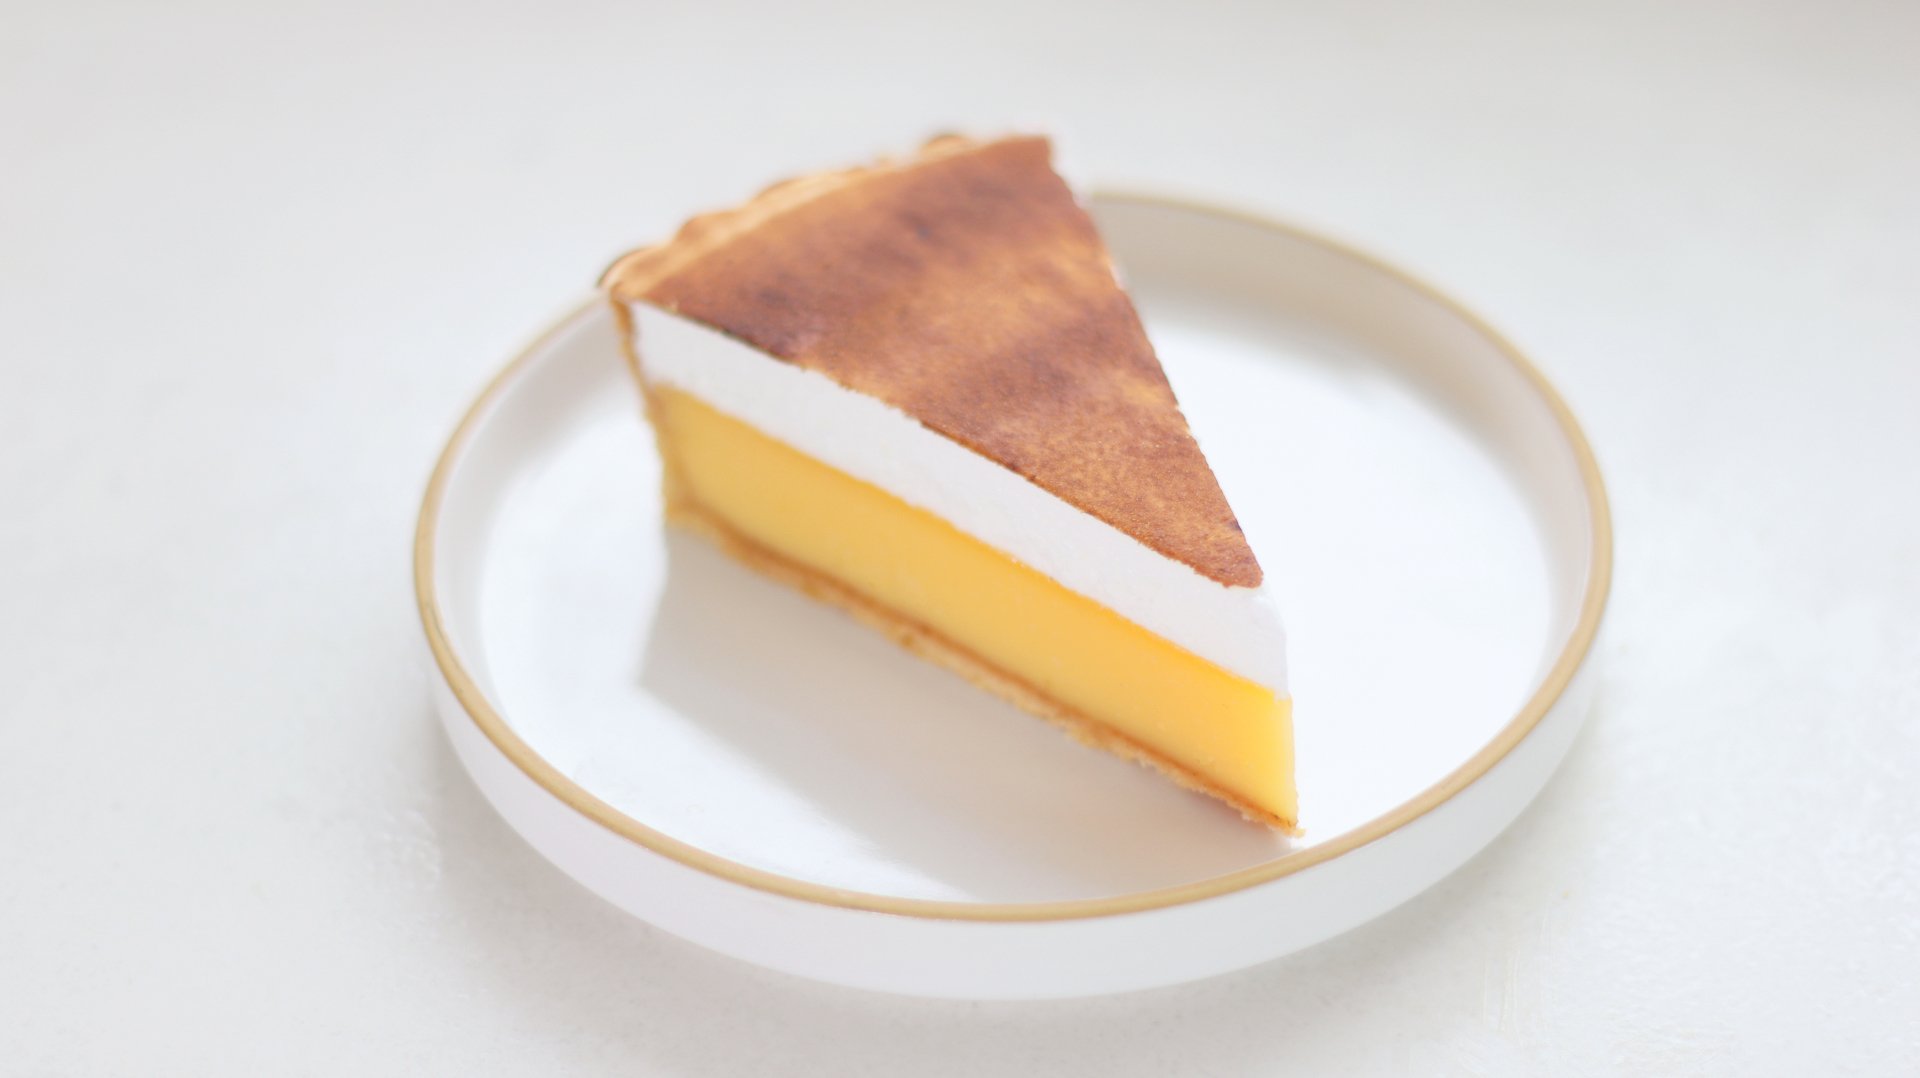
Lemon Meringue Tart
TIER 1
Lemon Meringue Tart
Lemon meringue tart is something I’ve been a bit hesitant to make before – I always thought there was way too much meringue, and it was overly sweet, so it was my mission to be proved wrong! The lemon filling is slightly richer than my Dad’s recipe, with more egg yolks which means it sets slightly firmer. We make a Swiss meringue for the topping, but with less sugar, which we press flat against the filling to create a more modern design.

1
9-INCH TART
Ingredients
Makes 1 9-inch tart
Lemon Sweet Pastry
100g Unsalted Butter, Cold & Cubed
70g Icing/Powdered Sugar, Sifted
Pinch of Fine Sea Salt
Zest ½ Lemon
50g Egg Yolk
200g Plain, All Purpose Flour
Egg Wash
40g Egg Yolk
10g Double/Heavy Cream
Lemon Filling
160g Whole Eggs
120g Egg Yolks
230g Caster/ White Sugar
200g Double/Heavy Cream
6g Lemon Zest
150g Lemon Juice
Swiss Meringue
100g Egg Whites
100g Caster/White Sugar
Special equipment
Stand mixer
9-inch fluted tart ring
Hand blender
Baking beans
Blow torch
Digital thermometer
Method
Lemon Sweet Pastry
1. Into the bowl of a stand mixer, add the butter, icing sugar, salt and lemon zest. With the paddle attachment, beat the mixture for 2-3 minutes, scraping it down a few times in between, until you have a smooth paste.
2. Add in the egg yolks, and beat again, until the mixture is evenly combined, you will need to scrape down the bowl a few times again.
3. Tip in the flour, and use a rubber spatula to scrape the bottom of the bowl to make sure the butter doesn’t get stuck. Scrape the sides, and then mix on a low speed until it pulls together to form a dough.
4. Scoop the dough out onto your work surface, and give it a quick knead just to bring it together. Shape it into a disc and warp it in clingfilm, before refrigerating for an hour or longer.
5. Once it’s chilled, remove it from the fridge and let it soften slightly at room temperature. The dough needs to be cold but flexible. If it is too cold when you roll it, it will crack.
6. Flour the dough and your rolling pin and applying even pressure, roll the dough out into a large, rough circle shape, around 3-5mm thick.
7. Working quickly, carefully lift this into a 23cm fluted tart ring on a baking tray. Use your fingers to press the dough into the side of the tin, then with the excess dough, fold it to create a thick rim around the outside of the tin. We will remove this excess later, but it will help to prevent the dough from shrinking as it bakes.
8. Dock the bottom of the pastry with a fork, and then freeze it for 30 minutes.
9. Preheat the oven to 175C Non-fan assisted (345F or 160C fan-assisted).
Lemon Filling
1. Into a large measuring jug, add the cream, sugar, eggs and egg yolks and blend until smooth.
2. Add in the lemon juice and zest, and blend again to combine, avoiding adding too many air bubbles.
3. Place a sheet of clingfilm on the surface, and refrigerate until needed.
Pastry Continued
1. Once the pastry has chilled, scrunch a large circle of parchment/baking paper up, then press it firmly into the tart. Fill it to the top with baking beans or rice.
2. Place it into the centre of the oven and bake for 25 minutes. Remove the parchment paper and beans, then bake for a further 5-10 minutes until it is a pale golden brown.
3. Whisk together the egg wash ingredients, then brush these all over the tart. Bake for a further 8-15 minutes, or until it is a deep golden colour.
4. As soon as it is out of the oven, use a serrated knife, holding it against the edge of the tin, and carefully trim off the excess pastry. Brush out any crumbs. Lower the oven temperature to 110C Non-fan assisted (230F or 95C fan-assisted).
5. Remove the lemon filling from the fridge and peel off the clingfilm. Scoop off any remaining bubbles with a spoon, then pour the mixture into a medium saucepan.
6. Place the pan onto a medium low heat and stir constantly until it reaches 40C/104F on a digital thermometer.
7. Immediately remove it from the heat and gently pour it through a sieve, back into a tall measuring jug.
8. Place the tart shell, on a tray, into the centre of the oven and pour the lemon filling in. Use a blow torch to pop any remaining bubbles.
9. Bake for around 55 minutes, or until the filling has just set when you gently wobble the tray.
10. Remove it from the oven and allow it to cool for 30 minutes at room temperature, before refrigerating for 1-2 hours.
Swiss Meringue
1. Into the bowl of a stand mixer (or a medium bowl if using an electric hand whisk), add the egg whites and sugar.
2. Place this over a pan of gently simmering water, whisking constantly until it reaches 65C/149F on a digital thermometer.
3. Immediately remove it from the heat, and place it onto a stand mixer fitted with the whisk attachment. Whisk for 5-7 minutes, until you have a medium stiff peak.
4. Remove the lemon tart from the fridge and with it still in the tin, spread the meringue over the top. Then using a large offset spatula, starting at one edge, press it firmly against the rim of the tin and drag it firmly across the tin, to smooth the top. You can do this a few times if needs be.
5. Use a blow torch to caramelise the meringue to an even golden brown colour. Alternatively place it under a hot grill, keeping a very very close eye on it.
6. Remove the tart from the tin and slice it with a hot knife to serve.
Shop the Equipment


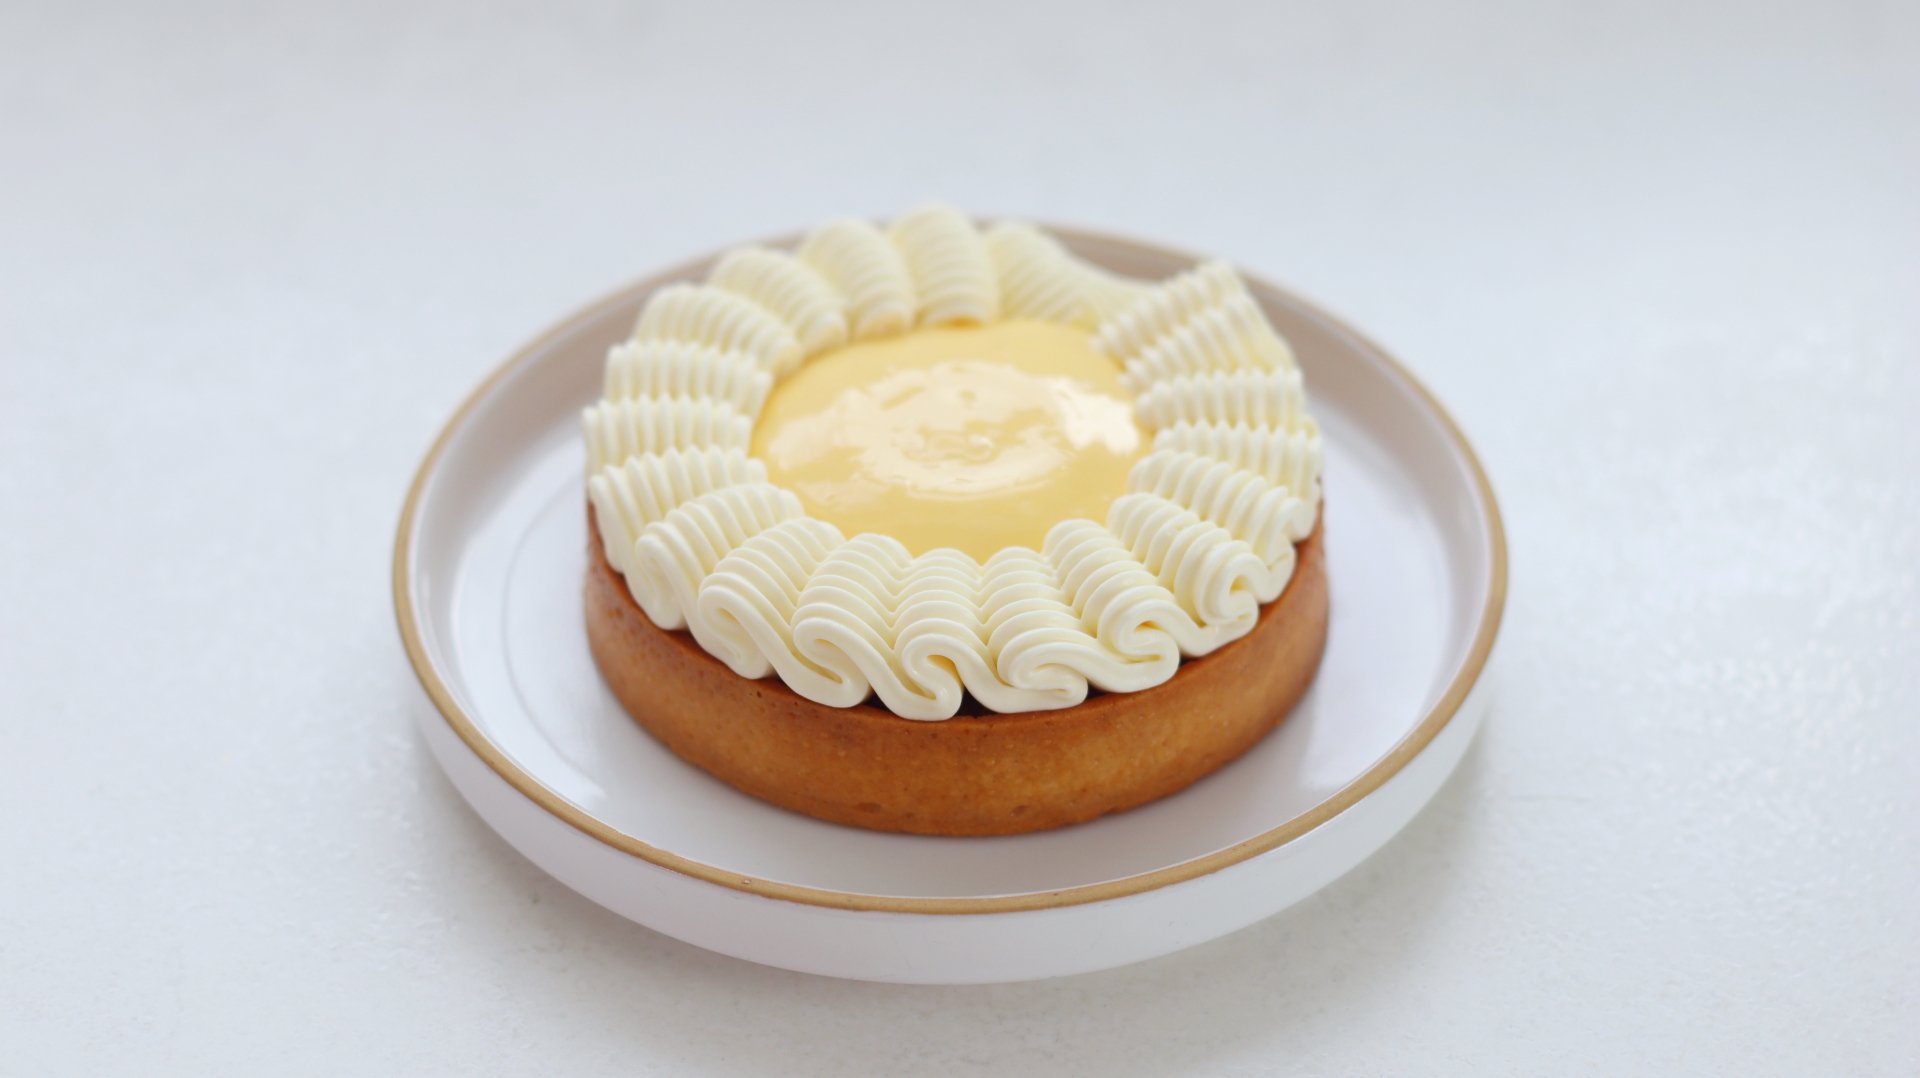
Lemon & White Chocolate Tarts
TIER 2
Lemon & White Chocolate Tart
For Tier 2, we use the same lemon filling as Tier 1, but instead of baking it we cook it like a curd. It sits on top of an almond mirliton, with a secret layer of zingy lemon confit, topped with a stunning white chocolate namelaka which is piped using a basket weave nozzle. Because we cook the lemon filling like a curd, it has a slightly softer texture, more like a cremeux which contrasts all the textures in the tart really well.
4
INDIVIDUAL TARTS
Ingredients
Makes 4 individual tarts
White Chocolate Namelaka
3g Powdered Gelatin (250 Bloom) + 18g Cold Water OR 1 Sheet of Leaf Gelatin
100g Whole Milk
10g Glucose or Honey
185g White Chocolate, Melted
200g Double/Heavy Cream, Cold
Lemon Confit
8g Lemon Zest
130g Lemon Juice
65g Caster/White Sugar
Lemon Sweet Pastry
100g Unsalted Butter, Cold & Cubed
70g Icing/Powdered Sugar, Sifted
Pinch of Fine Sea Salt
Zest ½ Lemon
50g Egg Yolk
200g Plain, All Purpose Flour
Egg Wash
40g Egg Yolk
10g Double/Heavy Cream
Lemon Filling
80g Whole Eggs
60g Egg Yolks
115g Caster/ White Sugar
100g Double/Heavy Cream
3g Lemon Zest
75g Lemon Juice
20g Unsalted Butter, Cold & Cubed (Optional)
Roasted Almond Mirliton
105g Unsalted Butter
85g Roasted Almond Powder
85g Icing/Powdered Sugar
110g Egg Whites
½ Fresh Vanilla Pod
Zest ½ Lemon
Special equipment
Hand blender
Stand mixer
2 silicon mats (optional)
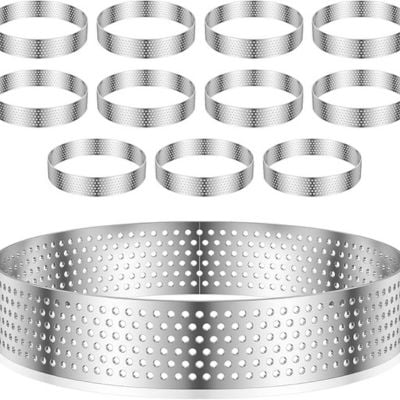
4 4-inch perforated tart rings
Multi-wheel pastry cutter (optional)
Digital thermometer
Piping bags
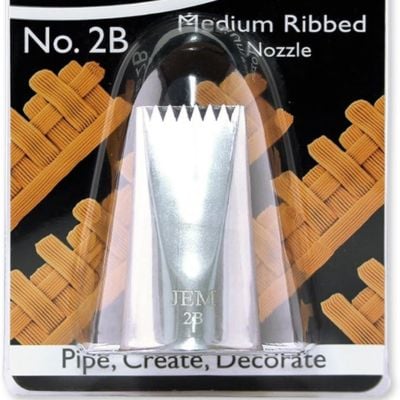
Basket weave nozzle
Rotating cake stand (optional)
Method
White Chocolate Namelaka
1. Into a small dish, add the powdered gelatin and cold water. Stir them together and allow it to bloom for 10 minutes at room temperature. If using leaf gelatin, soak this in a bowl of cold water.
2. Melt the white chocolate in a bowl over a pan of gently simmering water, and then set this to one side.
3. Meanwhile, add the milk and glucose/honey to a small saucepan. Stir it occasionally over a medium heat, until it is steaming and the glucose has dissolved.
4. Scoop in the bloom gelatin (or squeeze the excess water from the leaf gelatin and drop this in). Stir it together until the gelatin has completely dissolved.
5. Pour the hot milk mixture over the melted white chocolate in three parts, stirring in tight circles in the centre with a rubber spatula, to emulsify the mixture. Initially it will look slightly split but it will pull together.
6. Finally, pour in the cold cream and blend it with a hand blender, until smooth. Cover the surface with cling film and refrigerate overnight or a minimum of 6 hours.
Lemon Confit
1. Add the lemon zest into a small saucepan, and cover with cold water. Bring the mixture to the boil, then immediately pass it through a sieve. Repeat this two more times, to remove the bitterness from the zest.
2. Add the blanched zest, lemon juice and sugar into a saucepan, and note the total weight of the ingredients in the pan, on a digital scale.
3. Place the pan on a medium low heat, and simmer until the total weight of the pan has reduced by around 100g.
4. Pour the mixture into a small dish, covered with clingfilm and refrigerate overnight.
Lemon Sweet Pastry
1. Into the bowl of a stand mixer, add the butter, icing sugar, salt and lemon zest. With the paddle attachment, beat the mixture for 2-3 minutes, scraping it down a few times in between, until you have a smooth paste.
2. Add in the egg yolks, and beat again, until the mixture is evenly combined, you will need to scrape down the bowl a few times again.
3. Tip in the flour, and use a rubber spatula to scrape the bottom of the bowl to make sure the butter doesn’t get stuck. Scrape the sides, and then mix on a low speed until it pulls together to form a dough.
4. Scoop the dough out onto your work surface, and give it a quick knead just to bring it together.
5. Place the dough onto a large silicon mat. Place a second silicon mat on top and roll the mixture into a rough circle, getting it as thin as possible (around 3-5mm). If you don’t have silicon mats you can roll the dough between parchment paper but it will be very difficult as it will slip and slide all over the place!
6. Once you have a rough circle of dough, place it into the freezer for 30m.
7. Once chilled, remove it from the freezer and working quickly, peel the silicon mat off of the dough. Take 2 of the 4” perforated ring molds (very lightly greased with soft butter) and press these into the dough.
8. Lift them up and place them onto a perforated tray lined with a perforated baking mat.
9. Using a multi-wheel pastry cutter (or a ruler and a sharp knife) cut 2 long strips of dough, ensuring the width is slightly more than the height of your tart shells. Take the strip of dough and place it inside the tart ring, using your fingers to carefully press the walls against the base of the pastry. If at any point you feel the pastry is getting too warm, place it in the freezer for 5-10 minutes then carry on. Place the tarts into the freezer for 30 minutes.
10. Take the spare dough and form it back into a dough ball. Repeat steps 5-8 to make two more tart shells.
11. Preheat the oven to 175C/345F Non-fan assisted (160C fan-assisted).
12. Use a knife to trim the excess pastry from the tart rings so it is flush, then place the tarts into the centre of the oven for around 20 minutes, or until they are a light golden brown colour.
13. Remove them from the oven and allow them to cool for 5 minutes before carefully removing the tart rings.
14. Mix the egg wash ingredients together and use a pastry brush to paint this over the entire surface of the tart shells. Place them back into the oven and bake for a further 5-10 minutes, until the tarts are a deep golden brown colour. Set aside to cool.
Lemon Filling
1. Into a medium saucepan, add all of the ingredients for the lemon filling, excluding the butter.
2. Whisk it constantly over a medium heat, until it reaches a temperature of 82-84C (179-183F) on a digital thermometer.
3. Immediately remove it from the heat and pass it through a sieve, into a tall measuring jug.
4. Add in the cold butter and blend until smooth with a hand blender.
5. Pour the mixture onto a baking tray and cover the surface with clingfilm. Refrigerate it for 1-2 hours (or longer) until it is a thicker, more pipeable consistency.
Almond Mirliton
1. Into a small saucepan, add the butter and over a medium heat, until it has melted. Remove it from the heat and allow to cool for 5 minutes.
2. Add the remaining ingredients into a medium bowl and whisk to combine, before pouring in the melted butter and whisking to combine.
3. Cover the surface of the mixture with cling film and refrigerate for 1 hour. Meanwhile, set the oven to 160C/320F non-fan assisted (145C fan-assisted).
4. Once it has cooled, pipe the mixture into the tart shells, filling them up just above ¾ full. If you want you can also sprinkle some toasted flaked almonds on.
5. Place the tarts into the centre of the oven and bake for 20-25 minutes, or until it is a golden colour on top. Allow to cool for 30 minutes at room temperature.
Assembly
1. Remove the lemon confit from the fridge which should now be a thicker, marmalade like consistency.
2. Pipe a few dollops onto the top of the cooled tart, and spread this to the edges with the back of a spoon. It is quite sharp so you don’t need to overload the tart.
3. Remove the white chocolate namelaka from the fridge and add into the bowl of a stand mixer fitted with a whisk attachment. Whisk on a medium speed until the mixture holds a medium stiff peak.
4. Add it into a piping bag fitted with a basket weave nozzle.
5. Place the tart into the centre of a rotating cake stand and holding the piping bag at about a 60 degree angle, apply even pressure, then push the nozzle slightly forward to create an initial ruffle of buttercream, before pulling it back to fold the buttercream over itself. Continue this motion in one direction without stopping so the folds connect smoothly, creating an even, continuous ruffle/weave. Because of the type of nozzle it is a little difficult to join the lines up seamlessly, so you just have to neatly pull the piping bag away to create a tail.
6. Remove the lemon filling from the fridge and add this into a piping bag, pipe it into the centre of the tart, filling it just below the rim of the cream.
7. They are now ready to serve.
Shop the Equipment





Raspberry Jam Frangipane Tart
TIER 2
Raspberry Jam Frangipane Tart
In this recipe we take our homemade raspberry jam from tier 1 and spread it on a Páte Brisée pastry case. Then we fill it with an almond frangipane and delicately decorate it with a pattern of flaked almonds. I usually fill my desserts with almond cream instead of frangipane, but the addition of pastry cream really improves the texture and adds even more flavour to the dessert.
1
9-INCH TART
Ingredients
Makes 1 9-inch Tart
Pâte Brisée
200g Plain/All-Purpose Flour
100g Unsalted Butter, Cold & Cubed
50g Cold Water
3g Sea Salt
Pastry Cream
250g Whole Milk
½ Fresh Vanilla Bean Pod
35g Caster/White sugar
60g Egg Yolks
20g Cornstarch/Cornflour
2g Fine Sea Salt
20g Cold Unsalted Butter
Frangipane
165g Unsalted Butter, Room Temperature
165g Caster/White Sugar
Zest ½ Lemon
130g Whole Egg, Lightly Whisked Together
165g Ground Almonds/Almond Flour
2g Sea Salt
85g Pastry Cream, Cooled
To Fill & Finish
Raspberry Jam (Tier 1)
Flaked Almonds
Fresh Raspberries
Icing/Powdered Sugar
Special equipment
Stand mixer
Silicon mats
9-inch fluted tart ring
Baking beans
Piping bag
Method
Pâte Brisée
1. Into the bowl of a stand mixer, add the butter, flour and salt. Mix on a low speed until the butter has completely broken down into fine crumbs and there are no large chunks of butter.
2. Slowly drizzle in the cold water and mix for a few seconds until it pulls together into a dough.
3. Gently knead the dough into a disc on your work surface and wrap it in clingfilm, then refrigerate for 30 minutes.
4. After 30 minutes, place it in between two silicon mats (or two sheets of parchment paper), and roll the dough into a rough disc that is around 3-5mm thick.
5. Refrigerate the pastry again for 1 hour and preheat the oven to 180C/355F Non-fan Assisted. This is a good point to prepare your pastry cream.
6. Peel the silicon mats/parchment paper off the pastry and ensure the dough is cold but flexible. If it is too cold it will break so just leave it for a few minutes to soften slightly if needed.
7. Lift the pastry into a 22.5cm fluted tart ring and use your hands to gently press it into the edges. Work quickly, being careful not to tear the pastry.
8. Use a knife to trim the excess pastry off and place the tart shell back into the fridge to chill for 15 minutes.
9. Scrunch up a piece of baking paper and press this into the chilled tart shell. Fill the tart shell with baking beans or rice and then place it on a tray and straight into the oven to bake.
10. Bake the tart for 30 minutes, then remove the baking beans, and continue to bake for a further 10-15 minutes, or until the pastry is an even golden brown colour.
11. Remove it from the oven and allow it to cool for 30 minutes.
Pastry Cream
1. In a medium saucepan on the stovetop over medium heat, add the milk and the scraped vanilla pod just until it is steaming.
2. In a separate medium bowl, whisk together the sugar, egg yolks, cornstarch, and salt until smooth and thickened.
3. Slowly pour the hot milk mixture over the sugar and eggs mixture, whisking constantly.
4. Pour the mixture back into the saucepan. Whisk constantly over medium heat until it begins to bubble, then cook for 1 minute.
5. Remove the saucepan from the heat and pass the mixture through a sieve placed over a large bowl.
6. Whisk in the butter until the mixture is smooth. Cover the bowl with cling film and refrigerate it for an hour.
Frangipane
1. Into a stand mixer, add the soft butter, salt, lemon zest and sugar. Beat for 2-3 minutes on a medium-low speed until slightly thicker and paler in texture.
2. Slowly drizzle in the eggs and beat for a further minute.
3. Finally, add in the ground almonds/almond flour and scoop in the required amount of cooled pastry cream. Beat until smooth.
4. Add the mixture into a piping bag.
Assembly & Baking
1. Lower the oven temperature to 175C/345F Non-Fan Assisted.
2. Take the raspberry jam and spread a few tablespoons across the bottom of the cooled pastry. Make sure it is nice and even.
3. Next, pipe the frangipane evenly into the tart shell. Use a palette knife if needed to smooth it out.
4. Slice your fresh raspberries in half and press them gently into the frangipane.
5. Next, take your time, and evenly place the flaked almonds around the entire tart in a nice circular pattern. This is optional, you can simply sprinkle them on!
6. Place it into the oven and bake for 25-30 minutes or until it is an even golden colour all over.
7. Remove it from the oven, and at this point this filling will still be slightly soft, so let it cool for an hour at room temperature before serving.
Shop the Equipment
Raspberry Soufflé Tartlets
TIER 2
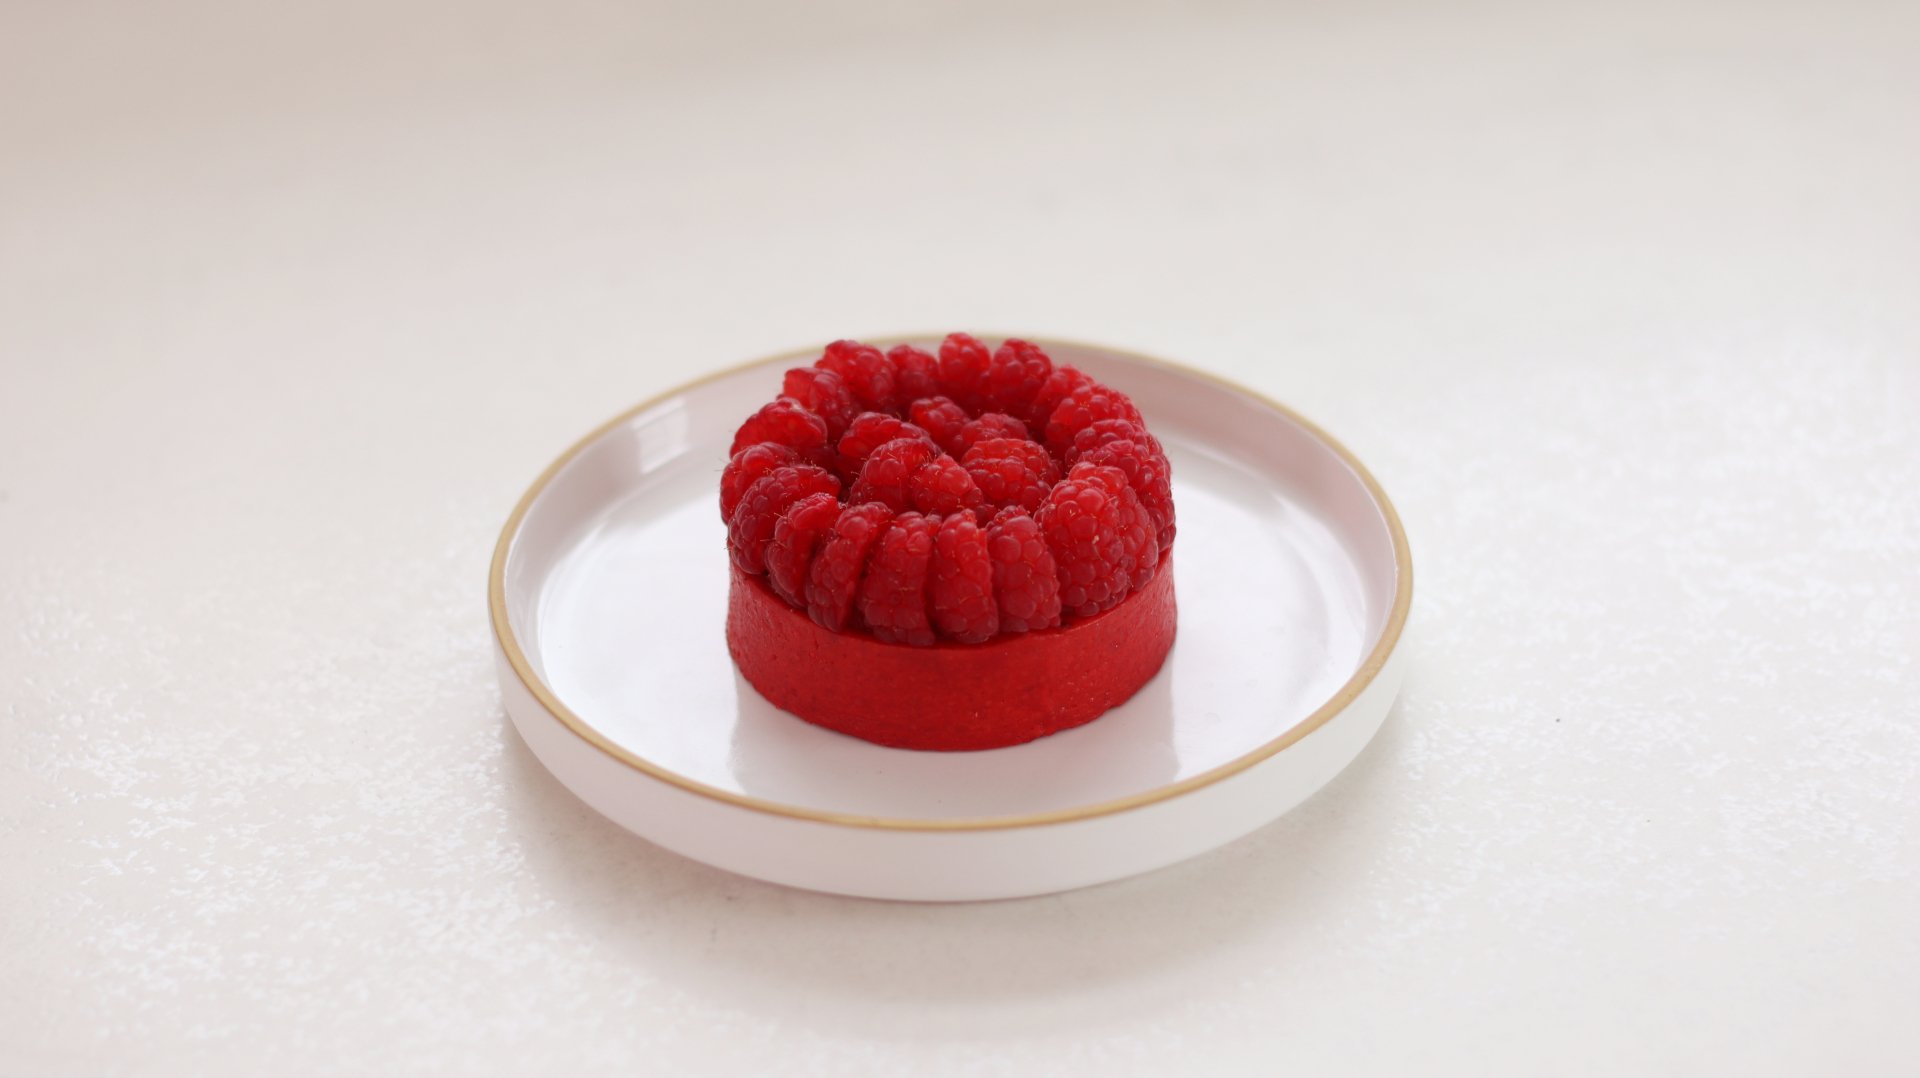
Raspberry Soufflé Tartlets
In Tier 2 we make a Bake It Better first – raspberry pastry! I tested this a few times and am really happy with the result. We fill this with a raspberry soufflé and garnish with fresh raspberries. It’s actually the pastry element of this recipe that makes this the Tier 2 recipe – the beauty of adding soufflé to a tart is there’s no pressure on the rise! So once you’ve mastered the pastry, it’s plain sailing!
4
INDIVIDUAL TARTS
Ingredients
Makes 4 Individual Tartlets
Raspberry Pastry
75g Unsalted Butter, Cold & Cubed (small cubes)
50g Icing Sugar
4g Powdered Raspberry Powder
38g Egg Yolks
150g Plain/AP Flour
Red Food Colouring Powder/Gel
Egg Wash
20g Egg Yolk
5g Double/Heavy Cream
Red Food Colouring Powder/Gel
Raspberry Soufflé
– Raspberry Base
120g Raspberry Puree
10g Cornstarch
Pinch of Sugar
– Meringue Base
75g Raspberry Base
80g Egg Whites
50g Caster Sugar
Fresh Raspberries To Fill + Garnish
Special equipment
Stand mixer
Silicone mats
4x 7.5cm x 2cm perforated tart rings
Multi-wheel pastry cutter OR a ruler
Digital thermometer
Piping bags
Method
Raspberry Pastry
1. Into the bowl of a stand mixer, add the cold cubed butter and then sift over the raspberry powder, icing sugar and red food powder. With the paddle attachment, beat on a medium low speed for 2 minutes or until the butter is smooth. As the butter is cold you will need to scrape down the bowl a few times to ensure it is completely incorporated.
2. Add in the egg yolks and beat again for around 30 seconds, scraping down the bowl again to ensure it’s all incorporated.
3. Finally, sift in the flour, scrape the bottom of the bowl just to loosen the butter stuck on the bottom, and then mix again on a low speed until it pulls together to form a dough, about 20-30 seconds.
4. Scoop the dough out and place it onto a large silicone mat and place a second silicone mat on top. Roll the dough out with a rolling pin until it is around 3-5mm thick, don’t worry too much about the shape.
5. Place the entire sheet of pastry into the freezer for 30 minutes.
6. While the dough is chilling, take the perforated tart ring and very lightly grease the inside with soft butter. This helps to prevent the dough from sticking to the ring.
7. Remove the chilled dough from the freezer and, working quickly, peel the top silicone mat off of the dough. Press the 4 tart rings firmly into the dough, lift them up, and transfer them to a perforated tray lined with a perforated baking mat. The dough should be cold enough that it attaches to the ring as you lift it up. Place the tray in the fridge while you cut the walls.
8. With the remaining dough, use a ruler and a sharp knife to cut 4 strips of dough each measuring 9.6 x 0.9 inches (24.4 x 2.3cm). These measurements seem quite precise, but this will ensure the dough fits perfectly into the tart rings with no excess overlapping. If they feel too warm to lift up, place them back in the freezer for 5 minutes just so they can cool back down slightly.
9. Remove the baking tray with the tart bases from the fridge and remove one strip of dough for the walls.
10. Working quickly, take the strip of dough and place it inside the tart ring. Use your fingers to gently press together this strip of dough, against the base of the tart. The idea is to slightly push down the wall of dough so that it meets the dough on the base of the tart shell and there are no gaps. If at any point you feel the dough is too warm or is tearing, place everything back in the freezer for 10 minutes then carry on.
11. Repeat this with the remaining tarts, again, chilling the dough if needed. At this point, squeeze together the remaining scraps of dough, and repeat the process, rolling the dough and chilling it, so that you can create the final 2 tart shells.
12. Once you have lined all the tart shells, avoid trying to move them in case the dough tears. Chill the entire tray in the freezer for 15 minutes and pre-heat your oven to 175C/350F.
13. Remove the shells from the freezer and holding a knife perpendicular to the tart shell, trim off the excess pastry hanging over the tart ring so that the pastry is flush.
14. Place the tart shells in the oven, and bake for 15 minutes. While they bake, add the egg wash ingredients to a small ramekin and blend it to combine – I prefer to use a hand blender as it fully emulsifies the colouring into the egg mixture.
15. Remove the tarts from the oven and allow them to cool for 5 minutes. At this point, the pastry should have retracted slightly from the ring mould, and you should be able to lift it off easily.
16. Lift the shells up and using a pastry brush, apply an even egg wash all over the tart. Lower the oven temperature to 140C/285F and place them back on the tray and into the oven for a further 5 minutes. Remove from the oven to cool.
Raspberry Soufflé
– Raspberry Base
1. Into a medium bowl, whisk together the sugar and cornstarch.
2. Add the puree into a medium saucepan and heat it until it reaches around 40C. Once hot, sift in the cornstarch mixture and whisk together. Continue to cook until the mixture thickens and starts to bubble. Once bubbling, cook for a further minute.
3. Immediately pass the mixture through a sieve into a bowl and cover the surface with cling film. Chill for 30 minutes in the fridge.
– Meringue Base
1. Fill a pan with a shallow amount of water and place it over a medium heat. Meanwhile, add the egg whites and sugar into a medium bowl and place this over the water once it is simmering.
2. Whisk constantly until it reaches 60-65C (140-150F) on a digital thermometer.
3. Immediately remove it from the heat and place it on a stand mixer fitted with a whisk attachment.
4. Whisk on a medium speed for 6-7 minutes until you have a stiff meringue.
5. While it is whisking, remove the raspberry base from the fridge, whisk it, then weigh 75g and add this into a medium bowl.
6. When the meringue is done, fold it in thirds into the raspberry base until you have a homogenous mixture.
Assembly
1. Add the raspberry soufflé mixture into a piping bag and snip the end off.
2. Take the cooled tart shells, and place a few torn up raspberries into the base.
3. Pipe the soufflé mixture into the tart shells, filling them right to the top, and then use a palette knife to level them so they are completely flush with the top of the tart.
4. Place the tarts back onto your baking tray, and place the perforated tart rings around the pastry again. This will just help to provide a little structure and prevent the pastry from cracking as the soufflé expands.
5. Place the tarts into the oven and bake them for 7 minutes. They should rise just slightly.
6. Once they are baked, these can be served warm or alternatively served chilled (place the tarts into the fridge for 1 hour)
7. To garnish, add some freshly sliced raspberries.
Shop the Equipment

Decadent Baked Chocolate Tart
TIER 1
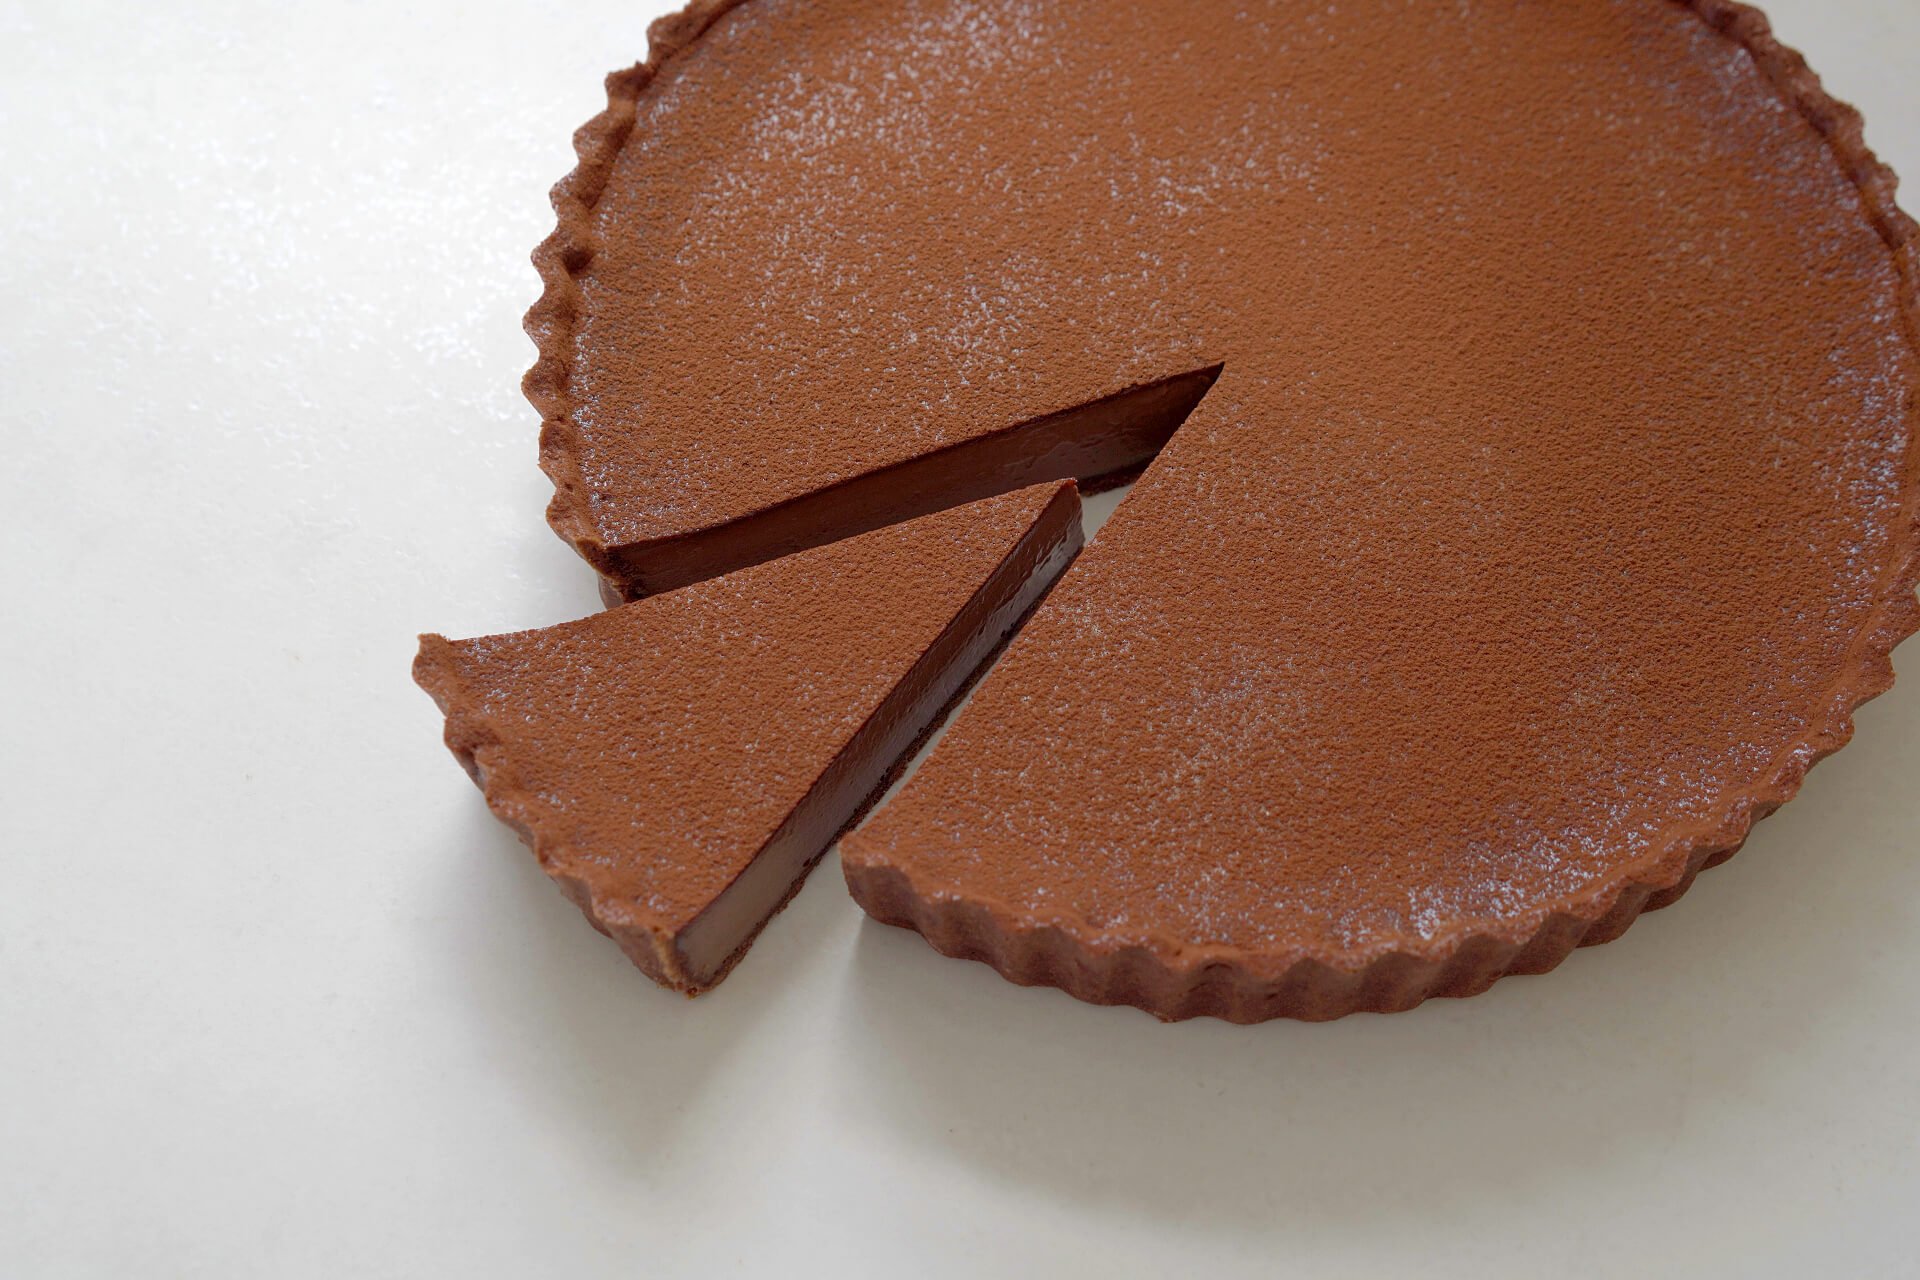
Decadent Baked Chocolate Tart
This recipe teaches you how to master the perfect chocolate pastry, and create the smoothest chocolate filling. Decadent really is the only way to describe it! It’s light but rich, and is best served with a nice dollop of Vanilla Chantilly.
1
9" TART
Ingredients
Makes 1 9-inch Tart
For the chocolate pastry
70g powdered/icing sugar
100g unsalted butter, cold and cubed
20g cocoa powder
50g egg yolks
180g all purpose/plain flour, plus a pinch of sea salt
For the cocoa egg wash
40g egg yolks, plus 5g cocoa powder
10g heavy/double cream
For the filling
155g whole eggs
85g granulated/caster sugar
pinch of sea salt
180g heavy/double cream
325g whole milk
130g dark chocolate, 70% cocoa solids, melted
Special equipment
Stand mixer with paddle attachment
9-inch (22.8cm) fluted tart tin
Method
Chocolate pastry and egg wash
- Into the bowl of a stand mixer fitted with the paddle attachment, sift in the sugar. Add the butter and the cocoa powder.
- Beat for 2 to 3 minutes, or until the mixture forms a smooth paste, pausing to scrape down the sides as needed.
- Add in the egg yolks, scrape down the sides and beat for 30 seconds, or until incorporated.
- Scrape down the bowl once again to ensure no butter is stuck to the sides. Add the flour and salt and mix on low speed for about 20 to 30 seconds, or until the mixture pulls together into a dough.
- Remove the dough from the bowl and gently work it into a disc shape. Wrap the dough in plastic wrap/cling film and refrigerate for 30 minutes.
- Take the dough out of the fridge and gently squeeze it, using your hands to test the firmness. You want the dough to be slightly pliable but still cold. If the dough is too soft it will get sticky as you roll, but if it is too cold it will crack. It might need a minute or two at room temperature to get it to the right consistency.
- Lightly flour the dough and your rolling pin, and working quickly, roll the dough into a rough circle until the pastry is relatively thin, about 0.15 to 0.20-inch (4mm to 5mm) thick. Lift the dough up occasionally and lightly flour underneath to prevent it from sticking. If the dough is tearing or feels too warm, place it on a baking tray and refrigerate for 10 to 15 minutes, then try again.
- Place your rolling pin at the top of the circle and fold the top edge of the dough over the rolling pin. Pull the rolling pin back towards you, which will wrap the dough around the rolling pin.
- Starting at the bottom edge of your fluted tart tin, carefully unroll the dough from the rolling pin, to cover the entire tin.
- Use your fingers to gently press the dough into the edges of the fluted indents. If the dough is tearing, simply take any excess pastry and patch the holes.
- Take the rolling pin, and pressing firmly against the top of the tin, roll it over the entire tin to trim away the excess dough. Place the tin on a tray and pop it into the freezer for 30 minutes. Pre-heat your oven to 350°F/175°C.
- Cut a large circle of parchment/baking paper, and scrunch this up a few times so that it is flexible. Remove the tray from the freezer and use a fork to poke holes evenly across the base of the pastry.
- Place the parchment/baking paper on the inside of the pastry and press it into the edges. Pour your baking beans or rice into the base and spread them out. Place the tray with the tin on in the oven and bake for 25 minutes.
- After 25 minutes, remove the tray from the oven and carefully lift out the parchment paper with the baking beans on. Return the tray to the oven and continue to bake until the pastry is an even golden color—about 5-10 minutes.
- Remove the tray from the oven and allow the pastry to cool for 10 minutes.
- Very carefully remove the pastry from the tin, keeping the removable base on the bottom. Really thoroughly mix together the ingredients for the egg wash to make sure the cocoa powder is incorporated.
- Using a pastry brush, lightly egg wash the inside and outside of the tart shell. Place it onto the tray and back into the oven for 5-7 minutes, or until the egg wash has completely set
- Remove the tart from the oven, allowing it to cool slightly. It is now ready to add your filling.
Filling
- Lower the oven temperature to 285°F/140°C.
- In a medium bowl, whisk together the egg, sugar, and salt for 1 minute.
- In a small saucepan on the stovetop over medium heat, combine the cream and milk. Bring the mixture to a gentle simmer, then slowly pour it over the egg mixture and whisk constantly until combined.
- Place the melted chocolate in a medium bowl and slowly pour the hot cream mixture over the chocolate, using a spatula to stir in small circles in the center of the bowl (ensure the melted chocolate is warm for this step). Use a spoon to scoop off any foam from the top.
Assembly
- Place the baked tart case, still in the pan, on a baking tray in the center of the oven. Carefully pour the chocolate filling into the tart shell, filling it just below the lip of the tart shell. Bake for about 50-60 minutes, or until there’s a wobble about 3” (7.5cm) big in the center of the tart.
- Remove the tray from the oven and allow the tart to cool to room temperature before placing it in the fridge for 2 hours.
- Remove the tart from the fridge and pop it out of the pan and onto your serving plate. oven. Decorate the tart with a dusting of cocoa powder around the edges.
Shop the Equipment

Chocolate and Caramel Tartlets
TIER 2
Chocolate and Caramel Tartlets
For this recipe, we use the same pastry and filling from Tier 1, but we advance it by using individual perforated tart rings, and by creating a Chocolate Namelaka and a Salted Caramel. I’ve used a #127 piping nozzle to create a funky design around the edge, but you can do whatever you fancy!
6
TARTLETS
Ingredients
Makes 6 Tartlets
For the chocolate pastry
70g powdered/icing sugar
100g unsalted butter, cold and cubed
20g cocoa powder
50g egg yolks
180g all purpose/plain flour, plus a pinch of sea salt
For the cocoa egg wash
40g egg yolks, plus 5g cocoa powder
10g heavy/double cream
For the Namelaka
3g powdered gelatin
18g cold water
160g dark chocolate, 70% cocoa solids
120g whole milk
12g glucose
240g heavy/double cream, cold
For the salted caramel
88g heavy/double cream
23g whole milk
68g glucose syrup, divided
40g superfine/caster sugar
1g flaky sea salt
30g unsalted butter
For the filling
100g eggs
50g granulated/caster sugar
pinch of sea salt
110g heavy/double cream
200g whole milk
80g dark chocolate, 70% cocoa solids
Special equipment
Stand mixer with paddle and whisk attachments
6x 3 x 0.78 inch (7.6×1.98cm) perforated tart rings
2x piping bags, plus a #127 tip piping nozzle
Hand blender
Method
Chocolate pastry and egg wash
- Into the bowl of a stand mixer fitted with the paddle attachment, sift in the sugar. Add the butter and the cocoa powder.
- Beat for 2 to 3 minutes, or until the mixture forms a smooth paste, pausing to scrape down the sides as needed.
- Add in the egg yolks, scrape down the sides and beat for 30 seconds, or until incorporated.
- Scrape down the bowl once again to ensure no butter is stuck to the sides. Add the flour and salt and mix on low speed for about 20 to 30 seconds, or until the mixture pulls together into a dough.
- Squeeze the mixture in your hand to form a rough ball. Place the ball of dough onto a silicone mat. Place a second silicone mat on top and roll the mixture into a rough rectangle, getting it around 0.15 to 0.2 inch (4mm to 5mm) thick. If you don’t have silicone mats you can roll the dough between parchment paper, but it will be more difficult as it has less grip. Place it in the freezer for 20 minutes.
- While the dough is chilling, take the perforated tart ring and very lightly grease the inside with soft butter. This helps to prevent the dough from sticking to the ring.
- Remove the chilled dough from the freezer and, working quickly, peel the top silicone mat off of the dough. Press the 4 tart rings firmly into the dough, lift them up, and transfer them to a perforated tray lined with a perforated baking mat. The dough should be cold enough that it attaches to the ring as you lift it up. Place the tray in the fridge while you cut the walls.
- With the remaining dough, use a ruler and a sharp knife to cut 4 strips of dough each measuring 9.6 x 0.9 inches (24.4 x 2.3cm). These measurements seem quite precise, but this will ensure the dough fits perfectly into the tart rings with no excess overlapping. If they feel too warm to lift up, place them back in the freezer for 5 minutes just so they can cool back down slightly.
- Remove the baking tray with the tart bases from the fridge and remove one strip of dough for the walls.
- Working quickly, take the strip of dough and place it inside the tart ring. Use your fingers to gently press together this strip of dough, against the base of the tart. The idea is to slightly push down the wall of dough so that it meets the dough on the base of the tart shell and there are no gaps. If at any point you feel the dough is too warm or is tearing, place everything back in the freezer for 10 minutes then carry on.
- Repeat this with the remaining tarts, again, chilling the dough if needed. At this point, squeeze together the remaining scraps of dough, and repeat the process, rolling the dough and chilling it, so that you can create the final 2 tart shells.
- Once you have lined all the tart shells, avoid trying to move them in case the dough tears. Chill the entire tray for 15 minutes and pre-heat your oven to 350°F/175°C.
- Remove the shells from the freezer and holding a knife perpendicular to the tart shell, trim off the excess pastry hanging over the tart ring so that the pastry is flush.
- Place the tart shells in the oven, and bake for 15 minutes. While they bake, thoroughly whisk together the ingredients for the egg wash.
- Remove the tarts from the oven and allow them to cool for 5 minutes. At this point, the pastry should have retracted slightly from the ring mold, and you should be able to lift it off easily.
- Lift the shells up and using a pastry brush, apply an even egg wash all over the tart. Place them back on the tray and into the oven for a further 5-8 minutes. The pastry is blind baked now ready to add your filling.
Namelaka
- In a small bowl, combine the powdered gelatin and cold water. Mix well and allow to bloom for 5 minutes.
- To a medium bowl, add the chocolate and place the bowl over a pan of gently simmering water without allowing the bowl to touch the water. Stir until the chocolate has completely melted. Remove the bowl from the heat and set aside.
- To a small saucepan over medium heat, combine the milk and glucose. Stir the mixture until steaming. Remove the saucepan from the heat and stir in the bloomed gelatin until it completely dissolves.
- Slowly pour this mixture over the melted chocolate, stirring in small circles in the center of the chocolate as you pour. Initially, the mixture will look quite split and oily, but as you add the remaining milk, everything will pull together.
- Add the cold cream and use a hand blender or a hand whisk to mix until combined. Cover the surface with plastic wrap/cling film and refrigerate for a minimum of 5 hours or ideally overnight.
Salted Caramel
- In a medium saucepan on the stovetop over medium heat, combine the milk, heavy cream, and 23 grams of corn/glucose syrup. Bring to a gentle simmer, whisking the mixture to ensure the syrup has fully dissolved. Remove the saucepan from the heat but ensure the mixture stays warm.
- In a medium saucepan on the stovetop over medium heat, combine the superfine/caster sugar and the remaining 45 grams of glucose sugar. Cook until the mixture turns a deep caramel color, whisking slowly to help disperse the sugar.
- Once golden, immediately pour in the hot cream mixture, being very careful as it will bubble up violently. Whisk the mixture and cook for 1 minute.
- Remove the saucepan from the heat and pour the mixture through a sieve and into a large bowl. Let the mixture cool for 2 minutes. Add the sea salt flakes and butter. Blend or whisk until smooth.
- Pour the mixture into a container and chill for at least 3 hours
Filling
- Lower the oven temperature to 285°F/140°C.
- To a medium bowl, add the chocolate and place the bowl over a pan of gently simmering water. Stir until the chocolate has completely melted. Remove the bowl from the heat and set aside.
- In a medium bowl, whisk together the eggs, sugar, and salt for 1 minute.
- In a small saucepan over a medium heat, combine the milk and cream. Heat until the mixture is steaming.
- Slowly pour the milk mixture over the eggs, whisking to combine as you pour.
- Slowly pour this mixture over the melted chocolate, using a spatula to stir the mixture in small circles in the center as you pour. Once everything has been combined, use a spoon to scoop off any foamy bubbles on the top.
Assembly
- Place the tray with the tarts on, in the middle of the oven and carefully pour in the chocolate filling—just to the top of the tart shell. Bake for about 25 or 30 minutes or until they have a very small wobble in the center.
- Remove the tarts from the oven and allow them to cool to room temperature before refrigerating for 3 hours.
- Remove the namelaka from the fridge and add it to the bowl of a stand mixer fitted with the whisk attachment. Whisk on medium speed until you get a medium–stiff peak.
- Add the mixture to a piping bag fitted with a small St. Honore nozzle. Holding the piping bag just slightly below vertical, pipe the namelaka around the outside edge of the tart in a zigzag motion, leaving a small gap in the center. If you have a cake turntable, this can make it a little easier to spin the tart as you pipe.
- Add the salted caramel to a piping bag and snip a small hole off the end. Pipe this into the center of the tart.
- Allow the tarts to sit at room temperature for 30 minutes before serving.
Shop the Equipment


Golden Gianduja Tart
TIER 3
Golden Gianduja Tart
4
INDIVIDUAL TARTS
Ingredients
Makes 4 individual tarts
Chocolate Pâte Sucrée
100g Unsalted Butter, Cold & Cubed
70g Icing/Powdered Sugar
50g Egg Yolks
175g Plain/All-Purpose Flour
25g Cocoa Powder
Pinch of Salt
Orange Frangipane
200g Unsalted Butter, Room Temperature
200g Caster Sugar
200g Whole Eggs
200g Ground Almonds
30g Plain Flour
Zest ½ Orange
Gianduja
160g Roasted Hazelnuts, Skins Removed
68g Icing/Powdered Sugar
230g Dark Chocolate, Melted
Gianduja Ganache
150g Gianduja
240g Double/Heavy Cream
To Decorate
200g Tempered or Melted Dark Chocolate
Edible Gold Dust
300g Roasted Hazelnuts, Skins Removed
Special equipment
4 x 11×3.5cm Perforated Tart Rings
Perforated Baking Mat
Perforated Baking Tray
Stand Mixer
Fluted Pastry Wheel Metal
Piping Bags
Hand Blender
4 x A4 Acetate Sheets
Cookie Cutters
Method
Chocolate Pâte Sucrée
*Note – the recipe makes enough for 4 tarts, however, you might not quite get that out of 2 dough balls. In this case, simply take the leftover scraps of dough and re-roll it for any remaining tart shells.
1. Into a large bowl (or the bowl of a stand mixer), add the cubed, cold butter and sift over the cocoa powder and icing/powdered sugar.
-
- 100g Unsalted Butter, Cold & Cubed
- 70g Icing/Powdered Sugar
- 25g Cocoa Powder
2. With a paddle attachment or with the beaters on a hand mixer, beat the butter and sugar for 2-3 minutes until it is evenly combined. Scrape down the mixture with a spatula twice during this time.
3. While still beating the mixture, pour in the eggs and beat to combine. After about 30 seconds, scrape down the bowl ensuring all the butter is scraped off the bottom of the bowl and then mix for another 30 seconds.
-
- 50g Egg Yolks
4. Add in the flour, and mix on a very low speed, until the dry ingredients are just combined. Be careful not to overbeat the mixture, simply mix until no more flour is visible and the mixture is clumping together. It should take about 15 seconds.
-
- 175g Plain Flour/All-Purpose
5. Split the mixture into two equal parts. Squeeze the mixture in your hand to form a rough ball. Place the first ball of dough onto a silicon mat. Place a second silicon mat on top and roll the mixture into a rough circle, getting it as thin as possible. If you don’t have silicon mats you can roll the dough between parchment paper but it will be very difficult as it will slip and slide all over the place!
6. Once you have a rough circle of dough, place it into the freezer for 30m. This dough will be for the base of the tart shells.
7. With the remaining dough, shape it into a rough log shape. Place the log of dough onto a silicon mat. Working with the silicon mat lengthways, fold it in half so you have a long vertical mat.
8. Roll the log of dough into a long vertical strip of dough. The reason we do this, is that we are going to use this portion of the dough to create the walls for our tart shells. By rolling it into a long vertical shape, we maximise the dough and reduce any wastage. Place the sheet of dough in the freezer for 30 minutes.
9. While the dough is chilling, take the perforated tart ring and very lightly grease the inside with some soft butter.
10. Remove the chilled dough from the freezer that you are going to use for the base of the tart shell.
11. Working quickly, peel the dough off of the silicon matt and place it onto your baking tray lined with a baking mat (ideally a perforated baking mat). Press the tart shells into the dough and peel away any excess dough. Arrange the 4 tart shells on the baking tray and place them back in the freezer.
12. Remove the dough from the freezer that we are going to use for the walls of our tart shell. Working quickly, peel the top of the silicon mat off. Use a knife to cut one long line of dough, then use a fluted pastry wheel to cut a line above that – ensuring the width is the same as the height you need for your tart shell. This will then give you a fluted top to your pastry. The most efficient way to cut the strips is like the design in the PDF (excuse the rough drawing!).
13. Cut 4 strips of dough in total and then quickly place these back into the freezer for 10 minutes. You need to work quickly so the dough doesn’t melt.
*Note – you may not have enough dough here for 4 tart walls depending on how you rolled it. In which case, start by cutting two walls and then re-roll the scraps to make another 2 walls.
14. Once chilled, remove the baking tray from the freezer that has the tart bases on and remove one strip of dough for the walls.
15. Work quickly and take the strip of dough and place it inside the tart ring, ensuring the fluted part of the dough is at the top. Use a knife to cut it to size so that there isn’t too much excess dough overlapping. Alternatively, you can measure a piece of paper on the inside of the tart ring so that it measures perfectly, then cut your strips of dough to this exact length so they fit perfectly when you place them inside the tart ring.
16. Use your fingers to press together the base and the walls. The idea is to slightly push down the base of the wall, so that it meets the dough on the base of the tart shell. Do this all the way around the tart shell so that there are no gaps in between the wall and the base.
17. You have to do this while the dough is cold, otherwise, if it is too warm, as you press the dough it will tear. If it does feel too warm, place it back in the freezer for 10 minutes then try again.
18. Remove the remaining strips of dough for the walls from the freezer and repeat this with the remaining tarts.
19. Once you have attached the walls and the dough, do not try and move the tart shells or lift them up as the dough will have softened and it will tear. Always keep them on the tray. Place the entire tray of tart shells in the freezer.
Orange Frangipane
1. Preheat the oven to 175C/350F.
2. Into the bowl of a stand mixer, add the room temperature unsalted butter along with the sugar & orange zest. Beat for 1-2 minutes, scraping down the bowl halfway through, until the mixture is smooth.
-
- 100g Unsalted Butter, Room Temperature
- 100g Caster Sugar
- Zest ½ Orange
3. Next, pour in the eggs in three parts (ensure they are room temperature) and beat again. Initially the mixture will look quite split, but scrape down the sides halfway through and keep beating for 1 minute. Don’t worry if there are a few lumps of butter left.
-
- 100g Whole Egg
4. Finally, add the ground almonds and plain flour. Beat until the mixture forms a smooth paste, about 30 seconds.
-
- 100g Ground Almonds
- 15g Plain, All-Purpose Flour
5. Add the mixture into a piping bag fitted with a round tip nozzle.
6. Remove the tart shells from the freezer and pipe the frangipane in. Fill the tart slightly below halfway as we need to ensure there is enough room for the ganache once it has baked.
7. Place the tarts in the oven and bake for 25-30 minutes or until lightly golden on top. Watch the tarts very closely for the first 5 minutes as sometimes, the pastry can slip down from the edge of the tart ring. If you see the pastry slipping ever so slightly, simply open the oven and use your finger to gently press the dough back against the tart ring then it will stay in place.
8. Once baked, remove from the oven and allow them to cool completely.
Gianduja
1. Add your roasted hazelnuts into a powerful food processor, along with the icing/powdered sugar.
If you don’t have roasted hazelnuts, take hazelnuts with the skin on, and place them in the oven at 175C/350F for 8-10m or until the skins start to burst. Remove them from the oven and let them cool, then peel off the skins. Pop them back in the oven very briefly until lightly golden.
-
- 160g Roasted Hazelnuts
- 68g Icing/Powdered Sugar
2. Blend the mixture on a medium high speed until it forms a smooth paste. Initially it will go a little chunky and you will need to scrape down the sides of the mixer 3-4 times to ensure it is fully incorporated. Depending on the power of your food processor, it should take 2-3 minutes until you have a smooth paste.
3. Once smooth, remove it from the food processor and scrape the mixture into a bowl.
4. Add the dark chocolate into a bowl and melt it over a pan of gently simmer water.
-
- 230g Dark Chocolate
5. Pour the melted chocolate into the blended hazelnut paste and stir the mixture to combine. You can use the mixture immediately or store it in a plastic container to use later for the ganache. It will set it like a soft chocolate.
Gianduja Ganache
1. Into a tall jug, add the gianduja.
-
- 150g Gianduja
2. Meanwhile, add your heavy/double cream to a medium saucepan and bring it to a gentle simmer.
-
- 260g Double/Heavy Cream
3. Once hot, pour this over the gianduja. Let it sit for 2 minutes then blend till smooth.
4. Take the cooled tart and pour the ganache onto the top of the frangipane. Fill the tart, until the ganache is slightly below the rim.
5. Place the tarts in the fridge until you are ready to decorate. The ganache will be quite liquid so we need it to set up so it is still soft, but not too firm. 1.5 hours in the fridge or 30 minutes in the freezer should be perfect.
Gold Chocolate Discs
1. Temper 200g of dark chocolate – for a full video on how to temper check the Bake It Better classes.
2. Pour the half of the tempered chocolate onto an A4 sheet of acetate.
3. Place a second sheet of acetate on top and then using a rolling pin, or a wooden rod and carefully run it along the top of the acetate, smoothing out the chocolate until it is an even thickness.
4. Place something heavy on top like a book, and let it set at room temperature for 30-60 minutes. Repeat with the remaining chocolate on a second pair of acetate sheets.
5. Once the chocolate has set, take a cookie cutter, slightly smaller than the size of your tart. Heat it up with a blow torch or run it under some hot water so that it is hot.
6. Peel off the top sheet of acetate and cut out 2 circles from the first sheet of chocolate, and two from the second sheet.
7. Peel the chocolate discs carefully off the acetate and place them in the fridge for 5 minutes.
8. After 5 minutes, add a small amount of edible gold dust to a bowl and use a brush to dust it onto the disc so that it is evenly covered. Leave at room temperature until you are ready to assemble. If it is particularly warm in your house, leave them in the fridge.
Assembly
1. Remove the chilled tarts from the fridge. The ganache should be set on top but still be ever so slightly soft. This means it will be easier to press the hazelnuts in. If it is too firm, quickly and gently heat the top with a blow torch.
2. Take your roasted hazelnuts and chop them in half. Try and cut them so they relatively equal in size. This may be slightly more hazelnuts than you actually need but sometimes they don’t cut perfectly in half so you have a few that aren’t “aesthetic” enough!
-
- 300g Roasted Hazelnuts
3. Place the halves of roasted hazelnuts all around the tart, starting from the outside and working your way into the centre. It is a bit of a laborious process but worth it for final presentation.
4. For a clean design, ensure the hazelnuts are all facing the same direction.
5. Remove the gold chocolate discs from the fridge and carefully lift it on top of the hazelnuts.
6. Take a heat gun, or a hair dryer and very gently melt the gold disc onto the tart. Try to avoid using a blow torch as this is more likely to burn the chocolate. You can also place the tart into a warm oven for a minute or so! Keep an eye on it!
7. Let the tart come to room temperature before serving.

Chocolate Hazelnut Tart
TIER 2
Chocolate Hazelnut Tart
4
INDIVIDUAL TARTS
Ingredients
Makes 4 individual tarts
Chocolate Pâte Sucrée
100g Unsalted Butter, Cold & Cubed
70g Icing/Powdered Sugar
50g Egg Yolks
175g Plain/All-Purpose Flour
25g Cocoa Powder
Pinch of Salt
Chocolate Frangipane
70g Unsalted Butter
60g Icing/Powdered Sugar
15g Cocoa Powder
75g Ground Almonds
70g Whole Egg
30g Chopped Hazelnuts
Soft Caramel
175g Double Cream
45g Whole Milk
45g Glucose (1)
80g Caster Sugar
90g Glucose (2)
1.5g Sea Salt Flakes
60g Unsalted Butter
Vanilla Namelaka
2.5g Powdered Gelatin + 15g Cold Water
100g Whole Milk
10g Glucose
185g White Chocolate, Melted
½ Tsp Vanilla Bean Paste
200g Double/Heavy Cream, Cold
Dark Chocolate Namelaka
2.5g Powdered Gelatin + 15g Cold Water
100g Whole Milk
10g Glucose
135g Dark Chocolate, Melted
200g Double/Heavy Cream, Cold
Special equipment
Hand Blender
Stand Mixer
4 x 5” Perforated Tart Rings
Metal Ruler
Perforated Baking Mat
Perforated Baking Tray
Piping Bags
Star Tip Piping Nozzle (4B)
Round Tip Piping Nozzle
Method
Vanilla Namelaka
1. Into a small bowl, add the gelatin powder and cold water. Stir together. Allow the mixture to bloom for 5 minutes.
-
- 2.5g Powdered Gelatin + 15g Cold Water
2. Into a small saucepan, add the whole milk and glucose. Place it over a medium heat and bring it to a gentle simmer. Once it is hot, scoop out the bloomed gelatin and add it into the hot milk. Stir it through until it is dissolved.
-
- 100g Whole Milk
- 10g Glucose
3. Take the melted white chocolate, and pour the hot milk mixture over, in three parts. Whisk the mixture thoroughly each time as you add the milk. Initially it may thicken or look oily, don’t panic – add the remaining milk and it will become smooth.
-
- 185g White Chocolate, Melted
4. Once it is all incorporated, pour in the cold double/heavy cream and blend or whisk the mixture to combine it.
-
- 200g Double/Heavy Cream, Cold
5. Pour the cream into a bowl and cover the surface directly with cling film. Refrigerate overnight.
Chocolate Namelaka
1. Into a small bowl, add the gelatin powder and cold water. Stir together. Allow the mixture to bloom for 5 minutes.
-
- 2.5g Powdered Gelatin + 15g Cold Water
2. Into a small saucepan, add the whole milk and glucose. Place it over a medium heat and bring it to a gentle simmer. Once it is hot, scoop out the bloomed gelatin and add it into the hot milk. Stir it through until it is dissolved.
-
- 100g Whole Milk
- 10g Glucose
3. Take the melted dark chocolate, and pour the hot milk mixture over, in three parts. Whisk the mixture thoroughly each time as you add the milk. Initially it may thicken or look oily, don’t panic – add the remaining milk and it will become smooth.
-
- 135g Dark Chocolate
4. Once it is all incorporated, pour in the cold double/heavy cream and blend or whisk the mixture to combine it.
-
- 200g Double/Heavy Cream, Cold
5. Pour the cream into a bowl and cover the surface directly with cling film. Refrigerate overnight.
Soft Caramel
1. Into a saucepan, add the whole milk, double/heavy cream and glucose.
-
- 175g Double Cream
- 45g Whole Milk
- 45g Glucose (1)
2. Bring the mixture to a gentle simmer, whisking to ensure the glucose has dissolved fully. Once it is hot, set it to one side, but ensure it stays warm while you create the caramel.
3. Into a medium saucepan, add the glucose and the caster sugar.
-
- 80g Caster Sugar
- 90g Glucose (2)
4. Place it over a medium heat and bring it to a deep caramel. Try to avoid stirring the mixture, and shake the pan to help disperse the sugar. If the sugar isn’t breaking down, very quickly stir it in with a spatula.
5. Keep a careful eye on it, it will go from a deep golden colour to burnt quickly!
6. Once you have a nice deep golden colour, immediately pour in the hot cream mixture, being very careful as it will bubble up violently.
7. Whisk the mixture and cook over a medium heat for 1 minute.
8. Remove it from the heat and pour it through a sieve into a separate bowl.
9. Let it cool for 2 minutes, then add in the salt & butter and blend (or whisk) until smooth.
-
- 60g Unsalted Butter
- 1.2g Sea Salt Flakes
10. Pour the mixture into a container and store at room temperature.
Chocolate Pâte Sucrée
*Note – the recipe makes enough for 4 tarts, however, you might not quite get that out of 2 dough balls. In this case, simply take the leftover scraps of dough and re-roll it for any remaining tart shells.
1. Into a large bowl (or the bowl of a stand mixer), add the cubed, cold butter and sift over the cocoa powder and icing/powdered sugar.
-
- 100g Unsalted Butter, Cold & Cubed
- 70g Icing/Powdered Sugar
- 25g Cocoa Powder
2. With a paddle attachment or with the beaters on a hand mixer, beat the butter and sugar for 2-3 minutes until it is evenly combined. Scrape down the mixture with a spatula twice during this time.
3. While still beating the mixture, pour in the eggs and beat to combine. After about 30 seconds, scrape down the bowl ensuring all the butter is scraped off the bottom of the bowl and then mix for another 30 seconds.
-
- 50g Egg Yolks
4. Add in the flour, and mix on a very low speed, until the dry ingredients are just combined. Be careful not to overbeat the mixture, simply mix until no more flour is visible and the mixture is clumping together. It should take about 15 seconds.
-
- 175g Plain Flour/All-Purpose
5. Split the mixture into two equal parts. Squeeze the mixture in your hand to form a rough ball. Place the first ball of dough onto a silicon mat. Place a second silicon mat on top and roll the mixture into a rough circle, getting it as thin as possible. If you don’t have silicon mats you can roll the dough between parchment paper but it will be very difficult as it will slip and slide all over the place!
6. Once you have a rough circle of dough, place it into the freezer for 30 minutes. This dough will be for the base of the tart shells.
7. With the remaining dough, shape it into a rough log shape. Place the log of dough onto a silicon mat. Working with the silicon mat lengthways, fold it in half so you have a long vertical mat.
8. Roll the log of dough into a long vertical strip of dough. The reason we do this, is that we are going to use this portion of the dough to create the walls for our tart shells. By rolling it into a long vertical shape, we maximise the dough and reduce any wastage. Place the sheet of dough in the freezer for 30 minutes.
9. While the dough is chilling, take the perforated tart ring and very very lightly grease the inside with some soft butter.
10. Remove the chilled dough from the freezer that you are going to use for the base of the tart shell.
11. Working quickly, peel the dough off of the silicon matt and place it onto your baking tray lined with a baking mat (ideally a perforated baking mat). Press the tart shells into the dough and peel away any excess dough. Arrange the 4 tart shells on the baking tray and place it back in the freezer.
12. Remove the dough from the freezer that we are going to use for the walls of our tart shell. Working quickly, peel the top of the silicon mat off, and using a ruler and a sharp knife, cut long strips of dough, ensuring the width is slightly more than the height of your tart shells.
13. Cut 4 strips of dough in total and then quickly place these back into the freezer for 10 minutes. You need to work quickly so the dough doesn’t melt.
14. Once chilled, remove the baking tray from the freezer that has the tart bases on and remove one strip of dough for the walls.
15. Work quickly and take the strip of dough and place it inside the tart ring. Use a knife to cut it to size so that there isn’t too much excess dough overlapping. Alternatively, you can measure a piece of paper on the inside of the tart ring so that it measures perfectly, then cut your strips of dough to this exact length so they fit perfectly when you place them in.
16. Use your fingers to press together the base and the walls. The idea is to slightly push down the base of the wall, so that it meets the dough on the base of the tart shell. Do this all the way around the tart shell so that there are no gaps in between the wall and the base.
17. You have to do this while the dough is cold, otherwise as you press the dough it will tear. If it feels too warm, place it back in the freezer for 10 minutes.
18. Remove the remaining strips of dough for the walls from the freezer and repeat this with the remaining tarts.
19. Once you have attached the walls and the dough, do not try and move the tart shells or lift them up as the dough will have softened and it will tear. Always keep them on the tray. Place the entire tray of tart shells in the freezer while you make the frangipane.
Chocolate Frangipane
1. Preheat the oven to 175C/350F.
2. Into the bowl of a stand mixer, add the room temperature unsalted butter along with the sugar & cocoa powder. Beat for 1-2 minutes, scraping down the bowl halfway through, until the mixture is smooth.
-
- 70g Unsalted Butter
- 60g Icing/Powdered Sugar
- 15g Cocoa Powder
3. Next, pour in the eggs in three parts (ensure they are room temperature) and beat again. Initially the mixture will look quite split, but scrape down the sides halfway through and keep beating for 1 minute. Don’t worry if there are a few lumps of butter left.
-
- 70g Whole Egg
4. Finally, add the ground almonds. Beat until the mixture forms a smooth paste, about 30 seconds.
-
- 75g Ground Almonds
5. Add the mixture into a piping bag fitted with a round tip nozzle.
6. Remove the tart shells from the freezer and using a sharp knife, cut off any excess dough that is hanging over the edge. As the dough is cold, you should be able to lift these up in your hand and cut them easily.
7. Place them back onto your baking tray and pipe the frangipane in. Only fill the tart shells up about halfway or the frangipane will spill over as it bakes.
8. Press a few chopped roasted hazelnuts into the frangipane and place the tarts into the oven. Bake for 25 minutes, then remove from the oven and allow to cool completely.
Assembly
1. Remove the vanilla namelaka from the fridge, and add it into a stand mixer (or a large bowl if you are using an electric whisk)
2. Whisk the mixture on a medium speed until it holds a medium stiff peak.
3. Add the mixture into a piping bag fitted with a round tip nozzle.
4. Take the cooled tarts and pipe, odd dollops of the vanilla cream over the tart, leaving space to pipe the chocolate namelaka cream.
5. Remove the chocolate namelaka cream from the fridge and whisk that to a medium stiff peak too.
6. Add it into a piping bag fitted with a star tip nozzle.
7. Fill in the gaps of the tart, piping dollops of the chocolate cream.
8. Once the tart has been filed up, very carefully heat the back of a small melon baller or a metal measuring spoon in hot water or with a blow torch.
9. Very carefully press it into the top of one of the vanilla cream dollops. Press down to melt the top of the dollop, then slowly rotate it 180 degrees and lift it out.
10. Repeat this for 2-3 of the vanilla dollops.
11. Add the salted caramel to a piping bag and pipe a very small amount into the vanilla dollops that you created a small crater in.
12. Repeat this with all of the tarts and then serve.

Strawberry Meringue Tart
TIER 1
Strawberry Meringue Tart
4
INDIVIDUAL TARTS
Ingredients
Makes 4 individual tarts
Orange Pâte Sucrée
100g Unsalted Butter, Cold & Cubed
70g Icing/Powdered Sugar
50g Egg Yolks
200g Plain/All-Purpose Flour
Zest of ½ Orange
Pinch of Salt
Lemon Cake
65g Ground Almonds
150g Icing Sugar
35g Plain Flour
125g Egg Whites
Zest ¾ Medium Lemon
125g Melted Butter
Vanilla Meringue
80g Egg Whites
80g Caster Sugar
80g Icing Sugar
½ Tsp Vanilla Bean Paste
Strawberry & Raspberry Compote
100g Fresh Strawberries
100g Fresh Raspberries
½ Tsp Sugar
1 Tsp Cornflour
2-4 Tbsp Water (you may need more)
Fresh Strawberries To Decorate
Special equipment
4 x 4” (Width) x 1.75” (Deep) Fluted Tart Tin (Brioche molds are great for this)
Stand Mixer
5” Cookie Cutter
Large Round Tip Piping Nozzle
Piping Bags
Method
Orange Pâte Sucrée
1. Into a large bowl (or the bowl of a stand mixer), add the cubed, cold butter, orange zest and sift over the icing/powdered sugar. It is important to sift the icing sugar to prevent any lumps getting in the pastry.
-
- 100g Unsalted Butter, Cold & Cubed
- 70g Icing/Powdered Sugar
- Zest of ½ Orange
2. With a paddle attachment or with the beaters on a hand mixer, beat the butter, zest and sugar for 2-3 minutes until it is evenly combined. Scrape down the mixture with a spatula twice during this time.
3. While still beating the mixture, pour in the eggs and beat to combine. After about 30 seconds, scrape down the bowl ensuring all the butter is scraped off the bottom of the bowl and then mix for another 30 seconds.
-
- 50g Egg Yolks
4. Add in the flour, and mix on a very low speed, until the dry ingredients are just combined. Be careful not to overbeat the mixture, simply mix until no more flour is visible and the mixture is clumping together. It should take about 15 seconds.
-
- 200g Plain Flour/All-Purpose
- Pinch of Salt
5. Split the dough into two dough balls. Take one dough ball and place it into the centre of a baking mat. Place a second baking mat on top and with a rolling pin, roll the dough to about ⅛” thick into any rough circular shape. Place the sheet of dough into the freezer for 30 minutes and repeat with the second ball of dough.
6. While the dough is chilling, lightly grease the outside of your fluted tart rings with soft butter.
7. Once the dough has chilled, remove it from the freezer and peel off the silicon mats. Use a cookie cutter that is about 1.25x bigger than your tart ring. I used a 4” tart ring, so I use a 5” cookie cutter. If your tart rings are not particularly deep then you may not need to cut a circle of dough quite as big. You want the circle of dough to be big enough so that it drapes over your tart shell but doesn’t quite reach the edge.
8. Cut out 2 circles of dough from one sheet, and 2 circles from the other sheet.
9. Place the circles of dough in the freezer and work with one at a time so that they don’t become too warm.
10. Gently massage the dough in your hands to warm it slightly, so that it is more pliable.
11. Place it over the back of your greased tart ring and carefully press it into the grooves. Don’t worry if it tears every so slightly as it bends, you can use your fingers to push it back together.
12. Once it fits nicely into the grooves, place the tart ring onto a baking tray and repeat with the 3 remaining shells.
13. Once you have 4 tarts on your tray, gently prick the base with a fork and place them into the freezer while you preheat your oven.
14. Preheat your oven to 175C/350F non-fan assisted.
15. Once hot, place the tart shells in the oven and bake for 18-25 minutes or until lightly golden. Keep an eye on them as every oven is different. Once baked, remove them from the oven and allow them to cool completely.
16. As an optional step, you can use a microplane to gently file down the edges of the pastry so that they are even and smooth. If you are planning to do this, pop the cooled pastries into the freezer for 10 minutes. If they are still slightly warm, they will be too fragile and will smash when you file them down.
17. Set the pastry cases to one side.
Lemon Financier
1. Preheat the oven to 175C/350F. Lightly grease the inside of your fluted tart rings and coat them with a dusting of flour.
2. Into a large bowl, sift in the dry ingredients and whisk them together by hand until combined.
-
- 65g Ground Almonds
- 150g Icing Sugar
- 35g Plain Flour
- Zest of ¾ Medium Lemon
3. Next, pour in the egg whites and whisk again to combine them.
-
- 125g Egg Whites
4. Finally, pour in the melted butter and whisk to mix this in. It might initially look slightly split, but keep whisking and will become smooth.
-
- 125g Melted, Unsalted Butter
5. Pour the batter equally between your 4 molds, filling them up slightly above halfway. Place them in the oven and bake for 25-30 minutes or until they are lightly golden brown on top.
6. Once baked, allow them to cool and then pop them out of the molds. If they get a little stuck, slide a knife carefully down the side to loosen them.
Vanilla Meringue
1. Preheat the oven to 95C/200F.
2. Into the bowl of a stand mixer, or a large mixing bowl if you are using an electric whisk, add the egg whites. Whisk on a medium low speed until they become thick and frothy.
-
- 80g Egg Whites
3. Once frothy, increase the speed to high and slowly add the sugar, 1 tablespoon at a time. Once you have added all of the sugar, keep whisking, until the mixture holds a stiff peak. Once it holds a stiff peak, add in the vanilla and briefly whisk it in.
-
- 80g Caster Sugar
- ½ Tsp Vanilla Bean Paste
4. Remove the bowl from the stand mixer, and place a sieve over the top. Sift over the icing/powdered sugar.
-
- 80g Icing Sugar
5. Use a spatula to very carefully fold the icing sugar into the meringue, until there is no more dry parts in the mixture
6. Take a sheet of parchment paper, and using your tart ring as a guide, draw around it to create an outline of the outside of your mold. Flip the baking paper over (so the pen doesn’t touch your meringue) and glue the sheet of parchment to your baking tray with a little bit of meringue.
7. Place the meringue into a piping bag fitted with a round tip nozzle.
8. Pipe dollops of the meringue, following the guide of the outline you drew. Start by piping at about a 45 degree angle then stop applying pressure, and drag the nozzle down towards the paper to create a nice swoop into the centre. As you are piping around the outline, ensure that the meringue “drops” are touching, so that once baked, the entire meringue olds its shape. Pipe 4 circles of meringue in total.
9. Place the meringues into the oven and bake for 40 minutes. After 40 minutes, turn the oven off and open the door slightly. Let them cool in there for 1 hour.
Strawberry & Raspberry Compote
1. Into a saucepan, add the fresh chopped fruits, cornflour, sugar, and about 3 Tbsp of water.
-
- 100g Fresh Strawberries
- 100g Fresh Raspberries
- ½ Tsp Sugar
- 1 Tsp Cornflour
- 2-4 Tbsp Water (you may need more)
2. Place it over a medium heat and stir the mixture for 3-4 minutes until the berries have completely broken down and the mixture has thickened. If the mixture is too thick as you are cooking it, simply add in a few more splashes of water.
3. Set the mixture aside to cool.
Assembly
1. Take the cooled tart and place a lemon financier into the shell.
2. Add the cooled compote on top of the financier and spread it out to the edges so that it is completely flush with the edge of the pastry.
3. Carefully lift the meringue on so that it sits around the edge of the pastry.
4. Fill the centre with fresh strawberries. I prefer to use a mix of small cubes of strawberry but you can also add whole strawberries too.
5. Serve the cake.

Vanilla & Blueberry Danish
We would love to see your Bake It Better creations!
Show off your skills by sharing your desserts
#BakeItBetter

Roasted Strawberry & Creme Brûlée Tart
We would love to see your Bake It Better creations!
Show off your skills by sharing your desserts
#BakeItBetter

St Honore Tart
We would love to see your Bake It Better creations!
Show off your skills by sharing your desserts
#BakeItBetter

Chocolate & Hazelnut Praline Tart
We would love to see your Bake It Better creations!
Show off your skills by sharing your desserts
#BakeItBetter

Lemon Tart
We would love to see your Bake It Better creations!
Show off your skills by sharing your desserts
#BakeItBetter

Frangipane Tart
We would love to see your Bake It Better creations!
Show off your skills by sharing your desserts
#BakeItBetter