

Apple & Almond Puff Pastry Tart
TIER 1
Apple & Almond Puff Pastry Tart
In Tier 1 we’re mastering the essential technique of laminating inverse puff pastry. This is trickier as the dough is wrapped in a butter block which means it can get a little sticky, but the resulting pastry melts in the mouth. We’ve covered laminating a few times so if you’ve tried those classes, you will be really confident heading into this. Once the dough has rested, we cut it into discs, fill it with an almond cream and finally add some sliced apples. After your first bite, you’ll want to eat the whole tray!

6
TARTS
Ingredients
Makes 6 Individual Tarts
Inverse Puff Pastry
Butter Block
100g Plain/All-Purpose Flour
300g Unsalted Butter, Room Temperature
Dough
200g Plain/All-Purpose Flour
4g Fine Sea Salt
120g Double/Heavy Cream
20g Cold Water
5g White Vinegar
Almond Cream
55g Unsalted Butter, Soft
55g Icing Sugar
130g Ground Almonds
10g Cornstarch/Cornflour
45g Whole Eggs, Room Temperature
2-3 Pink Lady Apples
Egg Wash
35g Egg Yolk
30g Double/Heavy Cream
Icing/Powdered Sugar To Decorate
Special equipment
Stand mixer
Digital thermometer
12cm cookie cutter
Piping bag
Method
Inverse Puff Pastry
Butter Block
1. Add the soft butter and flour into a stand mixer fitted with a paddle attachment. Beat for 1-2 minutes on a medium speed until smooth, scraping down the bowl as needed.
- 100g Plain/All-Purpose Flour
- 300g Unsalted Butter, Room Temperature
2. Trace a rectangle 35 x 20 cm/14 x 8 inches in the centre of a large sheet of parchment paper or acetate, then flip it over. Place the butter mixture into the centre, folding over the edges of the paper and taping them in place if needed.
3. Use a rolling pin to roll it into a rectangle with even thickness. Chill for 3 hours in the fridge or overnight.
Dough
1. For the dough, add all the ingredients to a large bowl and stir together until there are no more dry ingredients. It can help to squeeze it together with your hands.
- 200g Plain/All-Purpose Flour
- 4g Fine Sea Salt
- 120g Double Cream
- 20g Cold Water
- 5g White Vinegar
2. Tip the mixture onto a lightly floured work surface and knead it for 1–2 minutes. Initially, it will be quite dry, but as you continue to work it, it will become smooth and gain some very slight elasticity.
3. Trace a rectangle 17.5 x 20cm into the centre of a large sheet of baking parchment or acetate and flip it over. Place the dough in the centre and fold over the edges of the parchment, taping it in place if needed. Roll the dough to the edges until you have an even block. Refrigerate for 3 hours, or ideally overnight. A longer chill is preferable to relax the gluten.
4. Once both have chilled, remove the butter block from the fridge, it needs to be 9–10°C (48–50°F) before using. Once it is close to temperature, remove the dough from the fridge; this needs to be at 6–7°C (43–45°F).
5. Place the dough block in the centre of the butter and fold the butter over, sealing the seam with your fingers. Be quite generous with flouring the work surface and the dough here, or the butter will stick.
6. Rotate the dough 90 degrees so the seam is facing you horizontally, and use a sharp knife to score the edges of the dough where it is folded over the butter. This will release tension and make it easier to roll.
7. Lightly roll the dough to give it some slight width, then rotate the dough 90 degrees again so the seam is now vertically in line with your body.
8. Roll the dough lengthways into a long rectangle, being liberal with the flour so that it doesn’t stick, until it reaches a thickness of about 5–7mm. Use a sharp knife to trim off any wonky ends and dust off any excess flour.
9. Perform a double fold, folding one side of the dough up about 1/5th of the way, bringing the opposite side over to meet it, and then folding the whole piece in half. Wrap the dough tightly in cling film, and place it in the freezer for 15 minutes, then into the fridge for 10 minutes.
10. Remove the dough from the fridge, and with the open seam facing you (i.e if you were looking at the dough straight on, you would be able to see where it has been folded over itself), use a sharp knife again, to score the edges of the dough where it is folded.
11. Turn the dough 90 degrees so the open seam is now horizontal to you and give the dough a quick roll, to give it a little bit of width.
12. Turn the dough 90 degrees again so the open seam is facing you again and begin to roll the dough. Roll the dough into a long even rectangle, very very lightly flouring it, just as we did in step 8.
13. Perform another double fold, and place it in the freezer for 15 minutes, then into the fridge for 10 minutes.
14. Repeat this process one more time, but finishing with a single fold rather than a double fold. To do this, take one-third of the dough and fold it up, then take the other third of dough and fold this over the top.
15. Wrap the dough tightly in clingfilm and refrigerate, ideally overnight. Again, a longer chill helps to relax the gluten.
Almond Cream
1. Into a stand mixer fitted with a paddle attachment, beat the butter and icing sugar on a medium-low speed until smooth, 1-2 minutes.
- 55g Unsalted Butter, Soft
- 55g Icing Sugar
2. Scrape down the sides and add the ground almonds and cornstarch, then mix again just until combined.
- 130g Ground Almonds
- 10g Cornstarch/Cornflour
3. Finally pour in the eggs and beat until it is evenly combined.
- 45g Whole Eggs, Room Temperature
4. Cover this and set it to one side at room temperature.
Assembly
1. Preheat the oven to180C/355F Non-Fan assisted (165C/330 Fan).
2. Remove the puff pastry from the fridge and lightly flouring it, roll it into a rough square shape, around 3-4mm thick.
3. Using a 12cm/4.5” cookie cutter, cut 6 discs of pastry and lift these onto a baking tray lined with a silicon baking mat (or a perforated tray lined with a perforated baking mat). Cut more discs if you have enough dough.
4. Add the pistachio cream into a piping bag, and pipe and even layer into the centre of the puff pastry, leaving about a 1.5cm/0.6” border around the outside.
5. Take the apples and core them, then cut them in half. Next, thinly slice them with a knife or a mandolin.
6. Stack the apple slices together, fanning them apart just slightly and place enough into the tart to cover the pistachio cream, but avoid going over the border of puff pastry.
7. Whisk the egg wash ingredients together and with a pastry brush, very lightly brush the border of puff pastry. You can sprinkle some coarse brown/demerara sugar over the top too for some added crunch, or even toasted flaked almonds.
- 35g Egg Yolks
- 30g Double/Heavy Cream
8. Place these into the centre of the oven and bake for around 35-40 minutes, or until a golden brown colour.
9. Remove them from the oven and lift them onto a wire rack to cool for 15 minutes, then serve. They can be eaten warm or you can allow them to cool completely. Before serving, add a dusting of icing/powdered sugar to finish.
Shop the Equipment


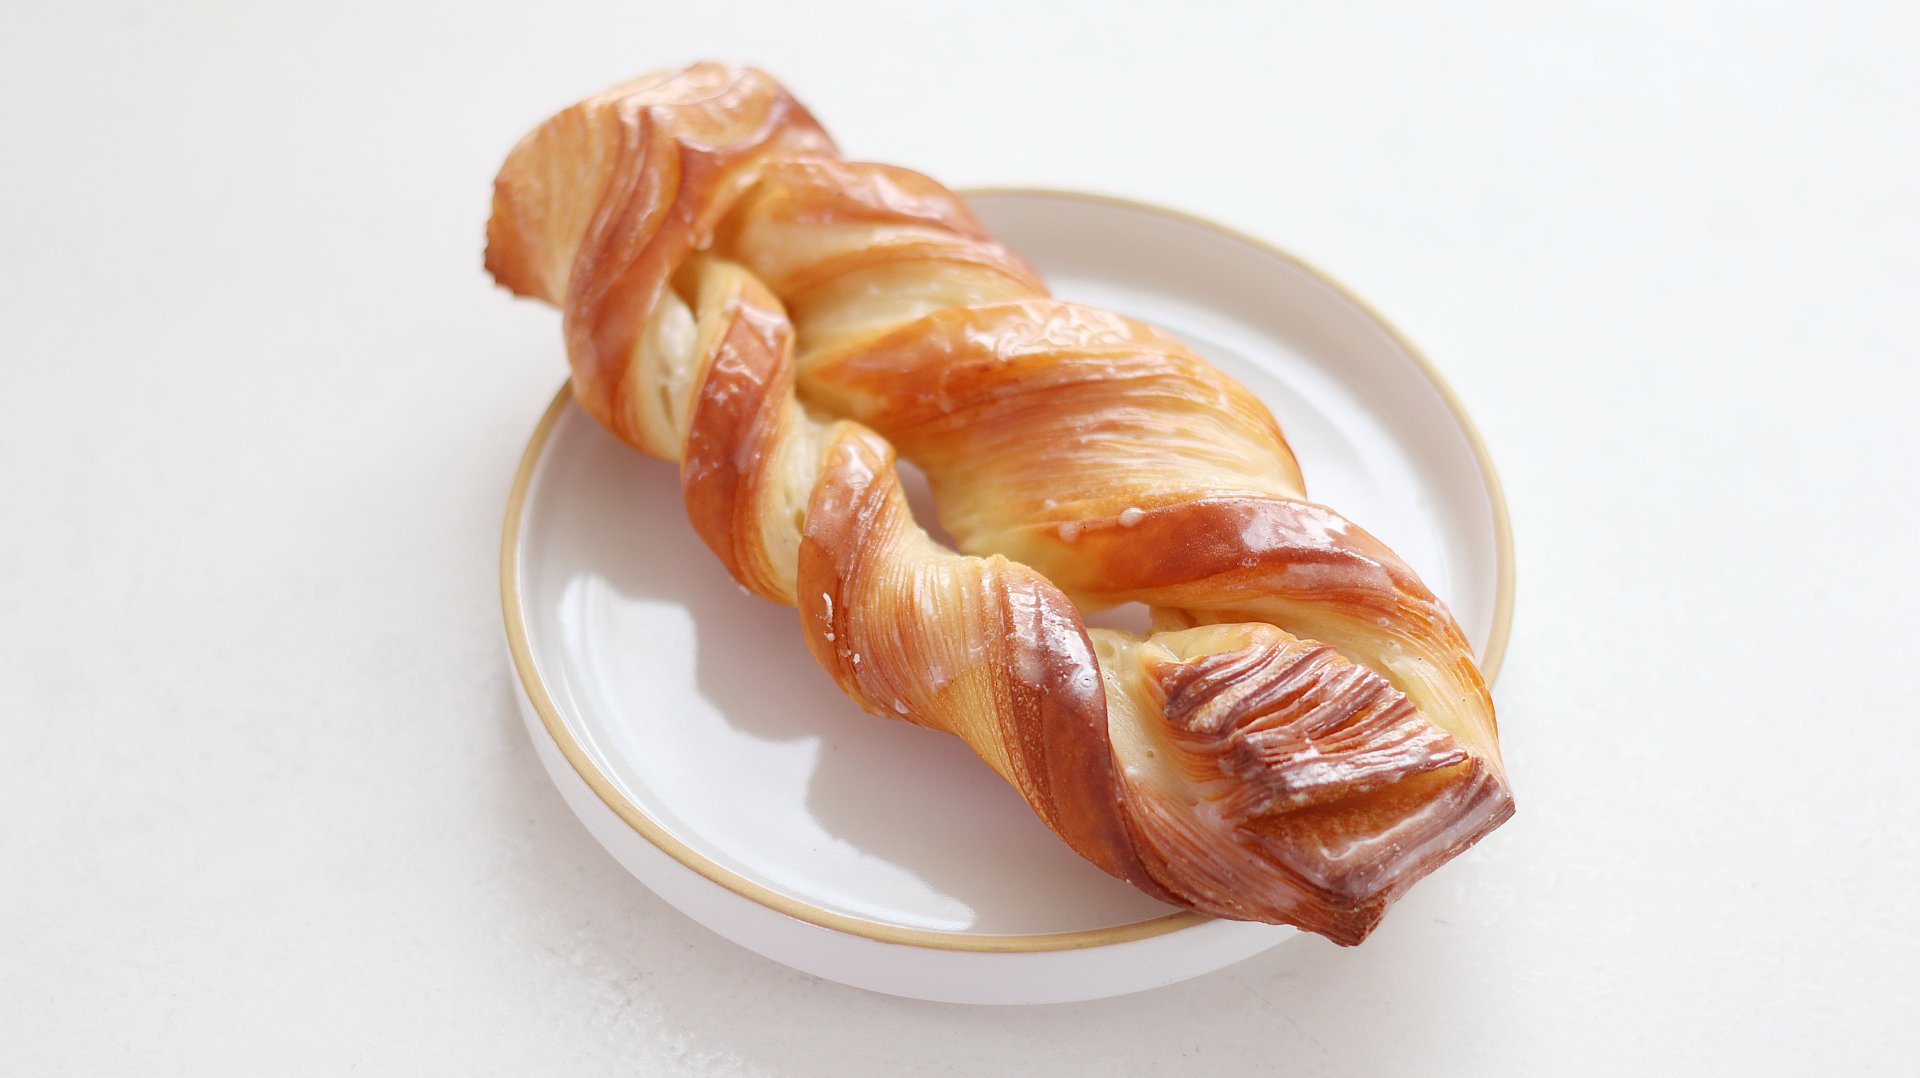
Vanilla Danish Twist
TIER 1
Vanilla Danish Twist
This recipe is all about the dough. We walk through hand lamination step-by-step, so make sure to watch the video before diving in. Once the dough is ready, we use a simple shaping technique to twist the dough, then finish the flakey pastry with a simple vanilla glaze. I think these are the perfect breakfast pastry, so I suggest wrapping them up once baked and leaving them at room temperature, then glazing them the next morning!
8-10
TWISTS
Ingredients
Makes 8-10 Twists
Danish Pastry Détrempe (Dough)
565g Strong White Bread Flour
30g Unsalted Butter, Room Temperature
14g Instant Dry Yeast
230g Whole Milk
65g Whole Eggs
38g Caster Sugar
12g Sea Salt
Buerrage (Butter Block)
250g Unsalted Butter, Room Temperature
25g Plain/All Purpose Flour
Vanilla Icing
400g Icing Sugar
Whole Milk
1 Vanilla Pod
Pinch of Fine Sea Salt
Special equipment
Stand mixer
Rolling pin
Digital thermometer
Ruler
Method
Danish Dough
1. Into the bowl of a stand mixer fitted with a dough hook, add all of the ingredients for the dough. Start with the wet ingredients on the bottom and the dry on top as it makes it easier for everything to incorporate.
2. Knead the mixture on a medium speed, for 6-8 minutes, until the dough feels smooth and elastic, passing the window pane test when you stretch a small piece of the dough. The dough is quite low hydration so initially may look quite dry but should pull together. If it does appear too dry, add up to 20g more milk to help pull it together.
3. Remove the dough from the mixer and briefly knead it on the work surface. Shape it into a rough rectangle, then wrap it in clingfilm, but not too tightly as it will need some room to proof. Place it onto a baking tray and refrigerate overnight. Alternatively if you want to do this whole process in one day, you can chill it for 3 hours.
Buerrage (Butter Block)
1. For the butter block, start by preparing your parchment paper. Take a large sheet, and with a marker, draw a 17.5x20cm square. Flip the paper over so the pen is facing the work surface.
2. Add the butter into the bowl of a stand mixer fitted with a paddle attachment. Add the flour on top, and beat briefly, to combine them and there are no streaks of flour.
3. Scoop the mixture into the centre of the parchment. Wrap the excess parchment around the butter, folding the edges in to match the guides of the neat square you drew. It can help to tape the edges together to stop the parchment paper from moving around or opening up as you roll.
4. Flip it back over and use a rolling pin to roll the butter, pushing it to the edges and creating an even layer of butter across the rectangle of parchment. Place this in the fridge to chill for at least an hour or again, ideally overnight.
Lamination
1. When you are ready to laminate, remove the butter from the fridge, it needs to be 13-14C (55-57F) when you insert a digital thermometer. If it is too cold it will shatter when you start to laminate.
2. Just before it is at temperature, remove the dough from the fridge. Lightly flour it and roll it to just over double the length of the butter, 44cm, but the same width, 17.5cm.
3. The dough will be slightly curved at the top when you roll it out, so I like to trim the dough down, so that it is 40cm in total length. This then gives you a really neat rectangle to fold over your butter.
4. When the butter is at temperature, place it into the centre of the dough and then fold the edges of the dough so they meet in the centre of the butter.
5. Pinch the dough together to form a seam. Using a sharp knife, score the folded edges of the dough.
6. With this seam facing towards you, turn the dough 90 degrees so the seam is now horizontal to your body and give the dough a quick roll, to give it a little bit of width.
7. Turn the dough 90 degrees again so the seam is vertical in line with your body and begin to roll the dough. Working relatively quickly. Apply even pressure and roll the dough into a long even rectangle, flouring very lightly if needed.
8. Don’t focus too much on the length of the rectangle, but more on getting it into an even rectangle that ends up around 5mm thick (0.2”).
9. Once you are happy with the thickness and shape, dust off any excess flour with a brush, and if the ends of the dough have gone a bit wonky, cut them off so you have straight edges on either side.
10. Perform a single fold of the dough, where you take one-third of the dough and fold it up, then take the other third of dough and fold this over the top. This is called a ‘single fold or ‘single turn’.
11. Wrap the dough tightly in cling film, and place it in the freezer for 15 minutes, then into the fridge for 10 minutes.
12. Remove the dough from the fridge, and with the open seam facing you (i.e if you were looking at the dough straight on, you would be able to see where it has been folded over itself), use a sharp knife again, to score the edges of the dough where it is folded.
13. Turn the dough 90 degrees so the open seam is now horizontal to you and give the dough a quick roll, to give it a little bit of width.
14. Turn the dough 90 degrees again so the open seam is facing you again and begin to roll the dough. Roll the dough into a long even rectangle, very very lightly flouring it, just as we did in step 7.
15. Wrap the dough tightly in cling film, and place it in the freezer for 15 minutes, then into the fridge for 10 minutes.
16. Repeat steps 12-14 one more time, completing 3 single folds in total. Chill the dough in the fridge for 1 hour.
17. Lightly flour the chilled dough, and use a sharp knife to score the folded edges of the dough to release the tension.
18. Roll the dough out, so that it is roughly 25cm tall, and 8-10mm thick. Don’t worry about the length.
19. Once you are at the correct thickness, trim the edges of the dough so you are left with a rectangle that is 20cm tall.
20. Then cut the rectangle into 4cm wide strips.
21. Use a sharp knife to cut a slit down the centre of each rectangle.
22. Lift up each piece of dough and take one edge, and fold it over and through the slit to the other side, then feed the opposite edge under and through the slit. Pull both ends gently to tighten, which will form the twist.
23. Line two trays with baking paper and place the twists on, evenly spaced out, 4 per tray.
24. Place the trays into the oven, switched off, and place a small cup of boiling water in the bottom. Change this every 30-45 minutes, proofing the twists until they have puffed up and the layers appear to be separating slightly. It can take 3-4 hours, but don’t worry too much about overproofing them as the dough is resilient.
25. Remove them from the oven and preheat it to 185C/365F fan assisted. Once the oven is hot, load the trays into the oven, and immediately drop the oven temperature to 170C/340F. Bake the danishes for 15-20 minutes, or until they are an even golden brown colour.
26. Once baked, remove them from the oven and carefully lift them onto a wire rack to cool slightly. Keep the oven on.
Vanilla Icing
1. Into a large bowl, add the icing/powdered sugar, salt, beans from a fresh vanilla pod and then slowly start adding milk. Whisk the mixture, adding enough milk until you have a runny, glue-like consistency.
2. Keep the danishes on a wire rack, but place a tray underneath.
3. Pour the glaze over the top of each danish, coating them completely. If you need, scoop up the excess glaze from the tray underneath, and re-use it to glaze any remaining danishes.
4. Place them back into the oven, just for 1-2 minutes, until the glaze goes slightly transparent.
5. Remove them from the oven and allow them to cool for a few minutes then serve.
Note – the process can be quite long, that you end up finishing the danishes quite late which is not the ideal time to eat them (!). What I like to do is to bake the danishes, then wrap the tray tightly once they are cool and leave them at room temperature overnight. The next morning, I heat the oven to 175C/345F and just place them back in for 3-5 minutes, until they feel hot to the touch, then glaze them.
Alternatively you can freeze them once baked, and then just reheat them for longer in the oven (8-15 minutes).
Shop the Equipment

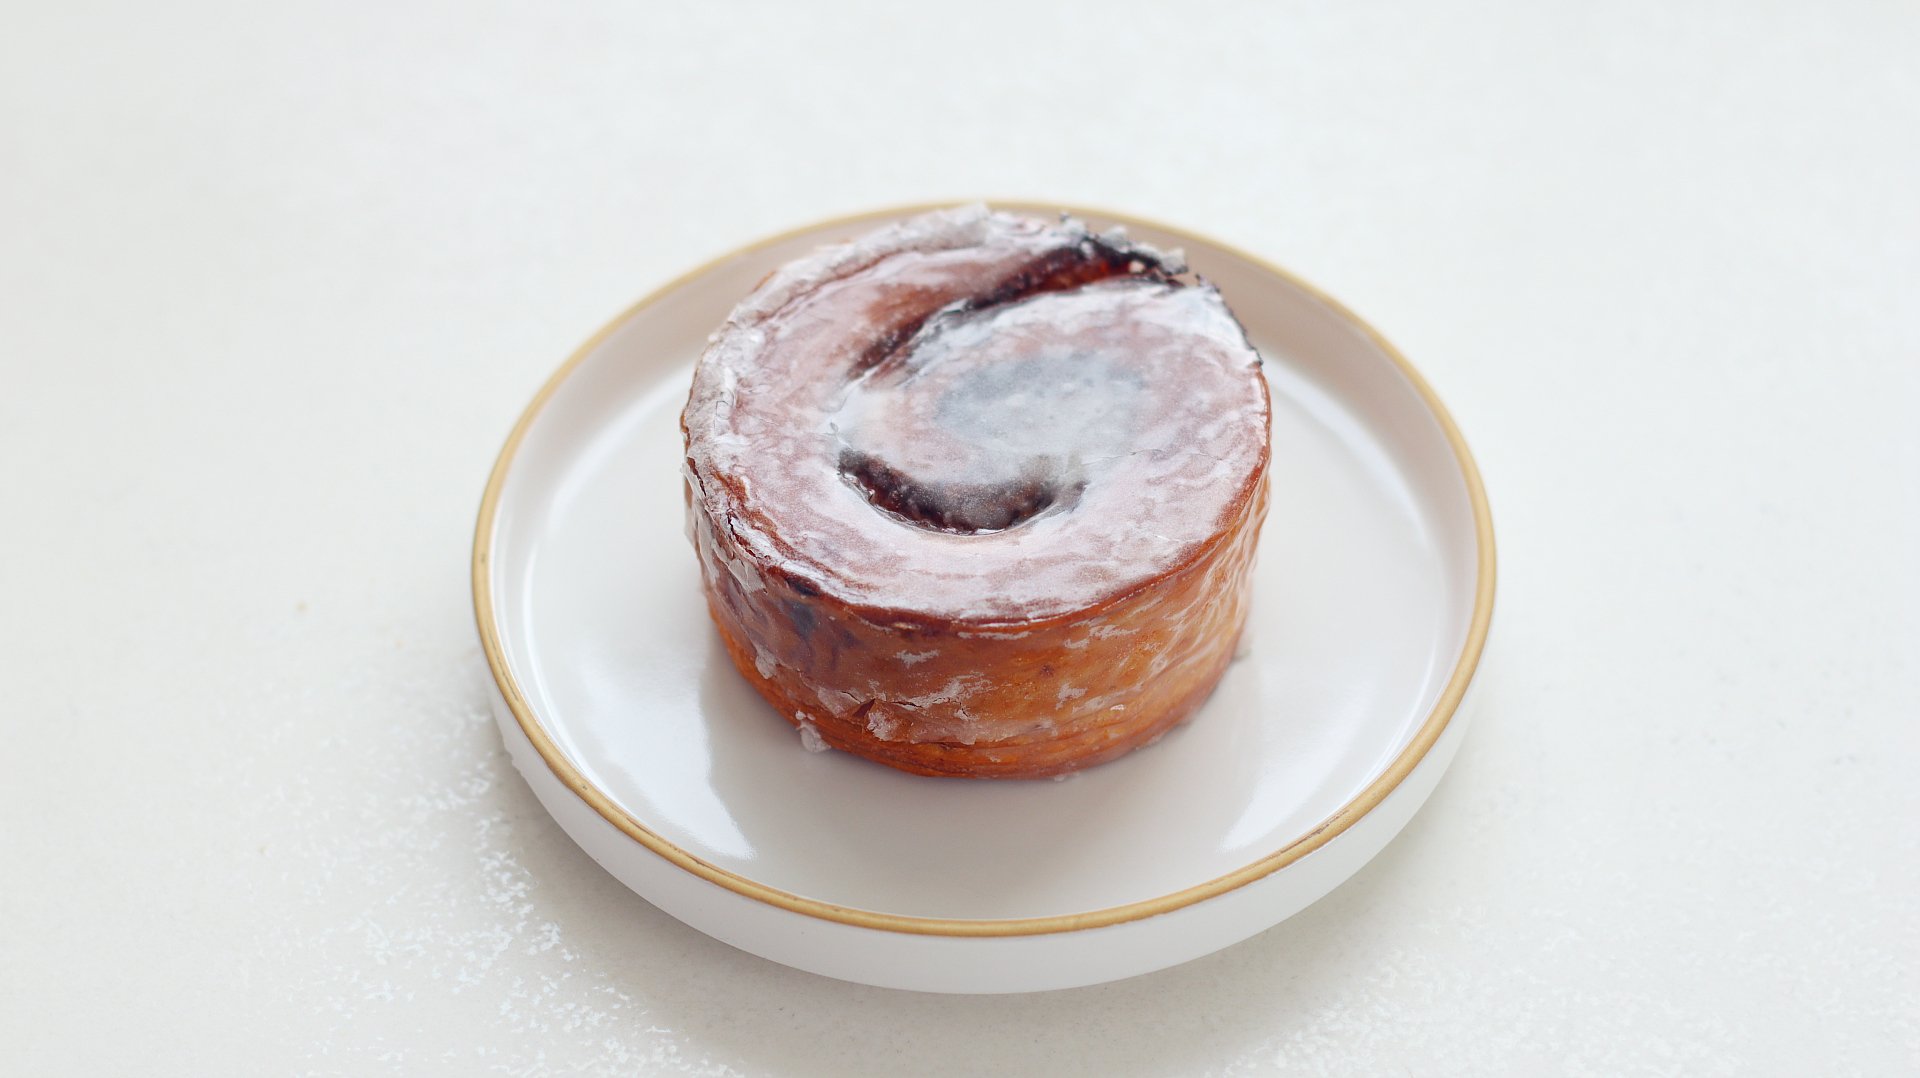
Danish Cinnamon Roll
TIER 2
Danish Cinnamon Roll
In Tier 2 we take the same dough from Tier 1 and fill it with a cinnamon crème pâtissière instead of a traditional cinnamon butter. Then we bake the rolls with a tray on top for the perfect ‘puck’ shape. The cinnamon glaze to finish gives it an extra cinnamon kick and a crackly texture. Make sure to watch the hand lamination technique from the Tier 1 video, as I don’t cover it again in this video.
8-10
ROLLS
Ingredients
Makes 8-10 Rolls
Danish Pastry Détrempe (Dough)
565g Strong White Bread Flour
30g Unsalted Butter, Room Temperature
14g Instant Dry Yeast
230g Whole Milk
55g Whole Eggs
38g Caster Sugar
12g Sea Salt
Buerrage (Butter Block)
250g Unsalted Butter, Room Temperature
25g Plain/All Purpose Flour
Cinnamon Pastry Cream
45g Dark Brown Sugar
10g Ground Cinnamon
70g Egg Yolks
25g Cornflour/Cornstarch
Pinch of Sea Salt
300g Whole Milk
1 Vanilla Pod
25g Unsalted Butter
Cinnamon Icing
400g Icing Sugar
Whole Milk
1 Vanilla Pod
½ Tsp Cinnamon
Pinch of Fine Sea Salt
Special equipment
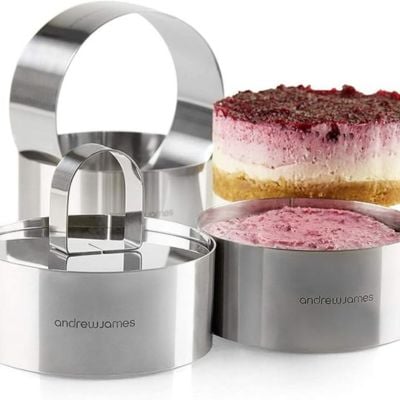
10 9cmx4cm ring molds
Stand mixer
Thermometer
Rolling pin
Piping bag
Metre ruler
Method
Danish Dough
1. Into the bowl of a stand mixer fitted with a dough hook, add all of the ingredients for the dough. Start with the wet ingredients on the bottom and the dry on top as it makes it easier for everything to incorporate.
2. Knead the mixture on a medium speed, for 6-8 minutes, until the dough feels smooth and elastic, passing the window pane test when you stretch a small piece of the dough. The dough is quite low hydration so initially may look quite dry but should pull together. If it does appear too dry, add up to 20g more milk to help pull it together.
3. Remove the dough from the mixer and briefly knead it on the work surface. Shape it into a rough rectangle, then wrap it in clingfilm, but not too tightly as it will need some room to proof. Place it onto a baking tray and refrigerate overnight. Alternatively if you want to do this whole process in one day, you can chill it for 3 hours.
Buerrage (Butter Block)
1. For the butter block, start by preparing your parchment paper. Take a large sheet, and with a marker, draw a 17.5x20cm square. Flip the paper over so the pen is facing the work surface.
2. Add the butter into the bowl of a stand mixer fitted with a paddle attachment. Add the flour on top, and beat briefly, to combine them and there are no streaks of flour.
3. Scoop the mixture into the centre of the parchment. Wrap the excess parchment around the butter, folding the edges in to match the guides of the neat square you drew. It can help to tape the edges together to stop the parchment paper from moving around or opening up as you roll.
4. Flip it back over and use a rolling pin to roll the butter, pushing it to the edges and creating an even layer of butter across the rectangle of parchment. Place this in the fridge to chill for at least an hour or again, ideally overnight.
Lamination
1. When you are ready to laminate, remove the butter from the fridge, it needs to be 13-14C (55-57F) when you insert a digital thermometer. If it is too cold it will shatter when you start to laminate.
2. Just before it is at temperature, remove the dough from the fridge. Lightly flour it and roll it to just over double the length of the butter, 44cm, but the same width, 17.5cm.
3. The dough will be slightly curved at the top when you roll it out, so I like to trim the dough down, so that it is 40cm in total length. This then gives you a really neat rectangle to fold over your butter.
4. When the butter is at temperature, place it into the centre of the dough and then fold the edges of the dough so they meet in the centre of the butter.
5. Pinch the dough together to form a seam. Using a sharp knife, score the folded edges of the dough.
6. With this seam facing towards you, turn the dough 90 degrees so the seam is now horizontal to your body and give the dough a quick roll, to give it a little bit of width.
7. Turn the dough 90 degrees again so the seam is vertical in line with your body and begin to roll the dough. Working relatively quickly. Apply even pressure and roll the dough into a long even rectangle, flouring very lightly if needed.
8. Don’t focus too much on the length of the rectangle, but more on getting it into an even rectangle that ends up around 5mm thick (0.2”).
9. Once you are happy with the thickness and shape, dust off any excess flour with a brush, and if the ends of the dough have gone a bit wonky, cut them off so you have straight edges on either side.
10. Perform a single fold of the dough, where you take one-third of the dough and fold it up, then take the other third of dough and fold this over the top. This is called a ‘single fold or ‘single turn’.
11. Wrap the dough tightly in cling film, and place it in the freezer for 15 minutes, then into the fridge for 10 minutes.
12. Remove the dough from the fridge, and with the open seam facing you (i.e if you were looking at the dough straight on, you would be able to see where it has been folded over itself), use a sharp knife again, to score the edges of the dough where it is folded.
13. Turn the dough 90 degrees so the open seam is now horizontal to you and give the dough a quick roll, to give it a little bit of width.
14. Turn the dough 90 degrees again so the open seam is facing you again and begin to roll the dough. Roll the dough into a long even rectangle, very very lightly flouring it, just as we did in step 7.
15. Wrap the dough tightly in cling film, and place it in the freezer for 15 minutes, then into the fridge for 10 minutes.
16. Repeat steps 12-14 one more time, completing 3 single folds in total. Chill the dough in the fridge for 1 hour.
Cinnamon Pastry Cream
1. Into a medium bowl add the sugar, salt, cornflour/cornstarch and egg yolks. Whisk together for about 30 seconds, then set this to one side.
2. Meanwhile in a medium saucepan, add the milk and beans scraped from a vanilla pod. Place it over a medium heat and whisk occasionally until it is steaming.
3. Slowly pour the hot milk mixture over the egg yolks and whisk to combine.
4. Pour the mixture back into the pan and cook it over a medium heat, whisking constantly. Once it thickens and begins to bubble, keep cooking it for a further minute.
5. Remove it from the heat and pass it through a sieve into a clean bowl. Add in the butter and whisk to combine. Cover the surface with cling film and refrigerate for at least an hour.
Danish Dough (Continued)
1. Remove the pastry cream from the fridge and whisk it for 1-2 minutes until it is smooth. Add it into a piping bag and set it to one side.
2. Line a baking tray with parchment paper and place 8-10 lightly greased ring molds (9x4cm)
3. Lightly flour the chilled dough, and use a sharp knife to score the folded edges of the dough to release the tension.
4. Roll the dough out, so that it is roughly 27-30cm tall, and 8-10mm thick. Don’t worry about the length.
5. Once you are at the correct thickness, trim the edges of the dough so you are left with a rectangle that is 25cm tall.
6. Then cut the rectangle into 3cm wide strips.
7. Cut quite a large hole in the end of the piping bag, and pipe a thick line of the pastry cream down the entire length of each strip of dough.
8. Roll the dough on itself but not too tightly, then carefully place them into the ring molds.
9. Place the tray into the oven, switched off, and place a small cup of boiling water in the bottom. Change this every 30-45 minutes, proofing the twists until they have puffed up and the layers appear to be separating slightly. It can take 3-4 hours, but don’t worry too much about overproofing them as the dough is resilient. Once it is ready, it should have risen to the edges of the ring molds, with the layers looking like they are separating slightly.
10. Remove them from the oven and pre-heat it to 185C/365F fan assisted.
11. Place a silicon mat or piece of parchment paper on top and then 2-3 heavy trays on top. This will prevent the dough from rising out of the ring molds.
12. Once the oven is hot, load the trays into the oven, and immediately drop the oven temperature to 170C/340F. Bake the danishes for 35-40 minutes. Try to avoid removing the trays on top too soon, so try and look in the oven and see what colour the dough looks like. It should be a deep golden brown colour once they are baked.
13. Remove them from the oven, and remove the ring molds. Flip them over and place them onto a wire rack to cool slightly.
Cinnamon Icing
1. Into a large bowl, add the icing/powdered sugar, salt, beans from a fresh vanilla pod and cinnamon. Slowly start adding milk and whisk the mixture, adding enough milk until you have a runny, glue-like consistency.
2. Keep the danishes on a wire rack, but place a tray underneath.
3. Pour the glaze over the top of each danish, coating them completely. If you need, scoop up the excess glaze from the tray underneath, and re-use it to glaze any remaining danishes.
4. Place them back into the oven, just for 1-2 minutes, until the glaze goes slightly transparent.
5. Remove them from the oven and allow them to cool for a few minutes then serve.
Note – the process can be quite long, that you end up finishing the danishes quite late which is not the ideal time to eat them (!). What I like to do is to bake the danishes, then wrap the tray tightly once they are cool and leave them at room temperature overnight. The next morning, I heat the oven to 175C/345F and just place them back in for 3-5 minutes, until they feel hot to the touch, then glaze them.
Alternatively you can freeze them once baked, and then just reheat them for longer in the oven (8-15 minutes).
Shop the Equipment
Ingredients
140g unsalted butter
185g egg whites
90g ground almonds
185g powdered/icing sugar
90g self-rising/self-raising flour
2g lemon zest
1⁄2 fresh vanilla bean pod or 1 tsp vanilla bean paste
125g blueberries
lightly toasted flaked almonds, for topping
Special equipment
Oval silicone/metal mold pan
Method
1. Preheat the oven to 320°F/160°C.
2. In a small saucepan on the stovetop over low heat, melt the butter. Remove the
saucepan from the heat and allow the butter to cool for 5 minutes.
3. In a medium bowl, whisk the egg whites for 30 seconds or until frothy.
4. Add the ground almonds, powdered/icing sugar and lemon zest. Cut the vanilla bean
lengthways and using the knife to scrape out half of the beans, add these into the
bowl. Whisk until combined.
5. Place a sieve over the medium bowl and sift in the flour. Whisk until the flour has just
been absorbed, about 30 seconds.
6. Add the melted butter and whisk until there are no more streaks of butter.
7. Gently fold the blueberries into the batter.
8. Pour the batter into the cups of an oval silicone/metal mold pan (or the cups of a
cupcake pan/tin) and fill the cups about three-fourths full. Sprinkle a few flaked
almonds over the top of each cup.
9. Place the pan in the oven and bake for 25 or 30 minutes or until the financiers have a
nice golden colour.
10. Remove the pan from the oven and allow the financiers to cool for 5 minutes before
removing them from the pan. Serve while still warm or allow them to cool completely
and then serve later.
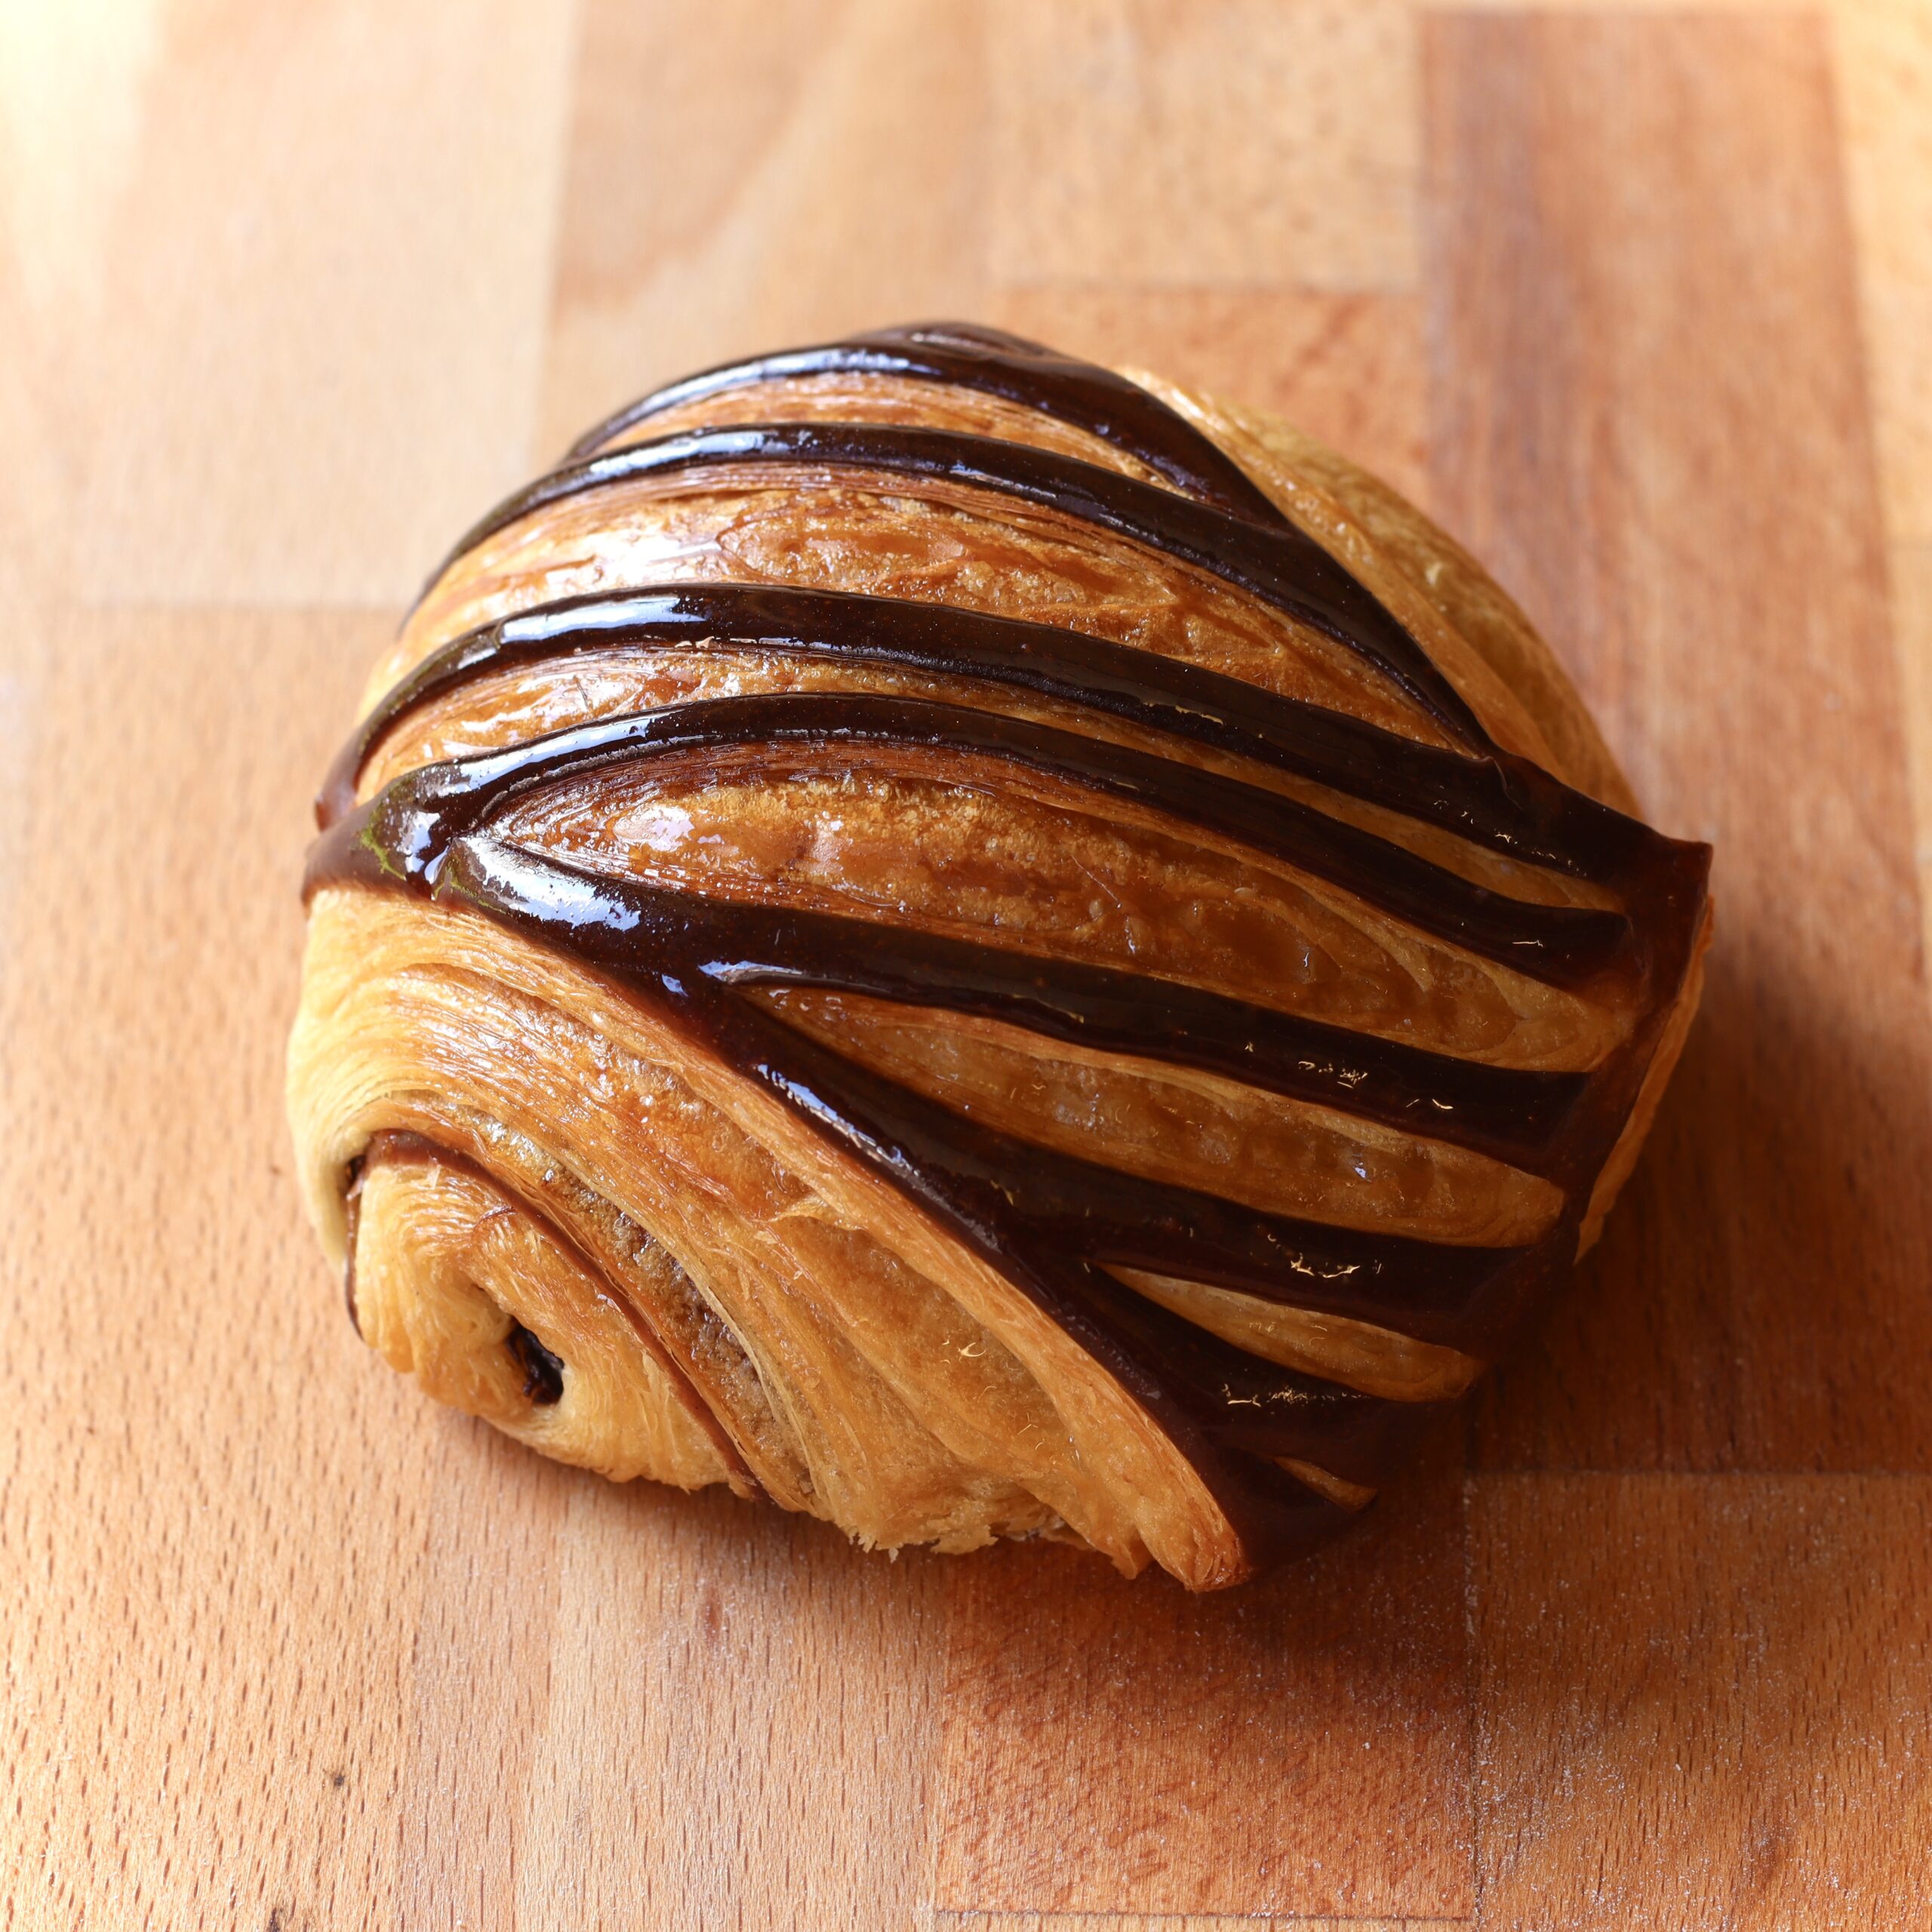
Bi-Color Pain Au Chocolat
TIER 3
Bi-Color Pain Au Chocolat
16-20
PAINS AU CHOCOLAT
Ingredients
Makes 16-20 pains au chocolat
Croissant Dough (Detrempe)
700g Croissant Flour (Also known as T55 Flour – you want a flour with 11-12% protein content)
300g Plain, All-Purpose Flour (Around 9-10% protein content) *If you only have access to Bread Flour – Use 500g Plain Flour + 500g Strong White Bread Flour
25g Salt
120g Sugar
40g Fresh Yeast
265g Whole Milk (5 Degrees Celsius)
265g Water (25 Degrees Celsius)
30g Unsalted Butter, Soft
Butter (Beurrage)
500g Professional Unsalted Butter (Isigny Ste-Mère – Beurre D’Isigny A.O.P)
Or
500g Unsalted Butter + 50g Flour (Croissant or Plain)
Chocolate Croissant Dough
230g Croissant Dough
30g Cocoa Powder
50g Water
Filling
3 Chocolate Batons Per Croissant
Syrup
100g Caster Sugar
100g Water
Special equipment
Stand Mixer
Ruler or Tape Measure
Digital thermometer
Dough Scraper
Razor Blade
Method
Croissant Dough
A quick note about dough temperature – the desired dough temperature (also known as the Desired Dough Temperature (DDT) is ideally around 24-26C. This is the perfect temperature for fermentation. Now – the DDT will depend on the temperature of your ingredients which means you may need to adjust the temperature of your milk and water according to your environment. If you check the back of the PDF recipe you will see how to calculate the DDT. You can follow the temperatures below as a guide but if you want to be very accurate, use the DDT formula.
1. Into the bowl of a stand mixer, add the mik, water & yeast. Use a whisk to whisk it until the yeast has dissolved.
-
- 40g Fresh Yeast
- 265g Whole Milk (5 Degrees Celsius)
- 265g Water (25 Degrees Celsius)
2. Add all of the remaining ingredients into a bowl, and attach your dough hook to the stand mixer.
-
- 700g Croissant Flour
- 300g Plain Flour
- 25g Salt
- 120g Sugar
- 30g Unsalted Butter, Soft
3. Place the mixer on low speed (speed 1 on your mixer) and mix for 8 minutes. After 8 minutes, increase the speed to 2, and mix for another 5-7 minutes.
4. After this time, take a small piece of dough and check to see if the gluten has fully developed. To do this, stretch the piece of dough out, and if it tears easily, then the gluten has not developed enough and you need to keep kneading the dough.
5. Keep kneading the dough until when you carefully stretch a small piece of dough, it stretches without tearing and you can see through the thinly stretched dough.
6. Depending on the strength of your mixer, the time it takes to develop the gluten may vary. It could take up to 15-18 minutes.
7. Remove the dough from the stand mixer and briefly knead it by hand into a smooth ball.
8. Using a dough scraper, cut off about 230g of the dough, which you will need to create the chocolate dough.
9. With the remaining dough, use your hands to pat the dough down and form it into a rough rectangular shape.
10. Wrap the dough in cling film, ensuring the cling film is not wrapped too tightly, there needs to be a little bit of room for it to expand.
11. Place the dough on a tray and into the fridge. The dough needs to be in the fridge for 8-15 hours (I prefer to do it for 12 hours). This the perfect window of time for the fermentation to take place and for the flavour in the dough to develop. I prefer to mix the dough at night so that I can laminate first thing in the morning.
Chocolate Croissant Dough
1. Into a stand mixer, take the croissant dough that you cut from the main dough, and place it into a stand mixer.
2. Into a separate bowl, add the water and cocoa powder. Mix it with a spatula until it forms a rough crumbly paste. Scrape this on top of the croissant dough.
3. With the dough hook attachment, mix the dough until it forms a cohesive chocolate dough. It can sometimes be a little difficult to incorporate so you can also scoop it out onto your work surface and knead it together with your hands.
4. Place the dough onto your work surface and with a rolling pin, roll it into a rough rectangle, about 30x20cm. You may need to flour it lightly to stop it from sticking.
5. Wrap the dough in cling film and place it in the fridge to chill overnight.
Butter
Depending on the type of butter you use, you may not need to follow the following steps and add flour into your butter. If you are able to purchase professional butter sheets used specifically for croissants then the butter will be pliable enough and you will not need to do this.
Option 1 – “Professional” Butter
1. Remove the butter from the package – they usually come in 1KG sheets, and cut it in haf to get 500g.
2. Place the butter on one long sheet of parchment paper then fold it in half. Leave the butter at room temperature for about 30 minutes then it will make it much easier to roll.
3. Use a rolling pin to roll the sheet of butter into a rectangle, around 20x30cm (7.8”x11.8”).
4. You fold the parchment paper into a 20x30cm (7.8”x11.8”) rectangle and then use the rolling pin to roll the butter into the edges until you have a nice even layer of butter.
5. Place the butter block in the fridge to chill overnight.
Option 2 – “Regular” Butter
1. Place the soft butter into a stand mixer along with the flour.
2. Beat the mixture for 1-2 minutes on a low speed until the flour has completely incorporated into the butter.
3. Scrape the butter out of the stand mixer and place it into the centre of a large sheet of parchment paper.
4. Fold the parchment paper over the butter and then fold the edges in, to create a rough rectangle that is 20x30cm (7.8”x11.8”). Use a rolling pin to roll the butter into the corners until you have an even layer of butter that is in a neat rectangular shape
5. Alternatively (and slightly easier) is to find a sandwich bag that is roughly 20x30cm (7.8”x11.8”) and place the soft butter inside that. Seal the sandwich bag leaving a slight hole at the top for air to escape.
6. Roll the butter into a neat rectangular shape, trying to get the butter a relatively even thickness. Seal the top of the bag and place the butter in the fridge overnight.
Laminating
1. After the croissant dough has fermented in the fridge, you are ready to laminate.
2. Remove your butter block from the fridge to allow it to come to temperature. The temperature of the butter is crucial – if the butter is too cold, it will crack when you begin to roll it. If the butter is too warm, it will bleed into the dough and you won’t get any layers to your pain au chocolat. Be sure to cut around the outside of the sandwich bag (if you are using one) and lift the butter out of the bag. Place it on a sheet of parchment to come to temperature.
3. The temperature you need your butter to reach before you begin laminating will depend on the butter you are using and the fat percentage. But a general rule of thumb is to leave the butter at room temperature until it reaches between 11-15C (51F-59F)
4. In my experience, if you are using “professional” croissant butter, you can laminate at around 11C, but with “regular” butter, you need to be closer to 13-14C.
5. Every butter brand will be different and behave differently depending on your room conditions so it may take some experimenting. If your butter melts or cracks the first time you begin laminating, don’t panic! You can still make the bi-color pain au chocolat, your layers may not be quite as perfect however. It can take a few failed attempts of bi-color pain au chocolat in order to understand your butter.
6. Place a digital thermometer into the butter. Depending on your room temperature or the weather outside, it can take the butter anywhere from 10-30 minutes to reach the correct temperature.
7. Once your butter is close to temperature, work quickly to remove your croissant dough from the fridge and start rolling. We want to ensure the dough status cold and is rolled out as soon as the butter is at the right temperature.
8. Very lightly flour the dough and roll it out into a rectangle, that is the same height as your butter (30cm/11.8”) but twice as wide.
9. If your butter block is 20x30cm, you want to roll your dough to 40cm wide x 30cm tall.
10. Place the butter block into the centre of the dough (as shown above) then fold each side of the dough into the centre so they meet in the middle.
11. Use your fingers to pinch the dough together to form a seam down the centre.
12. Turn the dough 90 degrees so the open seam is not facing you and give the dough a quick roll, to give it a little bit of width – extending the width of the dough by about 10cm/4”.
13. Turn the dough 90 degrees again so the seam is vertical in line with your body and begin to roll the dough. Working relatively quickly. Apply even pressure and roll the dough into a long even rectangle.
14. Don’t worry too much about the length of the dough, we are looking to roll it until it reaches around 1cm thick (0.39”)
A quick note on thickness – in an ideal world you would roll to about 5mm thick – but when you are doing it by hand, this can be a little more difficult. So as an easier guide I say around 1cm. 1.5cm is a little on the thick side, but, if you are really struggling to get it any thinner then you can leave it at this thickness and still progress. But if you can get closer to 5mm then even better!
15. Once you are happy with the thickness and shape, dust off any excess flour with a brush, and if the ends of the dough have gone a bit wonky, cut them off so you have straight edges on either side.
16. Perform a single fold of the dough, where you take one third of the dough and fold it up, then take the other third of dough and fold this over the top (see diagram in the PDF)
17. Wrap the dough tightly in cling film and place it onto a tray. Place the dough into the freezer for 10 minutes, then into the fridge for 5 minutes.
18. Remove the dough from the fridge and unwrap it.
19. Following the same process as before, turn the dough 90 degrees so that the “open seam” is horizontally against your body (so it is not facing you).
20. Roll the dough to give it a little bit of width, then turn the dough 90 degrees so that the open seam is now facing you.
21. Roll the dough into a long rectangle, until it is around 1cm thick (0.39”).
22. Now, perform your second, single fold. Following the diagram again, take one third of the dough, fold it up, then take the other third of dough and fold this over the top.
23. Wrap the dough up in cling film and place it in the freezer for 15 minutes, then in the fridge for 10 minutes.
24. Remove the dough from the fridge, and we are going to perform our final single fold, Repeat the process in steps 18-21.
25. When folding this dough, remember that after this stage you need to add the chocolate dough on top. The chocolate dough is 30x25cm, so try to roll the dough so that it is 30cm tall and 75cm long.
26. Perform your final single fold and you should be left with a block of dough that is close to 30x25cm.
27. Wrap the dough tightly in cling film and place it in the fridge for 30 minutes.
28. After 30 minutes, remove the dough from the fridge along with the chocolate dough that you rolled the night before.
29. Take the chocolate dough and unwrap it from the baking paper. Unwrap the croissant dough block. Lift the chocolate dough on to the top of the croissant dough. Avoid flouring the dough at this point as you need the chocolate dough to stick to the croissant dough. ○ If the chocolate dough is a little too small, very gently stretch it with your hands to the edge. If it is too big, simply trim off any excess.
30. Ensuring the chocolate side of the dough is facing up, take the open seam of the dough and turn it 90 degrees so the seam is not facing you. Here we need to roll the dough to the final width that we need for the pain au chocolat.
31. Each pain au chocolate is 8x17cm, which means that we need the dough to be at least 36-38cm tall.
We will make two rows of bi-color pain au chocolat so we need to make sure the dough is at least 2x17cm = 34cm tall. You want to go a little bigger than this so you can trim off any rough edges.
32. Once you have rolled the dough to around 36cm wide, turn it 90 degrees so the open seam is now facing you. Roll the dough into a long rectangle until it is as close to 1cm thick (0.39”) as possible.
33. Next, take a tape measure or a large ruler and trim off any rough edges so you are left with a rectangle that is exactly 34cm tall.
34. Take a pastry wheel and cut the dough in half, so that you are left with two very long strips of dough, each 17cm tall.
35. Then take a multi pastry wheel cutter or a knife, and cut the dough every 8cm. This will form a rectangle for your pain au chocolat that is 8x17cm.
36. With the chocolate side of the dough still facing you, take a razor blade and score thin lines in the top half of the dough (like below). Don’t use a knife to score the dough as it could tug the dough and damage it. A razor blade is much better.
37. Once you have sliced the chocolate side of the dough, flip it over, so the chocolate dough is now on the table surface, and make sure the “scores” are at the bottom.
38. Place two chocolate batons at the top. Carefully fold the top edge of the dough over the batons, then seal this dough that has overlapped the batons, by adding a third chocolate baton.
39. Continue to roll the dough down, into a log like shape.
40. Once you have a log, ensure the seam of the dough is on the underside, and gently press the bi-color pain au chocolat down, sealing the seam to the dough.
41. Take a large baking tray lined with a sheet of parchment paper and place the pain au chocolat on to it.
42. Repeat this process with all of the remaining dough.
43. Ensure the bi-color pain au chocolat have enough room to proof (I put about 6 per tray)
44. Once you have all the trays filled, boil the kettle and place the trays into your oven (not switched on!)
45. Place the trays into the oven, then place a small dish at the bottom.
46. Pour in a small amount of boiling water into the dish, around 150ml / ½ Cup – not too much. The steam from the water is going to help create a nice environment for the bi-color pain au chocolat to proof, but also prevent a skin from forming. Ensure you do not add too much hot water otherwise the temperature inside the oven will become too hot and the butter will leak from the bi-color pain au chocolat.
47. Change the water EVERY 30 minutes, and proof the pain au chocolat for around 2.5 – 3 hours.
The proofing time can vary greatly depending on your yeast, and how hot your oven becomes and several other factors. Without a professional proofer it can be hard to predict the exact time. Sometimes it can take 2.5 hours, sometimes it can take 5!
48. While the dough is proofing, make the sugar syrup glaze. We cannot egg wash the croissants as the egg will stain the chocolate dough yellow.
49. Add the sugar and water to a pan and bring it to a gentle simmer, until the sugar has dissolved. Don’t cook it for too long or the syrup will thicken and be difficult to paint on the pain au chocolat later. Set it to one side to cool to room temperature.
-
- 100g Caster Sugar
- 100g Water
50. Proof the pain au chocolat until they have at least doubled in volume and look puffy and jiggly.
51. If you are using the same oven you need to proof the bi-color pain au chocolat, as you need to bake it (!) once they are proofed, quickly remove them from the oven and pre-heat the oven.
52. Preheat the oven to 180C/355F Non Fan Assisted.
53. Once the oven is hot, place the bi-color pain au chocolat in. Bake for 25-30 minutes or until the croissant dough is a nice golden colour.
54. Remove the bi-color pain au chocolat from the oven, allow them to cool for 5-10 minutes before applying the sugar syrup glaze. This will give the pain au chocolat a beautiful shine.
Timings
Making pain au chocolat & croissants is an intensive process and something you really need to dedicate 16-24 hours to! Make sure you don’t have any plans on the day you need to laminate! Here is a rough guide on timings to follow:
Day 1:
9:00pm – Weigh the ingredients + mix the croissant dough. Cut the chocolate dough and wrap both doughs in cling film. Refrigerate overnight (ideally 12 hours)
9:30pm – Beat the butter until it is soft and shape into a rectangle. Chill overnight.
Day 2:
9:00am – Remove the butter from the fridge. Allow it to come to temperature.
9:20am – Remove the dough from the fridge, roll it out, then add the butter and perform your first lamination. Chill for 10 minutes in the freezer + 5 minutes in the fridge.
9:45am – Remove the dough from the fridge and laminate again. Chill in the freezer for 15 minutes + fridge for 10 minutes.
10:15am – Remove the dough from the fridge and perform the final lamination. Chill in the fridge for 30 minutes.
10:50am – Roll the dough to its final shape and cut into bi-color pain au chocolat rectangles. Roll the bi-color pain au chocolat up and then place them in the oven to proof.
11:10am – 2:10pm – Proof – changing the hot water every 30 minutes (Roughly 3 hours proofing time – could be slightly less, could be more!)
2:10pm – Remove the proofed bi-color PAC, and preheat the oven.
2:20pm – Bake for 25-30m or until golden. Glaze with the sugar syrup.
Desired Dough Temperature Formula (DDT)
As people are working in different environments – the temperature required for ideal fermentation will be affected by the temperature of your flour, water, milk. For fermentation, you want to finish kneading the dough and to have a final temperature of around 24-26C. The temperature of your flour will most likely be determined by the temperature of your room, which means as a result, you need to follow the formula below to calculate the temperature of the liquids in the recipe. This is very helpful especially if you are working in a particularly hot or particularly cold environment as it means you can simply adjust the temperature of your ingredients and still achieve perfect fermentation.
*note you can test the flour temperature by sticking a digital thermometer in the bag of flour!
(Desired Dough Temperature x 2) – Flour Temperature = Liquid Temperature
Example to achieve a 25C dough temperature where your room/flour temperature is 20C.
(25 x 2) – Flour Temperature = Liquid Temperature
50℃ – Flour Temperature = Liquid Temperature
50℃ – 20℃ = Liquid Temperature
50℃ – 20℃ = 30℃
Therefore if your flour temperature is 20℃ – then you need to make sure the milk + water are at 30℃ when you add them to your recipe. In which case, you can pour your milk and water into a pan, and VERY gently heat them until they reach around 29/30℃ then immediately pour them into your mix.

Croissants
TIER 2
Croissants
16-20
CROISSANTS
Ingredients
Makes 16-20 croissants
Croissant Dough (Detrempe)
700g Croissant Flour (Also known as T55 Flour – you want a flour with 11-12% protein content)
300g Plain, All-Purpose Flour (Around 9-10% protein content) *If you only have access to Bread Flour – Use 500g Plain Flour + 500g Strong White Bread Flour
25g Salt
120g Sugar
40g Fresh Yeast
265g Whole Milk (5 Degrees Celsius)
265g Water (25 Degrees Celsius)
30g Unsalted Butter, Soft
Butter (Beurrage)
500g Professional Unsalted Butter (Isigny Ste-Mère – Beurre D’Isigny A.O.P)
Or
500g Unsalted Butter + 50g Flour (Croissant or Plain)
Egg Wash
2 Eggs + 2 Egg Yolks
Special equipment
Stand Mixer
Ruler or Tape Measure
Digital thermometer
Dough Scraper
Method
Croissant Dough
A quick note about dough temperature – the desired dough temperature (also known as the Desired Dough Temperature (DDT) is ideally around 24-26C. This is the perfect temperature for fermentation. Now – the DDT will depend on the temperature of your ingredients which means you may need to adjust the temperature of your milk and water according to your environment. If you check the back of the PDF recipe you will see how to calculate the DDT. You can follow the temperatures below as a guide but if you want to be very accurate, use the DDT formula.
1. Into the bowl of a stand mixer, add the mik, water & yeast. Use a whisk to whisk it until the yeast has dissolved.
-
- 40g Fresh Yeast
- 265g Whole Milk (5 Degrees Celsius)
- 265g Water (25 Degrees Celsius)
2. Add all of the remaining ingredients into a bowl, and attach your dough hook to the stand mixer.
-
- 700g Croissant Flour
- 300g Plain Flour
- 25g Salt
- 120g Sugar
- 30g Unsalted Butter, Soft
3. Place the mixer on low speed (Speed 1 on your mixer) and mix for 8 minutes. After 8 minutes, increase the speed to 2, and mix for another 7-8 minutes.
4. After this time, take a small piece of dough and check to see if the gluten has fully developed. To do this, stretch the piece of dough out, and if it tears easily, then the gluten has not developed enough and you need to keep kneading the dough.
5. Keep kneading the dough until when you carefully stretch a small piece of dough, it stretches without tearing and you can see through the thinly stretched dough.
6. Depending on the strength of your mixer, the time it takes to develop the gluten may vary. It could take up to 15-18 minutes.
7. Remove the dough from the stand mixer and briefly knead it by hand into a smooth ball.
8. Use your hands to pat the dough down and form it into a rough rectangular shape.
9. Wrap the dough in cling film, ensuring the cling film is not wrapped too tightly, there needs to be a little bit of room for it to expand.
10. Place the dough on a tray and into the fridge. The dough needs to be in the fridge for 8-15 hours (I prefer 12 hours). This the perfect window of time for the fermentation to take place and for the flavour in the dough to develop. I prefer to mix the dough at night so that I can laminate first thing in the morning.
Butter
Depending on the type of butter you use, you may not need to follow the following steps and add flour into your butter. If you are able to purchase professional butter sheets used specifically for croissants then the butter will be pliable enough and you will not need to do this.
Option 1 – “Professional” Butter
1. Remove the butter from the package – they usually come in 1KG sheets, and cut it in haf to get 500g.
2. Place the butter on one long sheet of parchment paper then fold it in half. Leave the butter at room temperature for about 10-15 minutes then it will make it much easier to roll.
3. Use a rolling pin to roll the sheet of butter into a rectangle, around 20x30cm (7.8”x11.8”).
4. You fold the parchment paper into a 20x30cm (7.8”x11.8”) rectangle and then use the rolling pin to roll the butter into the edges until you have a nice even layer of butter.
5. Place the butter block in the fridge to chill overnight.
Option 2 – “Regular” Butter
1. Place the soft butter into a stand mixer along with the flour.
2. Beat the mixture for 1-2 minutes on a low speed until the flour has completely incorporated into the butter.
3. Scrape the butter out of the stand mixer and place it into the centre of a large sheet of parchment paper.
4. Fold the parchment paper over the butter and then fold the edges in, to create a rough rectangle that is 20x30cm (7.8”x11.8”). Use a rolling pin to roll the butter into the corners until you have an even layer of butter that is in a neat rectangular shape
5. Alternatively (and slightly easier) is to find a sandwich bag that is roughly 20x30cm (7.8”x11.8”) and place the soft butter inside that. Seal the sandwich bag leaving a slight hole at the top for air to escape.
6. Roll the butter into a neat rectangular shape, trying to get the butter a relatively even thickness. Seal the top of the bag and place the butter in the fridge overnight.
Laminating
1. After the croissant dough has fermented in the fridge, you are ready to laminate.
2. Remove your butter block from the fridge to allow it to come to temperature. The temperature of the butter is crucial – if the butter is too cold, it will crack when you begin to roll it. If the butter is too warm, it will bleed into the dough and you won’t get any layers to your croissant. Be sure to cut around the outside of the sandwich bag (if you are using one) and lift the butter out of the bag. Place it on a sheet of parchment to come to temperature.
3. The temperature you need your butter to reach before you begin laminating will depend on the butter you are using and the fat percentage. But a general rule of thumb is to leave the butter at room temperature until it reaches between 11-15C (51F-59F)
4. In my experience, if you are using “professional” croissant butter, you can laminate at around 11C, but with “regular” butter, you need to be closer to 13-14C.
5. This may take some experimenting, so if your butter melts or cracks the first time you begin laminating, don’t panic! You can still make the croissants, your layers may not be quite as perfect however. It can take a few failed attempts of croissants in order to understand your butter.
6. Place a digital thermometer into the butter. Depending on your room temperature or the weather outside, it can take the butter anywhere from 10-30 minutes to reach the correct temperature.
7. Once your butter is close to temperature, work quickly to remove your croissant dough from the fridge and start rolling. We want to ensure the dough status cold and is rolled out as soon as the butter is at the right temperature.
8. Very lightly flour the dough and roll it out into a rectangle, that is the same height as your butter (30cm/11.8”) but twice as wide.
9. If your butter block is 20x30cm, you want to roll your dough to 40cm wide x 30cm tall.
10. Place the butter block into the centre of the dough (as shown above) then fold each side of the dough into the centre so they meet in the middle.
11. Use your fingers to pinch the dough together to form a seam down the centre.
12. With the seam facing towards you, turn the dough 90 degrees so the seam is now horizontal to you and give the dough a quick roll, to give it a little bit of width.
13. Turn the dough 90 degrees again so the seam is vertical in line with your body and begin to roll the dough. Working relatively quickly. Apply even pressure and roll the dough into a long even rectangle.
14. Don’t worry too much about the length of the dough, we are looking to roll it until it reaches around 1cm thick (0.39”)
A quick note on thickness – in an ideal world you would roll to about 5mm thick – but when you are doing it by hand, this can be a little more difficult. So as an easier guide I say around 1cm. 1.5cm is a little on the thick side, but, if you are really struggling to get it any thinner then you can leave it at this thickness and still progress. But if you can get closer to 5mm then even better!
15. Once you are happy with the thickness and shape, dust off any excess flour with a brush, and if the ends of the dough have gone a bit wonky, cut them off so you have straight edges on either side.
16. Perform a single fold of the dough, where you take one third of the dough and fold it up, then take the other third of dough and fold this over the top (see diagram in the PDF)
17. Wrap the dough tightly in cling film and place it onto a tray. Place the dough into the freezer for 10 minutes, then into the fridge for 5 minutes.
18. Remove the dough from the fridge and unwrap it.
19. Following the same process as before, turn the dough 90 degrees so that the “open seam” is horizontally against your body (so it is not facing you).
20. Roll the dough to give it a little bit of width, then turn the dough 90 degrees so that the open seam is now facing you.
21. Roll the dough into a long rectangle, until it is around 1cm thick (0.39”).
22. Now, perform your second, single fold. Following the diagram again, take one third of the dough, fold it up, then take the other third of dough and fold this over the top.
23. Wrap the dough up in cling film and place it in the freezer for 15 minutes, then in the fridge for 10 minutes.
24. Remove the dough from the fridge, and we are going to perform our final single fold, Repeat the process in steps 18-22.
25. You will have now performed 3 single folds.
26. Wrap the dough tightly in cling film and place it in the fridge for 30 minutes.
27. After 30 minutes, remove the dough from the fridge. Take the open seam and turn it 90 degrees so the seam is not facing you. Here we need to roll the dough to the final width that we need for the croissant.
28. Each croissant is 9x27cm, which means that we need the dough to be at least 30-32cm tall.
29. Once you have rolled the dough to around 32cm wide, turn it 90 degrees so the open seam is now facing you. Roll the dough into a long rectangle until it is as close to 1cm thick (0.39”) as possible.
30. Next, take a tape measure or a large ruler and trim off any rough edges so you are left with a rectangle that is exactly 27cm tall.
31. Take a pastry wheel and measure 9cm on a ruler.
32. Use the multi wheel pastry cutter (or a knife and a ruler) and mark 9cm intervals along the bottom of the dough.
33. Then, mark 4.5cm in from the first interval, take a ruler and go to the top of the dough. Mark this point. This will be the tip of the croissant.
34. Once you have marked all the points on the rectangle, use a knife or pastry wheel and a ruler to cut triangles, following the each marked point.
35. Once you have cut the triangles, pick one up and use your hands to gently stretch the dough, you want to stretch the triangle so it is about 10cm longer.
36. Place the stretched triangle on the table and starting with the wide end, roll the dough in on itself, trying to keep the dough as central as possible as you roll.
37. Roll the dough into a nice spiral and then lift it up and press the tiny tail into the bottom of the dough so that it sticks.
38. Take a large baking tray lined with a sheet of parchment paper and place the croissants on to it.
39. Repeat this process with all of the remaining dough.
40. Ensure the croissants have enough room to proof (I put about 6 per tray)
41. Once you have all the trays filled, boil the kettle and place the trays into your oven (not switched on!)
42. Place the trays into the oven, then place a small dish at the bottom.
43. Pour in a small amount of boiling water into the dish, around 150ml / ½ Cup – not too much. The steam from the water is going to help create a nice environment for the croissants to proof, but also prevent a skin from forming. Ensure you do not add too much hot water otherwise the temperature inside the oven will become too hot and the butter will leak from the croissants.
44. Change the water EVERY 30 minutes, and proof the croissants for around 2.5 – 3 hours.
The proofing time can vary greatly depending on your yeast, how hot your oven becomes and several other factors. Without a professional proofer it can be hard to predict the exact time. Sometimes it can take 2.5 hours, sometimes it can take 5!
45. Proof the croissants until they have at least doubled in volume and look puffy, jiggly & “full”
46. If you are using the same oven you need to proof the croissants, as you need to bake it (!) once they are proofed, quickly remove them from the oven and preheat the oven.
47. Preheat the oven to 180C/355F Non Fan Assisted.
48. Leave the croissants out at room temperature for 10 minutes – this will help to form a skin on the dough and make them easier to egg wash.
49. For the egg wash, whisk together the egg and egg yolks.
50. Use a pastry brush to paint the egg wash onto the croissants, but avoid egg washing the outside exposed edges otherwise this could prevent them from rising correctly. Use a small pastry brush to paint the dough.
51. Once the oven is hot, place the croissants in. Bake for 25-30 minutes or until then are a nice deep golden brown colour.
52. Remove the croissants from the oven, allow to cool, then serve.
Timings
Making pain au chocolat & croissants is an intensive process and something you really need to dedicate 16-24 hours to! Make sure you don’t have any plans on the day you need to laminate! Here is a rough guide on timings to follow:
Day 1:
9:00pm – Weigh the ingredients + mix the croissant dough. Refrigerate overnight (ideally 12 hours)
9:30pm – Beat the butter until it is soft and shape into a rectangle. Chill overnight.
Day 2:
9:00am – Remove the butter from the fridge. Allow it to come to temperature.
9:20am – Remove the dough from the fridge, roll it out, then add the butter and perform your first lamination. Chill for 10 minutes in the freezer + 5 minutes in the fridge.
9:45am – Remove the dough from the fridge and laminate again. Chill in the freezer for 15 minutes + fridge for 10 minutes.
10:15am – Remove the dough from the fridge and perform the final lamination. Chill in the fridge for 30 minutes.
10:50am – Roll the dough to its final shape and cut into triangles. Roll the croissants up and then place them in the oven to proof.
11:10am – 2:10pm – Proof – changing the hot water every 30 minutes (Roughly 3 hours proofing time – could be slightly less, could be more!)
2:10pm – Remove the proofed croissant, and preheat the oven. Leave the croissant at room temperature to form a skin.
2:20pm – Egg wash the croissant
2:30pm – Bake for 25-30 minutes or until golden.
Desired Dough Temperature Formula (DDT)
As people are working in different environments – the temperature required for ideal fermentation will be affected by the temperature of your flour, water, milk. For fermentation, you want to finish kneading the dough and to have a final temperature of around 24-26C. The temperature of your flour will most likely be determined by the temperature of your room, which means as a result, you need to follow the formula below to calculate the temperature of the liquids in the recipe. This is very helpful especially if you are working in a particularly hot or particularly cold environment as it means you can simply adjust the temperature of your ingredients and still achieve perfect fermentation.
*note you can test the flour temperature by sticking a digital thermometer in the bag of flour!
(Desired Dough Temperature x 2) – Flour Temperature = Liquid Temperature
Example to achieve a 25C dough temperature where your room/flour temperature is 20C.
(25 x 2) – Flour Temperature = Liquid Temperature
50℃ – Flour Temperature = Liquid Temperature
50℃ – 20℃ = Liquid Temperature
50℃ – 20℃ = 30℃
Therefore if your flour temperature is 20℃ – then you need to make sure the milk + water are at 30℃ when you add them to your recipe. In which case, you can pour your milk and water into a pan, and VERY gently heat them until they reach around 29/30℃ then immediately pour them into your mix.

Pain Au Chocolat
TIER 1
Pain au Chocolat
16-20
PAINS AU CHOCOLAT
Ingredients
Makes 16-20 pains au chocolat
Croissant Dough (Detrempe)
700g Croissant Flour (Also known as T55 Flour – you want a flour with 11-12% protein content)
300g Plain, All-Purpose Flour (Around 9-10% protein content) *If you only have access to Bread Flour – Use 500g Plain Flour + 500g Strong White Bread Flour
25g Salt
120g Sugar
40g Fresh Yeast
265g Whole Milk (5 Degrees Celsius)
265g Water (25 Degrees Celsius)
30g Unsalted Butter, Soft
Butter (Beurrage)
500g Professional Unsalted Butter (Isigny Ste-Mère – Beurre D’Isigny A.O.P)
OR
500g Unsalted Butter + 50g Flour (Croissant or Plain)
Filling
3 Chocolate Batons Per Croissant
Egg Wash
2 Eggs + 2 Egg Yolks
Special equipment
Stand mixer
Ruler or tape measure
Digital thermometer
Dough scraper
Method
Croissant Dough
A quick note about dough temperature – the desired dough temperature (also known as the Desired Dough Temperature (DDT) is ideally around 24-26C. This is the perfect temperature for fermentation. Now – the DDT will depend on the temperature of your ingredients which means you may need to adjust the temperature of your milk and water according to your environment. If you check the back of the PDF recipe you will see how to calculate the DDT. You can follow the temperatures below as a guide but if you want to be very accurate, use the DDT formula.
1. Into the bowl of a stand mixer, add the mik, water & yeast. Use a whisk to whisk it until the yeast has dissolved.
-
- 40g Fresh Yeast
- 265g Whole Milk (5 Degrees Celsius)
- 265g Water (25 Degrees Celsius)
2. Add all of the remaining ingredients into a bowl, and attach your dough hook to the stand mixer.
-
- 700g Croissant Flour
- 300g Plain Flour
- 25g Salt
- 120g Sugar
- 30g Unsalted Butter, Soft
3. Place the mixer on low speed (Speed 1 on your mixer) and mix for 8m. After 8 minutes, increase the speed to 2, and mix for another 7-8 minutes.
4. After this time, take a small piece of dough and check to see if the gluten has fully developed. To do this, stretch the piece of dough out, and if it tears easily, then the gluten has not developed enough and you need to keep kneading the dough.
5. Keep kneading the dough until when you carefully stretch a small piece of dough, it stretches without tearing and you can see through the thinly stretched dough.
6. Depending on the strength of your mixer, the time it takes to develop the gluten may vary. It could take up to 15-18 minutes.
7. Remove the dough from the stand mixer and briefly knead it by hand into a smooth ball.
8. Use your hands to pat the dough down and form it into a rough rectangular shape.
9. Wrap the dough in cling film, ensuring the cling film is not wrapped too tightly, there needs to be a little bit of room for it to expand.
10. Place the dough on a tray and into the fridge. The dough needs to be in the fridge for 8-15 hours (I do 12 hours). This the perfect window of time for the fermentation to take place and for the flavour in the dough to develop. I prefer to mix the dough at night so that I can laminate first thing in the morning.
Butter
Depending on the type of butter you use, you may not need to follow the following steps and add flour into your butter. If you are able to purchase professional butter sheets used specifically for croissants then the butter will be pliable enough and you will not need to do this.
Option 1 – “Professional” Butter
1. Remove the butter from the package – they usually come in 1KG sheets, and cut it in haf to get 500g.
2. Place the butter on one long sheet of parchment paper then fold it in half. Leave the butter at room temperature for about 10-15 minutes then it will make it much easier to roll.
3. Use a rolling pin to roll the sheet of butter into a rectangle, around 20x30cm (7.8”x11.8”).
4. You fold the parchment paper into a 20x30cm (7.8”x11.8”) rectangle and then use the rolling pin to roll the butter into the edges until you have a nice even layer of butter.
5. Place the butter block in the fridge to chill overnight.
Option 2 – “Regular” Butter
1. Place the soft butter into a stand mixer along with the flour.
2. Beat the mixture for 1-2 minutes on a low speed until the flour has completely incorporated into the butter.
3. Scrape the butter out of the stand mixer and place it into the centre of a large sheet of parchment paper.
4. Fold the parchment paper over the butter and then fold the edges in, to create a rough rectangle that is 20x30cm (7.8”x11.8”). Use a rolling pin to roll the butter into the corners until you have an even layer of butter that is in a neat rectangular shape
5. Alternatively (and slightly easier) is to find a sandwich bag that is roughly 20x30cm (7.8”x11.8”) and place the soft butter inside that. Seal the sandwich bag leaving a slight hole at the top for air to escape.
6. Roll the butter into a neat rectangular shape, trying to get the butter a relatively even thickness. Seal the top of the bag and place the butter in the fridge overnight.
Laminating
1. After the croissant dough has fermented in the fridge, you are ready to laminate.
2. Remove your butter block from the fridge to allow it to come to temperature. The temperature of the butter is crucial – if the butter is too cold, it will crack when you begin to roll it. If the butter is too warm, it will bleed into the dough and you won’t get any layers to your pain au chocolat. Be sure to cut around the outside of the sandwich bag (if you are using one) and lift the butter out of the bag. Place it on a sheet of parchment to come to temperature.
3. The temperature you need your butter to reach before you begin laminating will depend on the butter you are using and the fat percentage. But a general rule of thumb is to leave the butter at room temperature until it reaches between 11-15C (51F-59F)
4. In my experience, if you are using “professional” croissant butter, you can laminate at around 11C, but with “regular” butter, you need to be closer to 13-14C.
5. This may take some experimenting, so if your butter melts or cracks the first time you begin laminating, don’t panic! You can still make the croissants, your layers may not be quite as perfect however. It can take a few failed attempts of croissants in order to understand your butter.
6. Place a digital thermometer into the butter. Depending on your room temperature or the weather outside, it can take the butter anywhere from 10-30 minutes to reach the correct temperature.
7. Once your butter is close to temperature, work quickly to remove your croissant dough from the fridge and start rolling. We want to ensure the dough stays cold and is rolled out as soon as the butter is at the right temperature.
8. Very lightly flour the dough and roll it out into a rectangle, that is the same height as your butter (30cm/11.8”) but twice as wide.
9. If your butter block is 20x30cm, you want to roll your dough to 40cm wide x 30cm tall.
10. Place the butter block into the centre of the dough (as shown above) then fold each side of the dough into the centre so they meet in the middle.
11. Use your fingers to pinch the dough together to form a seam down the centre.
12. Turn the dough 90 degrees so the open seam is not facing you and give the dough a quick roll, to give it a little bit of width – extending the width of the dough by about 10cm/4”.
13. Turn the dough 90 degrees again so the seam is vertical in line with your body and begin to roll the dough. Working relatively quickly. Apply even pressure and roll the dough into a long even rectangle. Lightly flour the dough as you need. You may also need to lift the dough up occasionally to loosen it from the surface and then continue rolling.
14. Don’t worry too much about the length of the dough, we are looking to roll it until it reaches around 1cm thick (0.39”)
A quick note on thickness – in an ideal world you would roll to about 5mm thick – but when you are doing it by hand, this can be a little more difficult. So as an easier guide I say around 1cm. 1.5cm is a little on the thick side, but, if you are really struggling to get it any thinner then you can leave it at this thickness and still progress. But if you can get closer to 5mm then even better!
15. Once you are happy with the thickness and shape, dust off any excess flour with a brush, and if the ends of the dough have gone a bit wonky, cut them off so you have straight edges on either side.
16. Perform a single fold of the dough, where you take one third of the dough and fold it up, then take the other third of dough and fold this over the top (see diagram in the PDF).
17. Wrap the dough tightly in cling film and place it onto a tray. Place the dough into the freezer for 10 minutes, then into the fridge for 5 minutes.
18. Remove the dough from the fridge and unwrap it.
19. Following the same process as before, turn the dough 90 degrees so that the “open seam” is horizontally against your body (so it is not facing you).
20. Roll the dough to give it a little bit of width, then turn the dough 90 degrees so that the open seam is now facing you.
21. Roll the dough into a long rectangle, until it is around 1cm thick (0.39”).
22. Now, perform your second, single fold. Following the diagram again, take one third of the dough, fold it up, then take the other third of dough and fold this over the top.
23. Wrap the dough up in cling film and place it in the freezer for 15 minutes, then in the fridge for 10 minutes.
24. Remove the dough from the fridge, and we are going to perform our final single fold, Repeat the process in steps 18-23.
25. You will have now performed 3 single folds.
26. Wrap the dough tightly in cling film and place it in the fridge for 30 minutes.
27. After 30 minutes, remove the dough from the fridge. Take the open seam and turn it 90 degrees so the seam is not facing you. Here we need to roll the dough to the final width that we need for the pain au chocolat.
28. Each pain au chocolate is 8x17cm, which means that we need the dough to be at least 38-40cm tall. Keep in mind the dough may retract and shrink slightly so it is better to go to 40cm given it may retract 1-2cm.
We will make two rows of pain au chocolat so we need to make sure the dough is at least 2x17cm = 34cm tall. You want to go a little bigger than this so you can trim off any rough edges.
29. Once you have rolled the dough to around 38-40cm wide, turn it 90 degrees so the open seam is now facing you. Roll the dough into a long rectangle until it is as close to 1cm thick (0.39”) as possible.
30. Next, take a tape measure or a large ruler and trim off any rough edges so you are left with a rectangle that is exactly 34cm tall.
31. Take a pastry wheel and cut the dough in half, so that you are left with two very long strips of dough, each 17cm tall.
32. Then take a multi pastry wheel cutter or a knife, and cut the dough every 8cm. This will form a rectangle for your pain au chocolat that is 8x17cm.
33. Take a rectangle of the dough and place two chocolate batons at the top. Carefully fold the top edge of the dough over the batons, then seal this dough that has overlapped the batons, by adding a third chocolate baton.
34. Continue to roll the dough down, into a log like shape.
35. Once you have a log, ensure the seam of the dough is on the underside, and gently press the pain au chocolat down, sealing the seam to the bottom of the dough.
36. Take a large baking tray lined with a sheet of parchment paper and place the pain au chocolat on to it.
37. Repeat this process with all of the remaining dough.
38. Ensure the pain au chocolat have enough room to proof (I put about 6 per tray)
39. Once you have all the trays filled, boil the kettle and place the trays into your oven (not switched on!)
40. Place the trays into the oven, then place a small dish at the very bottom.
41. Pour in a small amount of boiling water into the dish, around 150ml / ½ Cup – not too much. The steam from the water is going to help create a nice environment for the pain au chocolat to proof, but also prevent a skin from forming. Ensure you do not add too much hot water otherwise the temperature inside the oven will become too hot and the butter will leak from the pain au chocolat.
42. Change the water EVERY 30 minutes, and proof the pain au chocolat for around 2.5 – 3 hours.
The proofing time can vary greatly depending on your yeast, and how hot your oven becomes and several other factors. Without a professional proofer it can be hard to predict the exact time. Sometimes it can take 2.5 hours, sometimes it can take 5!
43. Proof the pain au chocolat until they have at least doubled in volume and look puffy and jiggly.
44. If you are using the same oven you need to proof the croissants, as you need to bake it (!) once they are proofed, quickly remove them from the oven and preheat the oven.
45. Preheat the oven to 180C/355F Non Fan Assisted.
46. Leave the pain au chocolat out at room temperature for 10 minutes – this will help to form a skin on the dough and make them easier to egg wash.
47. For the egg wash, whisk together the egg and egg yolks until evenly combined.
-
- 2 Whole Eggs
- 2 Egg Yolks
48. Use a pastry brush to paint the egg wash onto the pain au chocolat, but avoid egg washing the outside exposed edges otherwise this could prevent them from rising correctly. Be gentle when egg washing so as not to tear the dough.
49. Once the oven is hot, place the croissants in, bake for around 25-30 minutes or until then are a nice deep golden brown colour. Every oven is different so keep a close eye on them.
50. Remove the pain au chocolat from the oven, allow to cool, then serve.
Timings
Making pain au chocolat & croissants is an intensive process and something you really need to dedicate 16-24 hours to! Make sure you don’t have any plans on the day you need to laminate! Here is a rough guide on timings to follow:
Day 1:
9:00pm – Weigh the ingredients + mix the croissant dough. Refrigerate overnight (ideally 12 hours)
9:30pm – Beat the butter until it is soft and shape into a rectangle. Chill overnight.
Day 2:
9:00am – Remove the butter from the fridge. Allow it to come to temperature.
9:20am – Remove the dough from the fridge, roll it out, then add the butter and perform your first lamination. Chill for 10 minutes in the freezer + 5 minutes in the fridge.
9:45am – Remove the dough from the fridge and laminate again. Chill in the freezer for 15 minutes + fridge for 10 minutes.
10:15am – Remove the dough from the fridge and perform the final lamination. Chill in the fridge for 30 minutes.
10:50am – Roll the dough to its final shape and cut into pain au chocolat rectangles. Roll the pain au chocolat up and then place them in the oven to proof.
11:10am – 2:10pm – Proof – changing the hot water every 30 minutes (Roughly 3 hours proofing time – could be slightly less, could be more!)
2:10pm – Remove the proofed PAC, and preheat the oven. Leave the PAC at room temperature to form a skin.
2:20pm – Egg Wash the PAC.
2:30pm – Bake for 25-30 minutes or until golden.
Desired Dough Temperature Formula (DDT)
As people are working in different environments – the temperature required for ideal fermentation will be affected by the temperature of your flour, water, milk. For fermentation, you want to finish kneading the dough and to have a final temperature of around 24-26C. The temperature of your flour will most likely be determined by the temperature of your room, which means as a result, you need to follow the formula below to calculate the temperature of the liquids in the recipe. This is very helpful especially if you are working in a particularly hot or particularly cold environment as it means you can simply adjust the temperature of your ingredients and still achieve perfect fermentation.
*note you can test the flour temperature by sticking a digital thermometer in the bag of flour!
(Desired Dough Temperature x 2) – Flour Temperature = Liquid Temperature
Example to achieve a 25C dough temperature where your room/flour temperature is 20C.
(25 x 2) – Flour Temperature = Liquid Temperature
50℃ – Flour Temperature = Liquid Temperature
50℃ – 20℃ = Liquid Temperature
50℃ – 20℃ = 30℃
Therefore if your flour temperature is 20℃ – then you need to make sure the milk + water are at 30℃ when you add them to your recipe. In which case, you can pour your milk and water into a pan, and VERY gently heat them until they reach around 29/30℃ then immediately pour them into your mix.

Brioche Feuilletée
We would love to see your Bake It Better creations!
Show off your skills by sharing your desserts
#BakeItBetter

Vanilla & Blueberry Danish
We would love to see your Bake It Better creations!
Show off your skills by sharing your desserts
#BakeItBetter